Introduction
Effective user provisioning is essential for both organisational security and productivity in the context of digital operations. But controlling user access across many systems can be complicated and difficult at times. This blog article will discuss how IBM Verify SaaS integrates seamlessly with SAP NetWeaver and explain how this works together to improve overall operational efficiency, strengthen security, and streamline user provisioning processes.
SAP NetWeaver (on-premise) is a widely used platform that acts as the foundation for various SAP applications, including SAP ECC and S/4HANA. Users typically log in to these applications through the SAP NetWeaver interface.
IBM Security Verify SaaS adds an extra layer of security to the login process for SAP ECC and S/4HANA systems. By integrating with SAP NetWeaver, it allows users to log in securely using a web browser, but also requires an additional verification step (Multi-Factor Authentication or MFA) provided by IBM Security Verify. This MFA could be a code from a mobile app, a fingerprint scan, or another secure method.
SAP Netweaver on ABAP Stack vs SAP Netweaver on Java Stack
Development stacks for Java and ABAP are provided by SAP NetWeaver. Java offers open-source flexibility and meets the demands of contemporary development, while ABAP excels in fundamental business logic and connects with SAP with ease. Select Java for modern apps, scalability, and a larger talent pool, or ABAP for deep integration and current SAP expertise. Although it’s less prevalent, both allow interoperability and can coexist on a single server.
While IBM Security Verify offers an adapter for integrating with SAP NetWeaver applications on the Java stack, this blog focuses specifically on the integration process for SAP NetWeaver applications built on the ABAP stack with IBM Security Verify SaaS.
Architecture
IBM Security Verify SaaS can be integrated with a hybrid SAP landscape, including on-premise SAP Netweaver, cloud-based SAP BTP, and other SAP SaaS offerings (such as SAP SuccessFactors, SAP ARIBA, SAP Fieldglass). This centralized approach offers strong security with Multi-Factor Authentication and simplifies user experience through Single Sign-On. Users authenticate through IBM Security Verify, which then communicates with the relevant SAP application (Netweaver, BTP, or SAP SaaS offering) to grant access. This architecture enhances security and streamlines user experience for accessing SAP resources.

Prerequisites
- SAP NetWeaver
- IBM Security Verify
- A smartphone with IBM Security Verify App
Configurations and Settings in IBM Security Verify and SAP NetWeaver
IBM Security Verify Configuration :
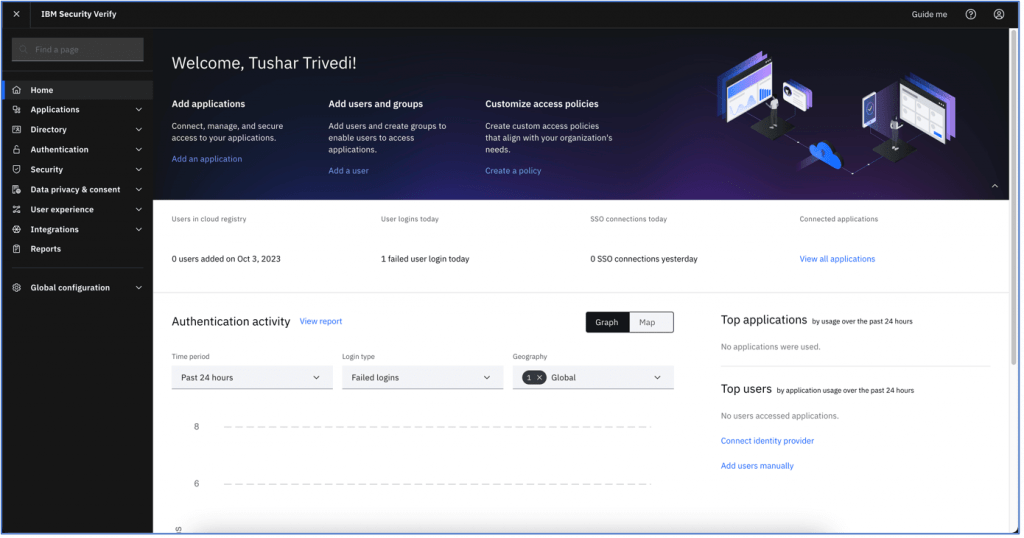
Log in into IBM Security Verify as an administrator
You will be navigated to the home screen, as displayed below, after logging in.
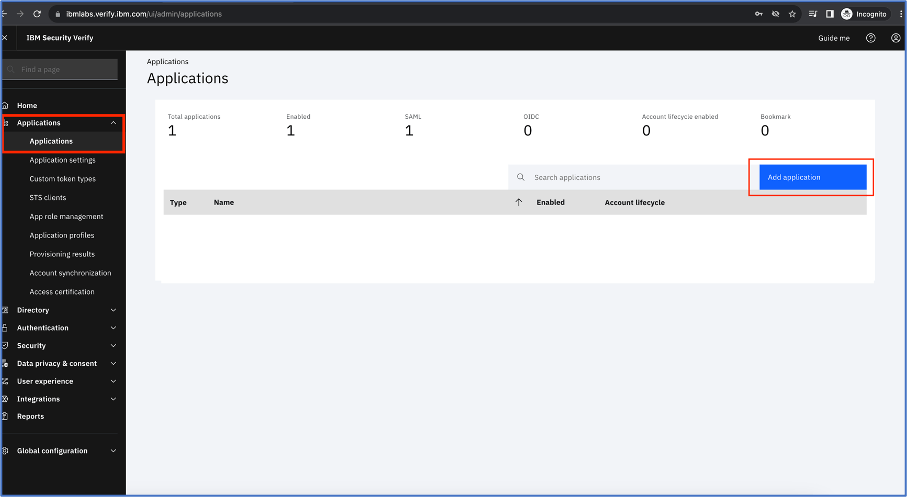
Now, follow these steps:
- On the left panel, click “Applications” under “Applications.”
- On the right side of the screen, click the “Add application” button.
- In the default applications list, search for “SAP NetWeaver” instead of creating a custom application.
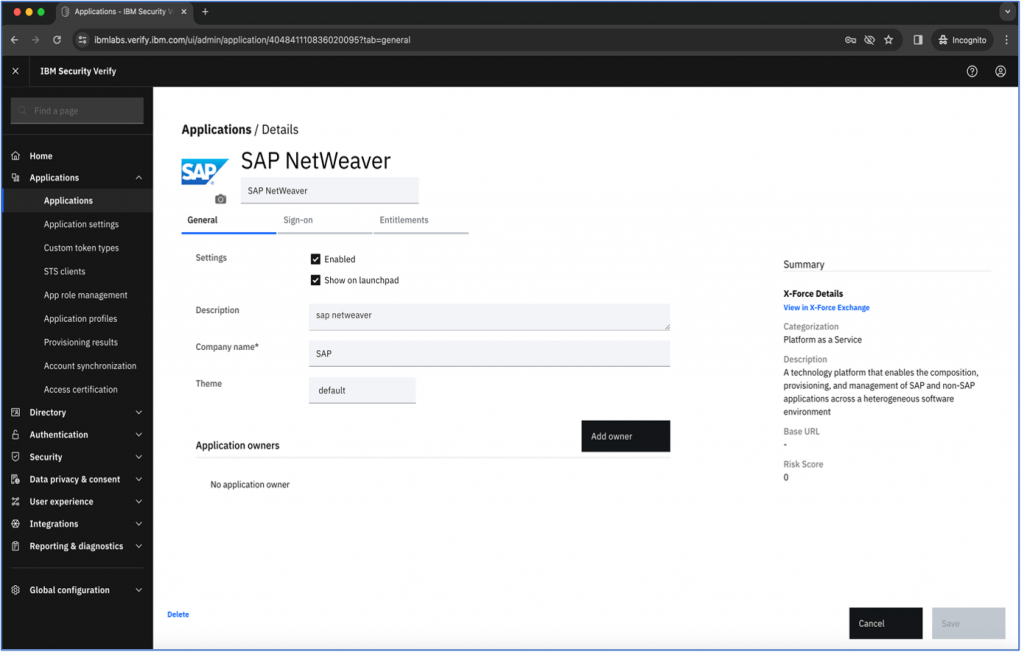
As indicated below, complete the “General” section with the relevant information, then save it.
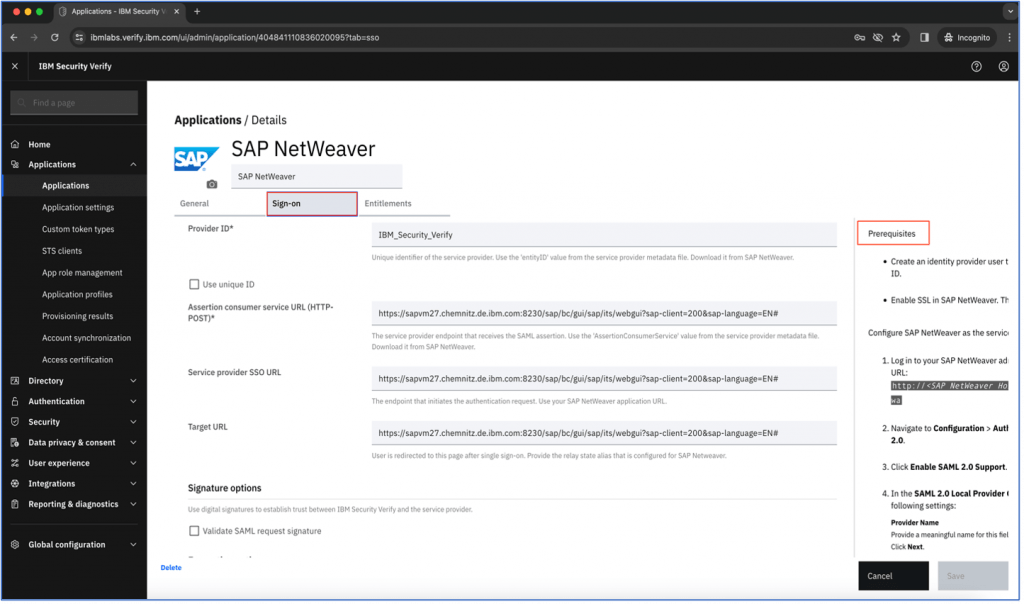
Select the “Sign on” tab and complete the fields as indicated by the screenshots below. The required data is available through your individual SAP NetWeaver account. Furthermore, adhere to the conditions listed in “Prerequisites” in order to receive the necessary information from SAP NetWeaver.
Now we need to upload “Metadata” file into SAP Netweaver which we can download from IBM Verify dashboard as mentioned in below steps.
- Go to “Sign on” section of the application and scroll on the right side of the screen where you can find prerequisites
- Scroll down as mentioned on below screenshots to the download metadata step and click on the link.
- The metadata file will be saved to device which you can upload to in SAP NetWeaver Cloud as highlighted below:

Refer to SAP Netweaver user details to create a user in IBM Security Verify. Follow the instructions outlined below.
- Log in to SAP Netweaver via SAP GUI.
- Navigate to transaction code “SU01D”.
- Choose the user for whom you want to create details in IBM Security Verify.
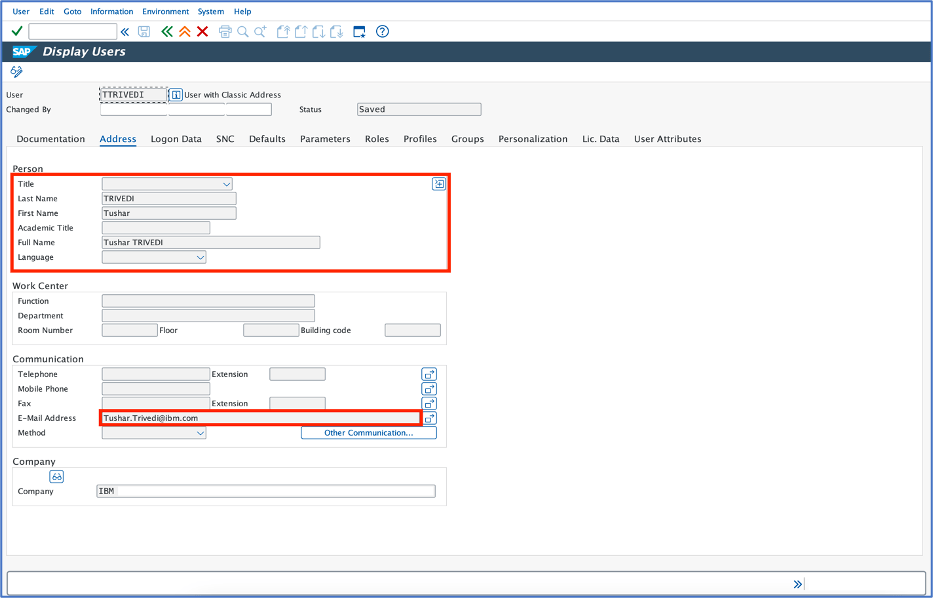
- Gather user information, including first and last names, email addresses, etc.
For reference see below screenshot:
As we have completed the configurations in IBM Security Verify. Now, let’s add a user with the appropriate attributes in IBM Security Verify and check if it maps to the SAP NetWeaver dashboard.
1. Go to the “Users” tab under the “Directory” section on the left side of the IBM Security Verify dashboard.
Click on the “Add User” button as shown in the screenshot below.

Complete all required fields in the user information section depicted in the image below, then proceed to click on the “Save” button within the user tab interface.
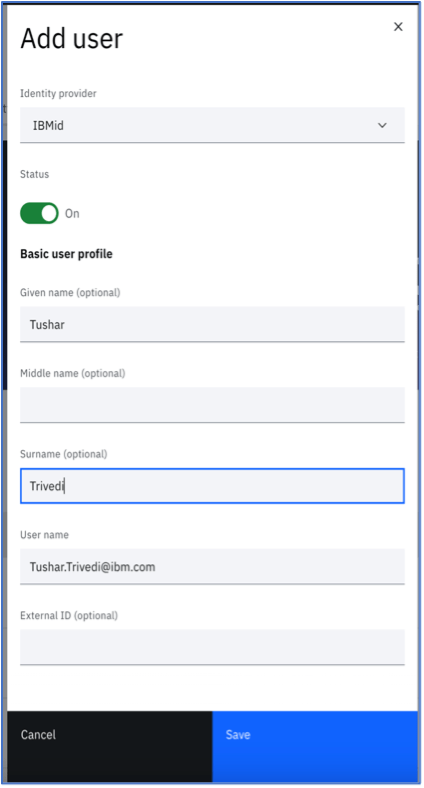
Navigate downwards to access additional fields for adding further details about the user. In the provided screenshot, you can observe that we have included the email address for the user.
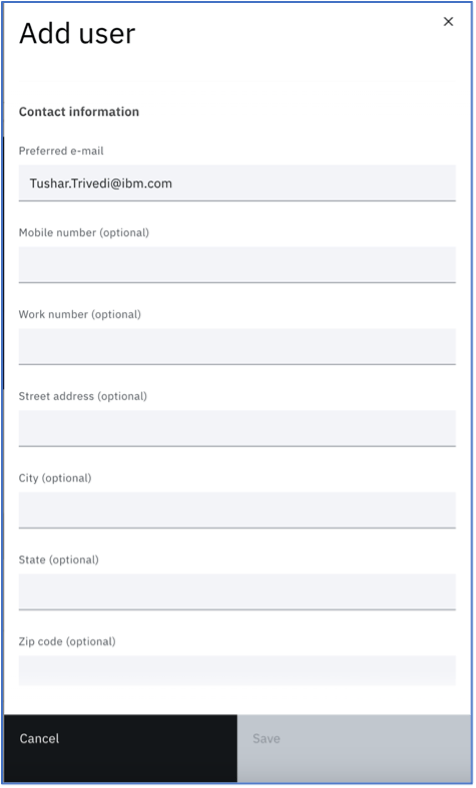
After completing the necessary user details, proceed to click on the “Save” button to ensure the user information is stored. Set up the SAP Netweaver configuration and then access the SAP NetWeaver application to ensure that the newly formed user is correctly mapped within the system.
SAP Netweaver Configuration
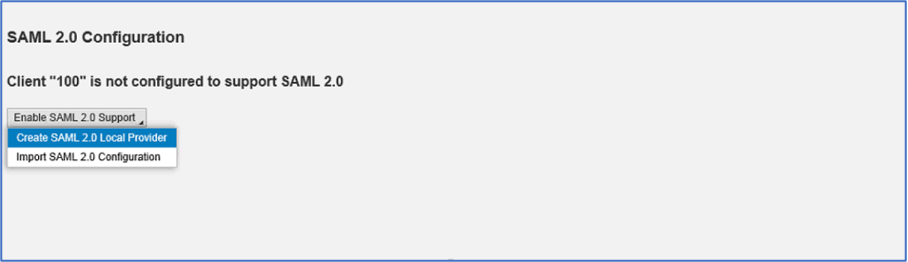
Establish a local SAML 2.0 provider: Enter into the SAP Netweaver login page using SAP GUI. Here, access the transaction “SAML2” by navigating to the command field at the top of the screen, as indicated below:

A web browser configuration screen will be displayed, requiring you to choose “Create SAML2.0 Local Provider” and press the “Next” button.
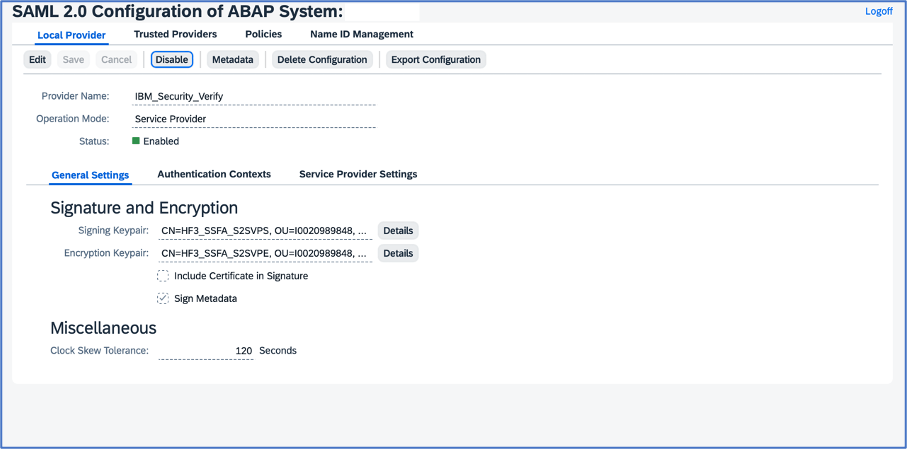
Enter “IBM_Security_Verify” as the provider name in the Initial settings.

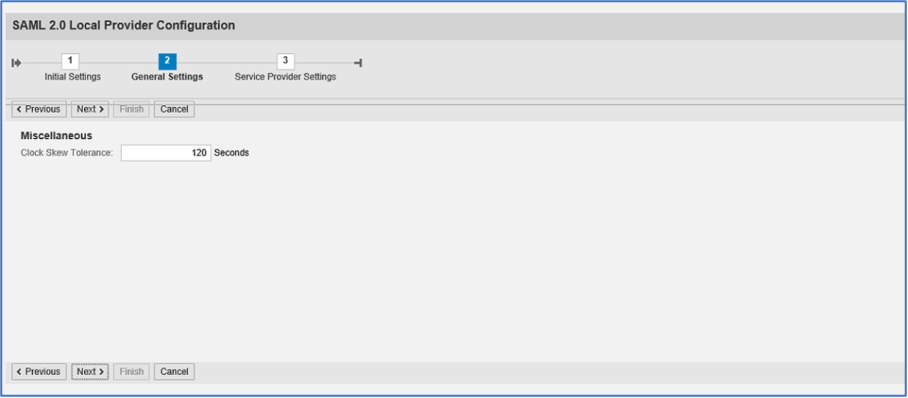
Click “Next” since there is no need to modify the options in the “General Settings” box.
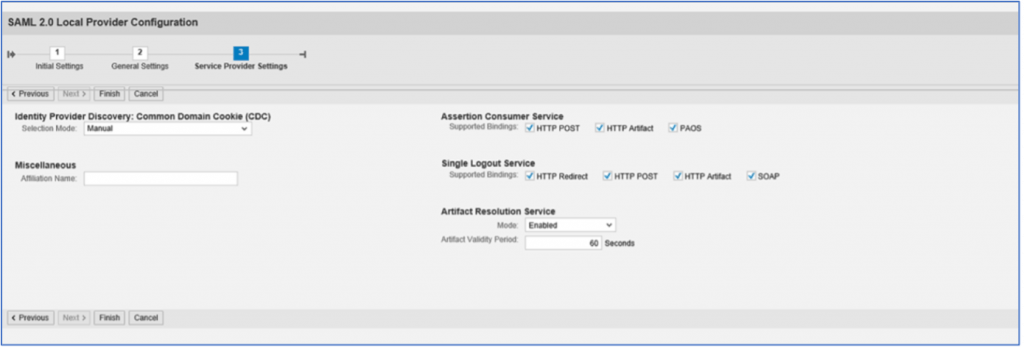
Select the “Finish” option, we’ll leave the “Service Provider Settings” as they are by default, as seen below.
You will now be taken to the screen below, where you can see the details that you customised in accordance with the previous instructions.
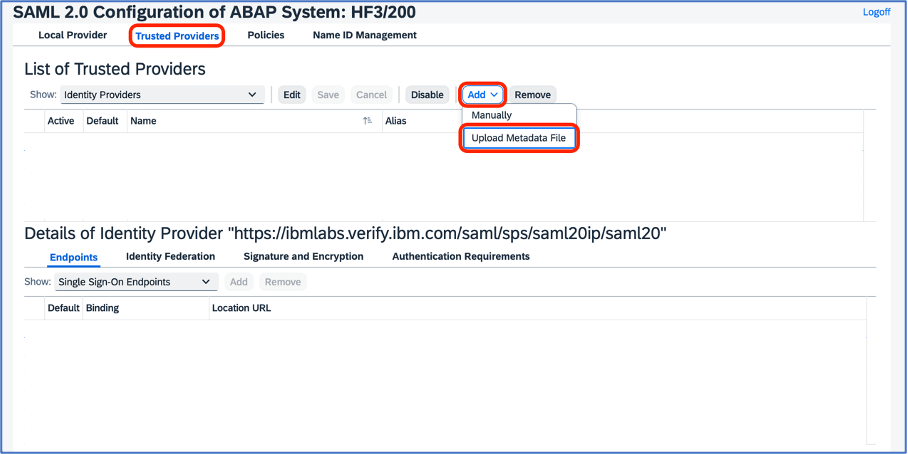
Upload Metadata File: As indicated below, click the “Trusted Providers” section. Then, click the “Add” button to bring up a drop-down menu, from which choose “Upload Metadata File” and upload the file which was downloaded from IBM Security Verify to local device.
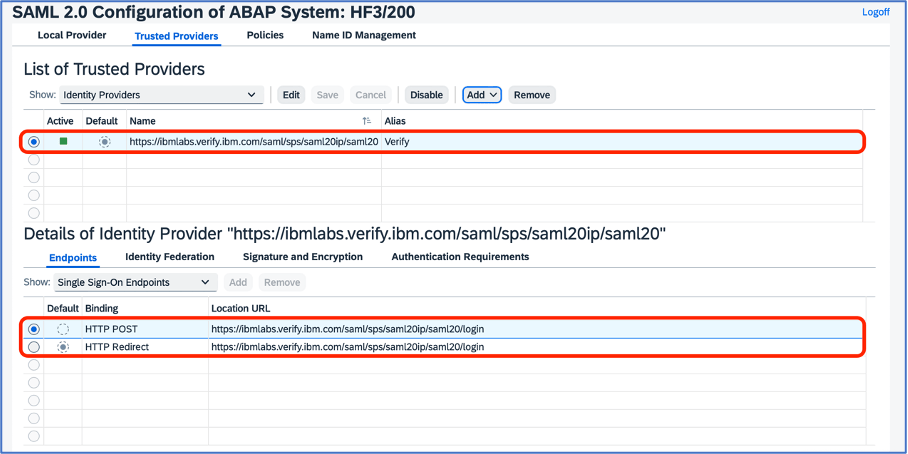
There should be a new line item shown in the trusted providers list. You can configure in the “Endpoints” area as seen in the screenshot below.
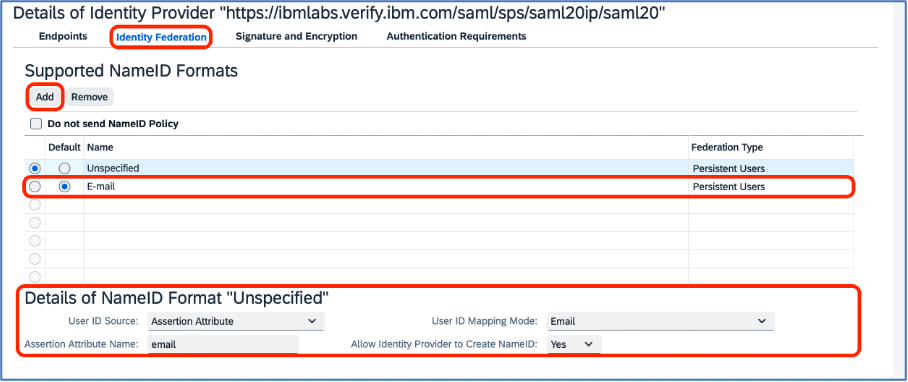
Click “Add” after selecting the “Identity Federation” section, then enter the user’s email address under “Supported NameID Formats”. Additionally, as seen in the screenshot below, set “Email” as the User ID mapping mode and “email” for the “Assertion Attribute Name” field.
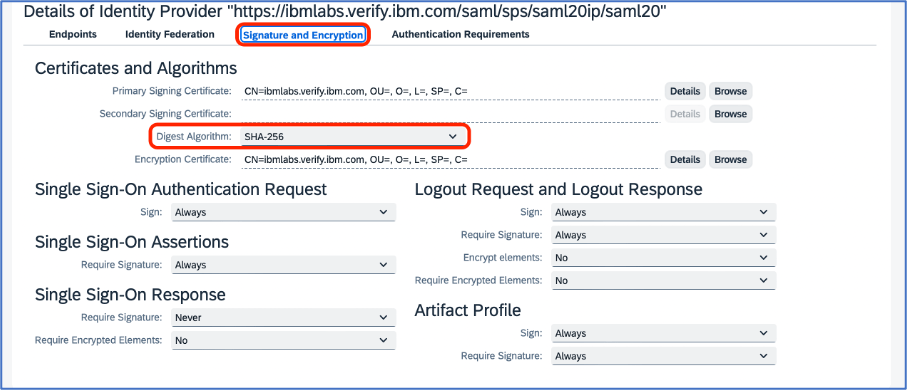
The following step will take us to a different section called “Signature and Encryption” where we will check the value of “Digest Algorithm” and, if it isn’t already, set it to “SH-256”. We will also check the values of the remaining fields, as indicated in the screenshot below:
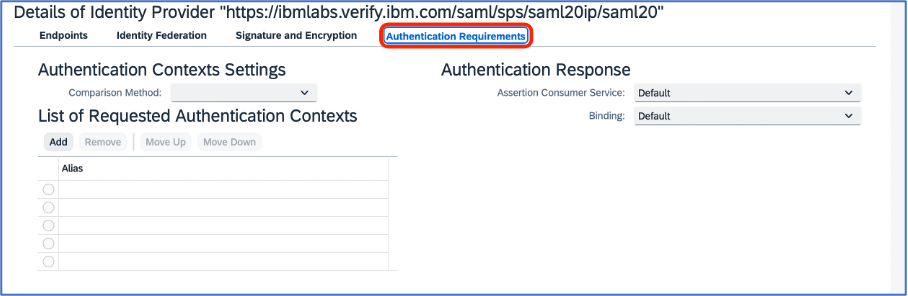
We’ll now select the “Authentication Requirements” option and review the default settings as shown below:
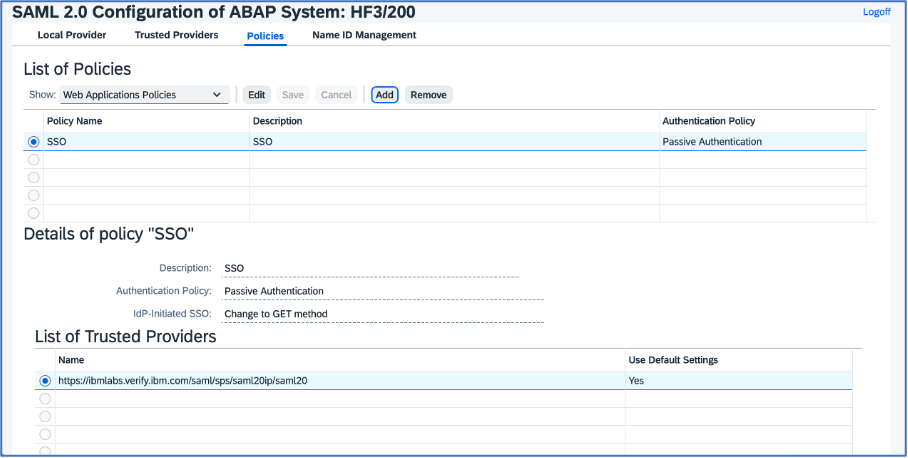
Include a policy for web applications: To access “Policies,” follow the instructions in the screenshot below. After choosing “Web Applications Policies” press “Add”.

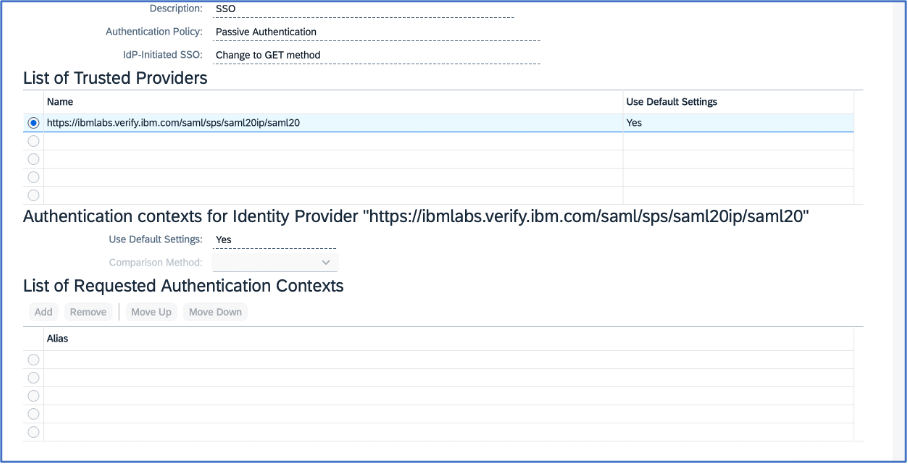
Name the policy “SSO” and describe it as such. And confirm the information as displayed in the screenshots below:
Let’s test :
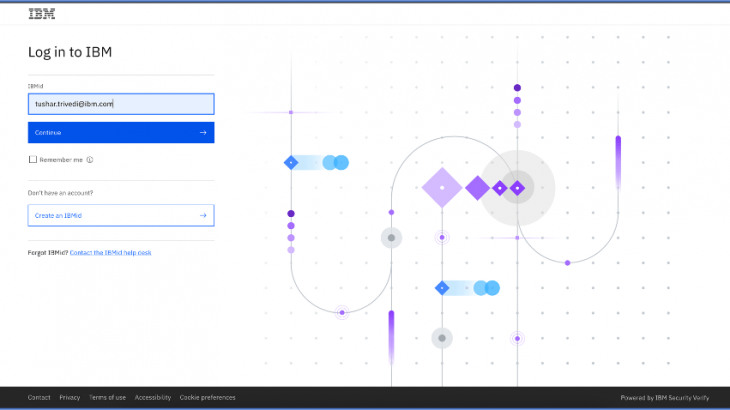
Use the web browser to log in to SAP Netweaver as shown below. Please be aware that in order to access SAP Netweaver on a web browser, you must utilise a login link.
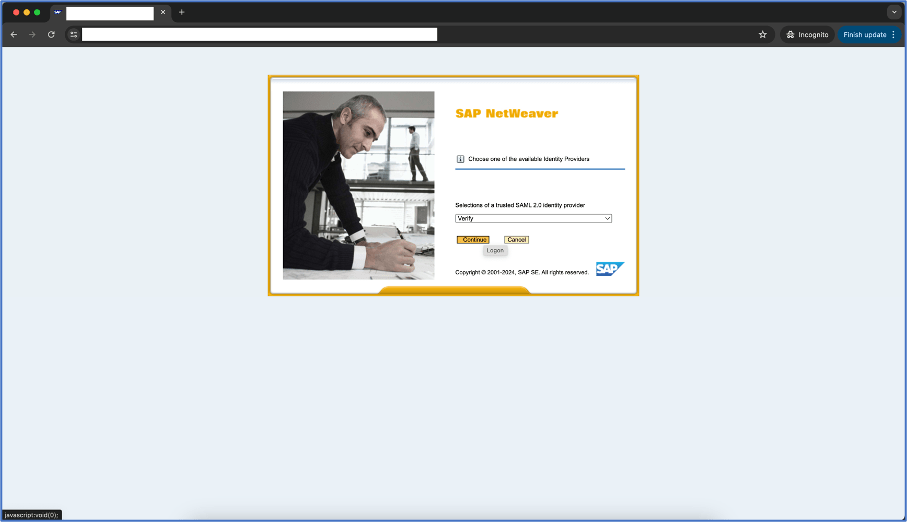
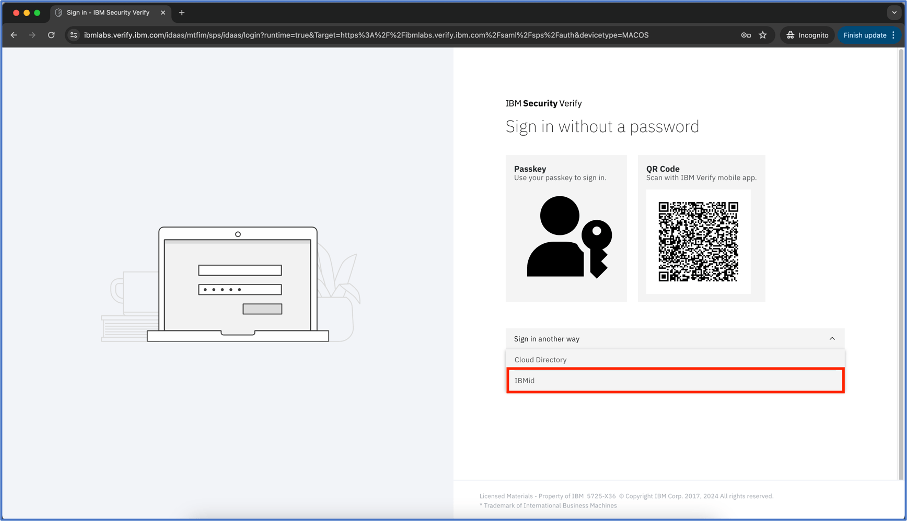
Here, I’ll use the IBMid for further login into the system.
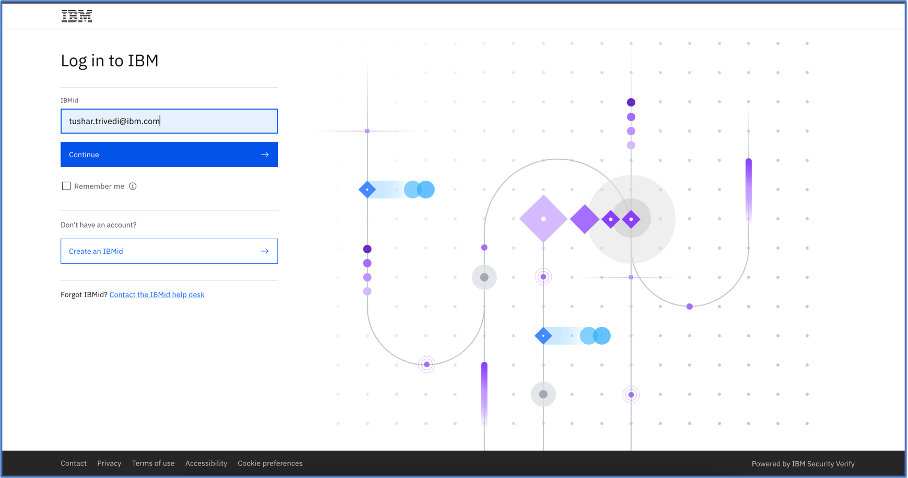
Give your IBMid and click on “Continue”.
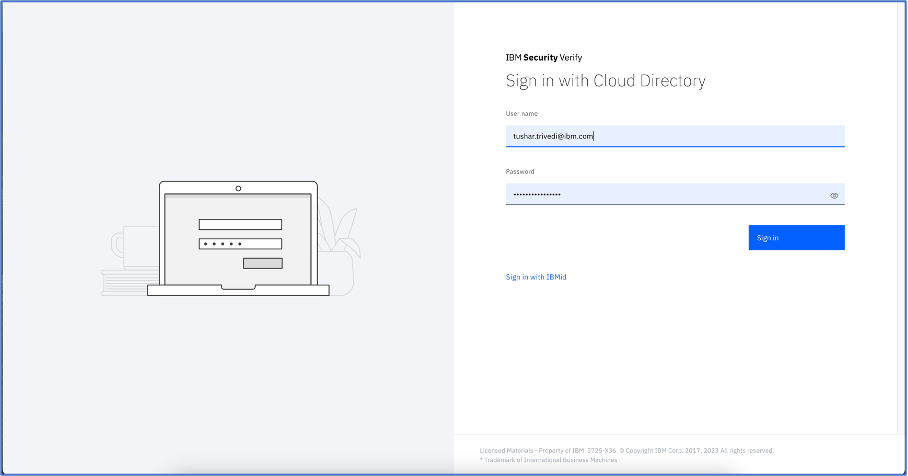
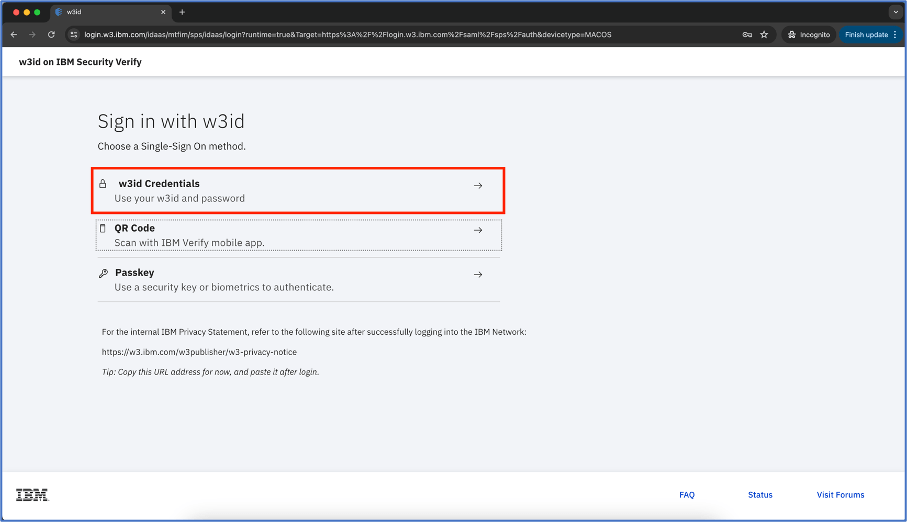
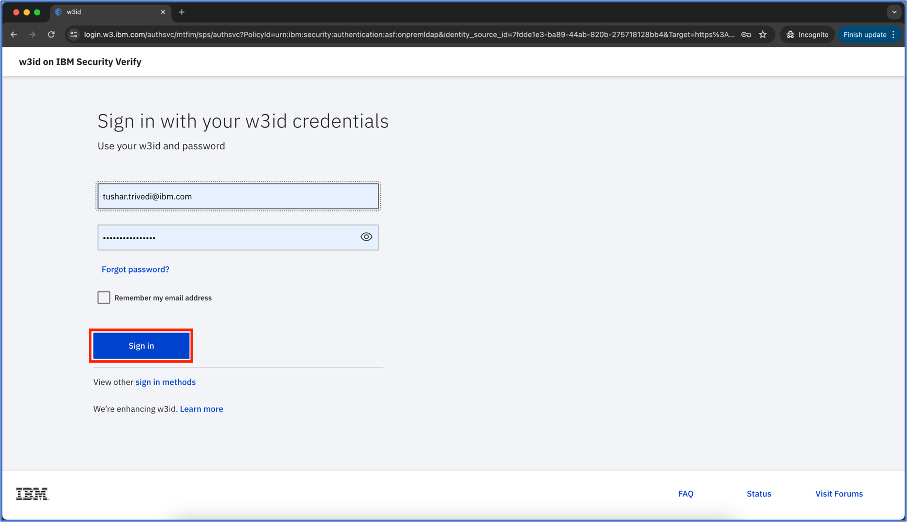
Select “w3id Credentials” as below :
Give your username and password details and click on “Sign in”.
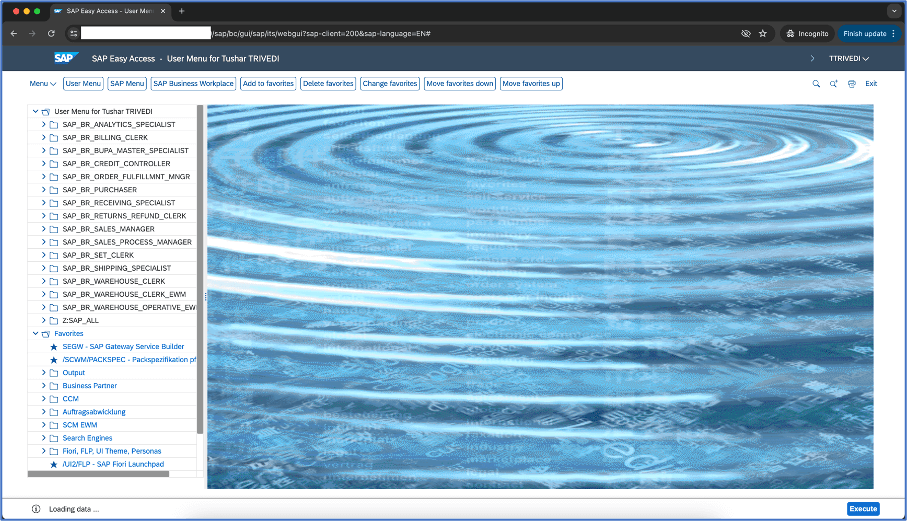
You should be able to access the SAP Netweaver as below in your web browser.
Conclusion
The integration of IBM Verify with SAP NetWeaver presents a powerful synergy that not only simplifies user provisioning but also fortifies organisational security and enhances operational efficiency. By combining the robust authentication features of IBM Verify with the versatile platform of SAP NetWeaver, businesses can streamline user access management, reduce manual effort, and bolster security measures. This integration not only ensures compliance and consistency but also elevates the overall user experience. As organizations navigate the complexities of the digital landscape, leveraging this integration can provide a competitive edge while effectively managing user identities and access controls.


