Introduction
Many companies are using SAP Analytics Cloud (SAC) for planning alongside Power BI for reporting. However, users often request to utilize SAC planning data within Power BI. This integration can be challenging due to differences in data handling and capabilities. If you are facing similar demands, our blog provides a practical solution to this issue.
In this blog post, we will guide you through creating an export service for SAC that integrates seamlessly with Power BI using Azure Data Factory (ADF). This straightforward setup leverages the SAC Data Export Service API, ADF and Multi-Action API Step to ensure minimal compute usage and cost efficiency.
To demonstrate how this setup works in practice, we’ve created a demo video. Watch the video below to see how updating data in an SAC story seamlessly updates the data in Power BI. This will give you a clear understanding of the real-time integration between SAC and Power BI using ADF.
Prerequisites
Before we begin, ensure you meet the following prerequisites
- SAC Tenant, including Planning Model and related story
- Azure Data Factory Account
- Azure Storage Account in ADLS
- Power BI
Step-by-Step Guide
- Creating the Data Export Pipeline in ADF
- Triggering ADF Pipeline through Multi-Action API Step
- Connecting Power BI with Azure Data Lake Storage
- Running the entire process
Creating the Data Export Pipeline
The pipeline consists of four main parts:
- REST Service: Create a REST service for the desired model.
- Copy Table Names: Identifies all endpoints for the specified model.
- Lookup Tables: Outputs the names obtained from “Copy Table Names”.
- ForEach Loop: Uses the SAC REST API to retrieve data from the endpoints and copy it to ADLS.
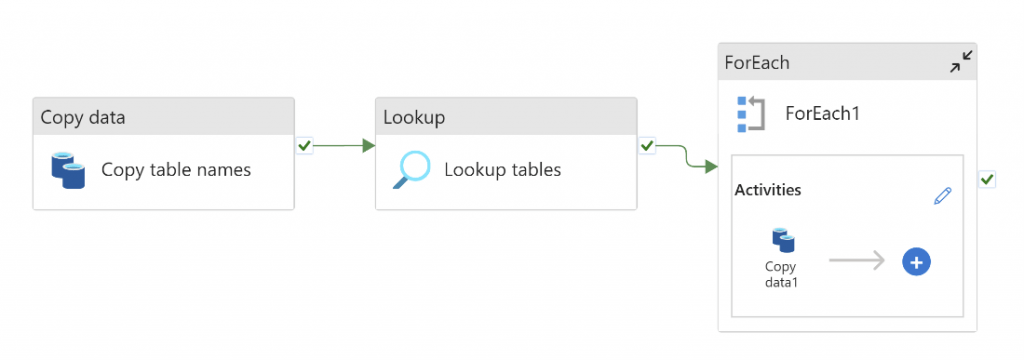
To help you visualize the above-mentioned steps, we’ve created a short GIF that quickly demonstrates the process.
Setting up REST Service
1. Create a REST Service:
1.1 Set up a REST Service with base URL:
{your SAC tenant}/api/v1/dataexport/providers/sac/{model ID}
1.2 Choose “OAuth 2.0 Client Credential” for the authentications type. We will name this service “REST_EXPORT_API_DEMO”.
2. Generate OAuth Credentials:
2.1 In your SAC tenant, navigate to ‘System > Administration > App Integration’ to find your token endpoint and create a client to get the client ID and client secret.
Setting up “Copy Table Names”
1. Create a REST Dataset:
- Set up a REST dataset using the linked service “REST_EXPORT_API_DEMO”.
Name this table “Tables”.
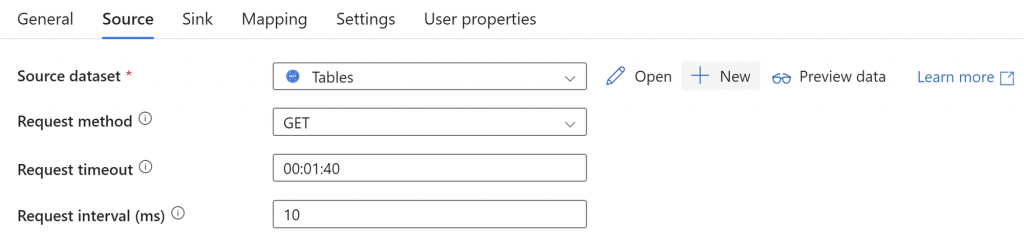
2. Data Source Configuration:
- In “Copy Table Names” select the REST dataset you just created.
2. Create a CSV file to store the table names. The file path should be:
{Storage account}/{model ID}/Table_names.csv
This will be used as the sink for “Copy Table Names”.

3. Use the just created CSV file as the sink dataset.

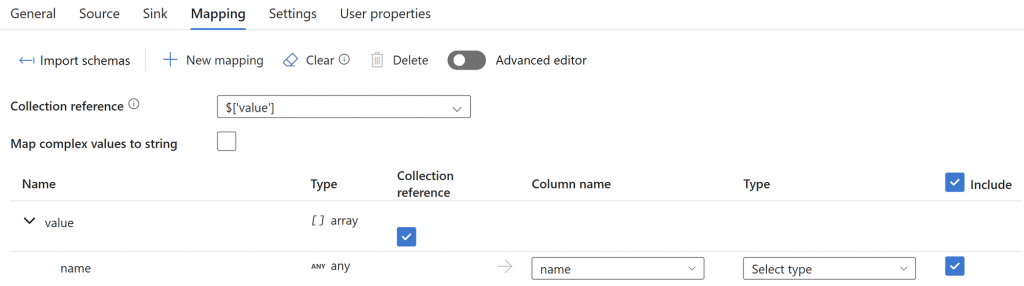
4. Ensure that the mapping includes only the table names.
Setting up “Lookup Tables”
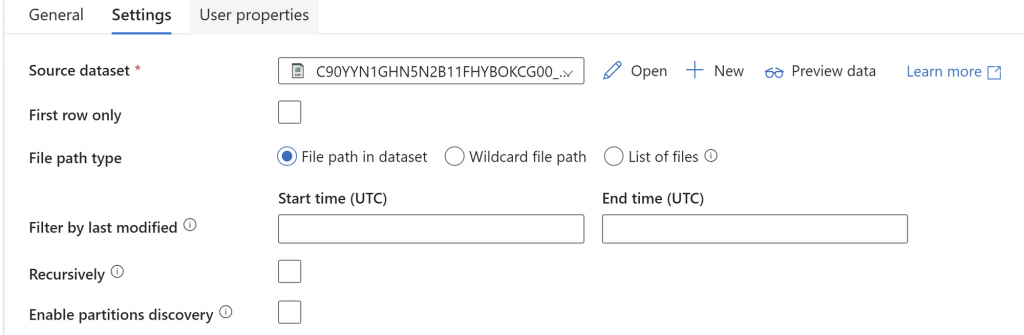
Use the sink dataset from the “Copy Table Names” step as the source for “Lookup Tables”.
Configuring the “ForEach” Loop
Under settings, set the “Items” to: @activity(‘Lookup tables’).output.value
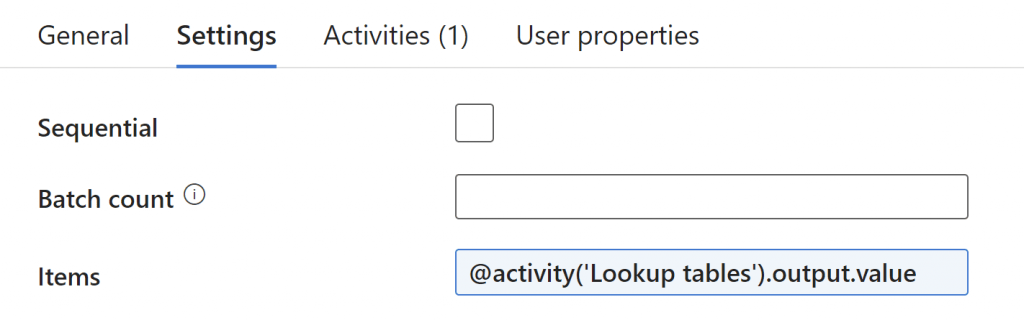
This configuration ensures the loop iterates over all table names, using them in the subsequent copy data activities within the loop.
Configuring “Copy Data” within the “ForEach” loop
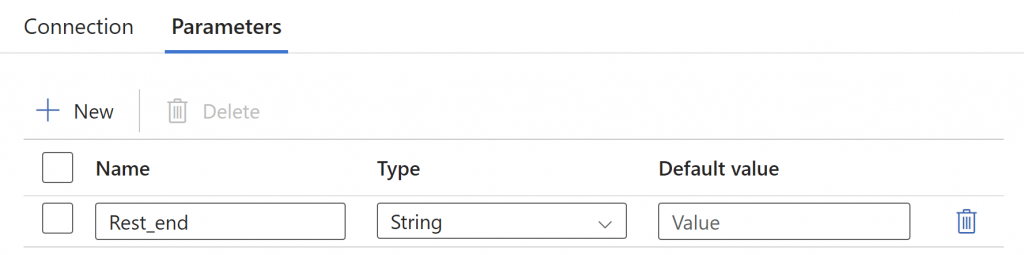
- Set up a new REST Dataset: This will be called “REST_API_ForEach”. We will use the “REST_EXPORT_API_DEMO” as linked service, but will now add a dynamic relative URL.

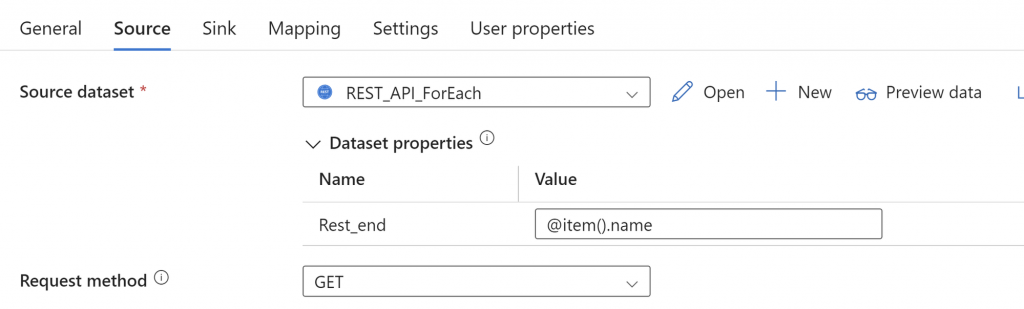
2. Setting up Source: We will use the above dataset as source and the item setting that configured under “Configuring the “ForEach” Loop”. This way we will access the endpoint for each table in the given model.
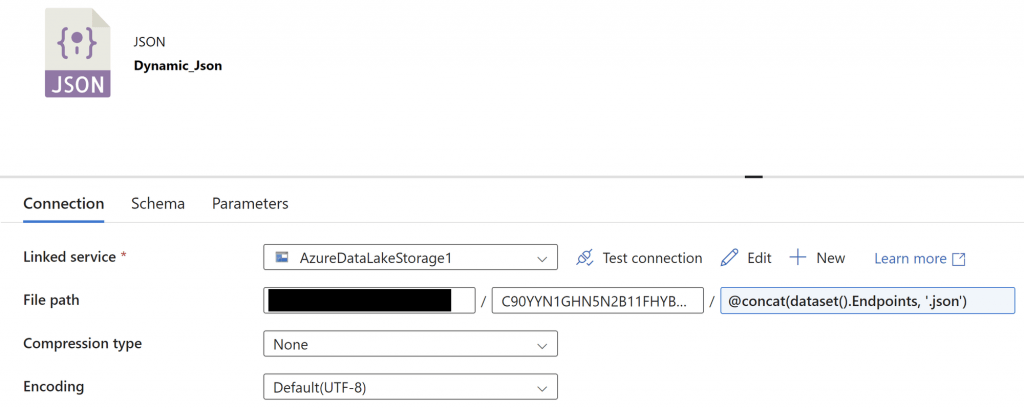
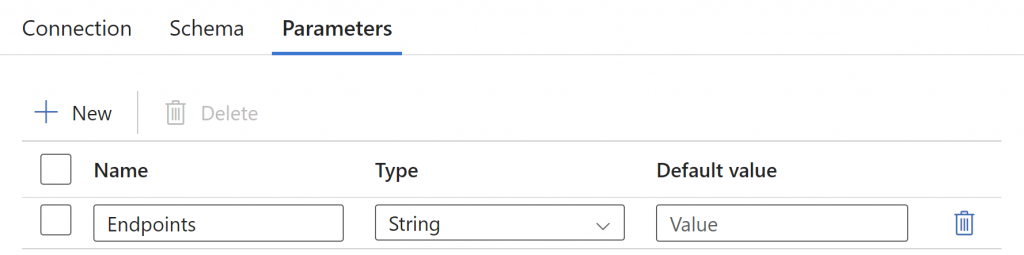
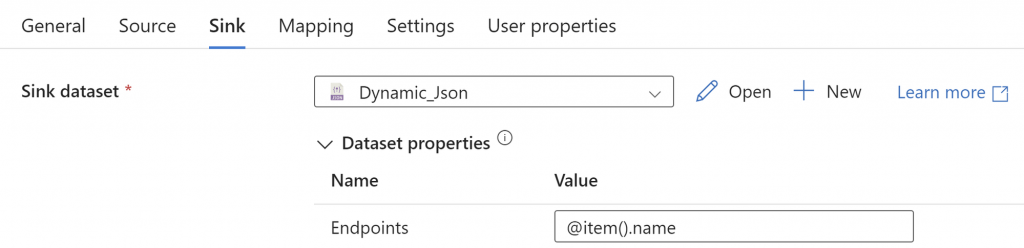
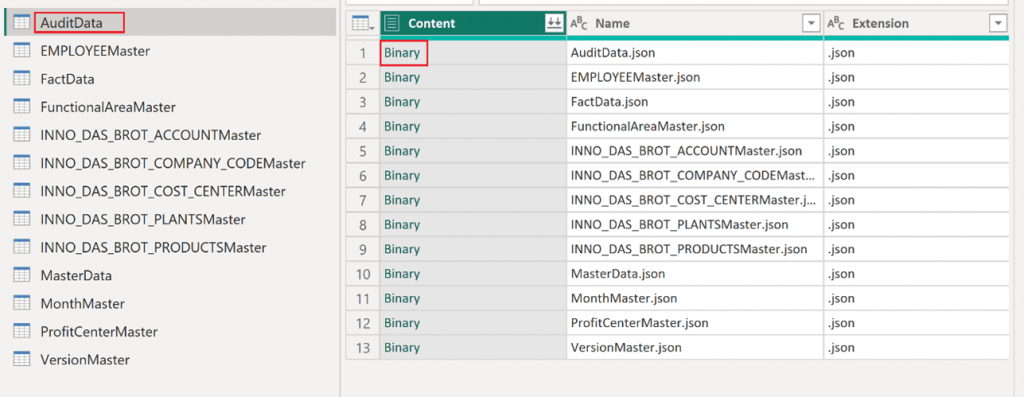
3. Creating a dynamic JSON sink dataset: The JSON sink dataset is created such that we will have one unique JSON file for each table in the model, which will inherit its name from the model.
Setting the sink in “Copy Data”: We now simply use the above created table along with the “Items” configured under “Configuring the “ForEach” Loop”.
The ADF pipeline is now fully configured and should export the model from SAC into the Azure blob storage, under the path defined in the first step of “Creating a dynamic JSON sink dataset”.
Triggering ADF Pipeline through Multi-Action
Register an App in Azure
- Go to ‘Home > App Registration > Endpoint‘ and copy the Token URL:
“OAuth 2.0 token endpoint (v2)”. - Go to ‘Home > App Registration‘ and click ‘+ New Registration‘.
- Name your app and select ‘Accounts in this organizational directory only (Single tenant)’.
- Copy the ‘Application (client) ID‘, this is your “OAuth Client ID”.
Configure OAuth Credentials
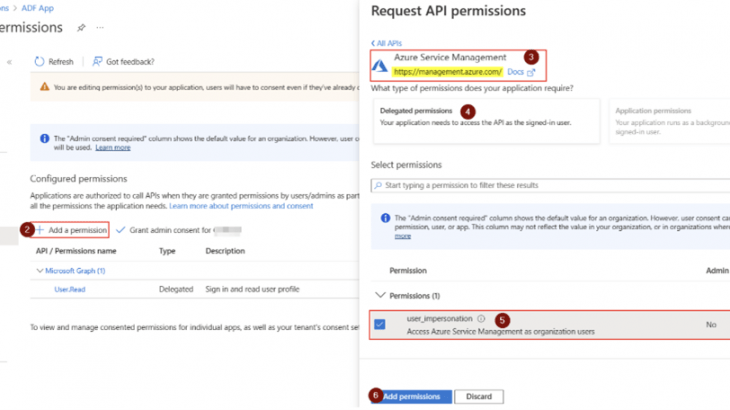
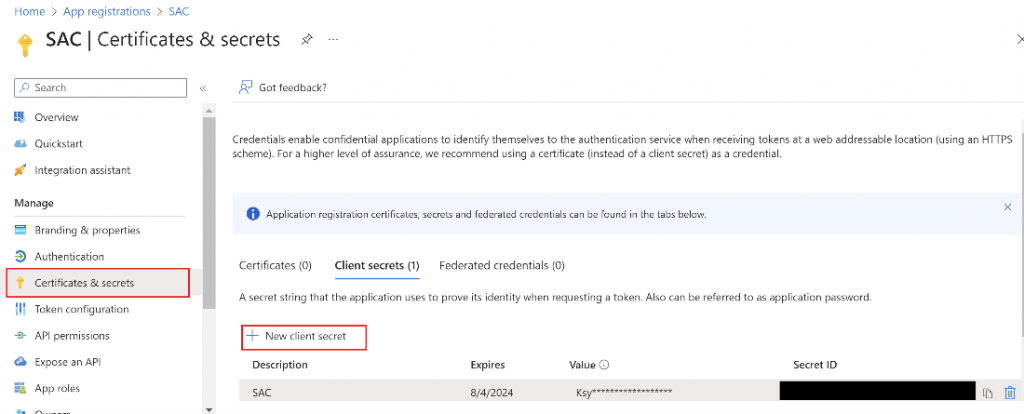
1. Go to ‘Certificates & Secrets’ and create a new client secret. Copy the ‘Value‘ as your client secret.
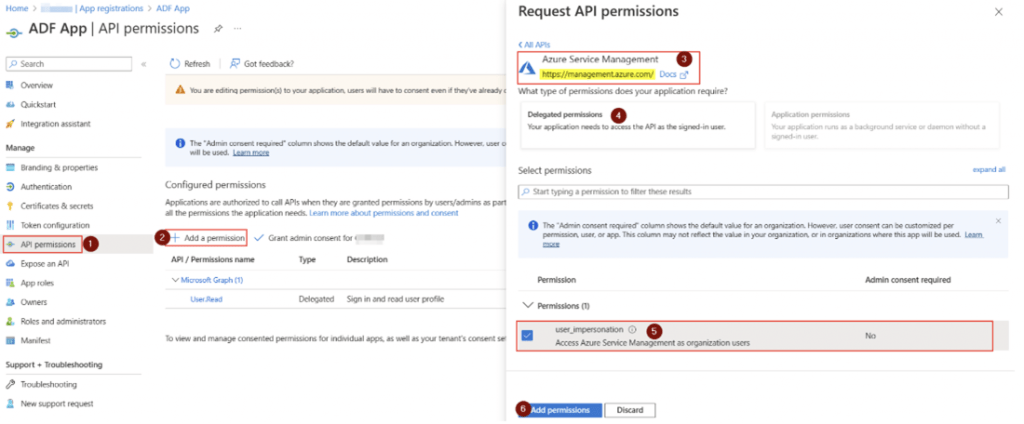
2. Ensure that the created App, “SAC”, has the permission ‘user_impersonation‘.
3. Assign the app the role of ‘Data Factory Contributor‘:
‘Azure Portal > Data factories > Your Data Factory > Access Control (IAM) > Add Role Assignment‘.
Create the Connection in SAC
Create a connection using the OAuth Client ID, Secret and OAuth 2.0 token endpoint (v2) retrieved in the previous steps.
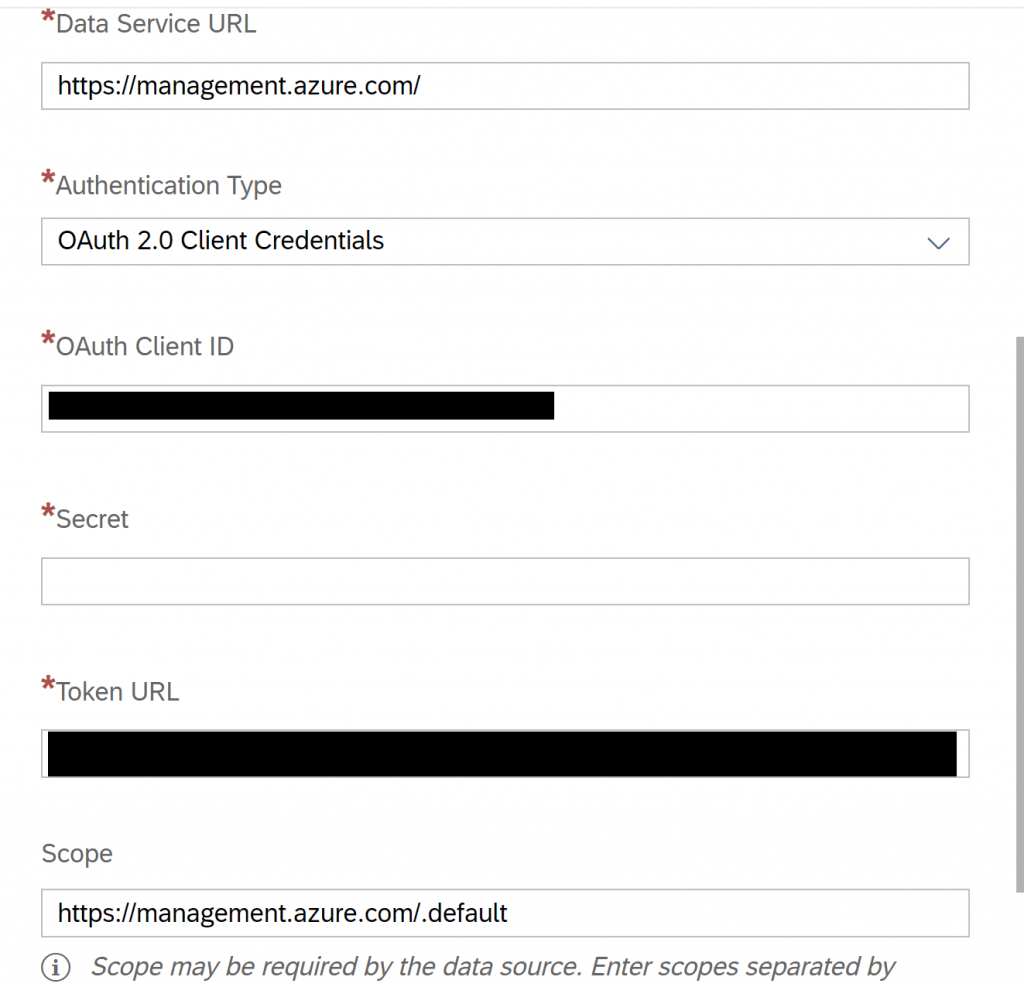
The OAuth client ID is a unique, autogenerated ID that identifies your Azure application to SAP Cloud Platform and verifies its authorization to access requested resources. The specific OAuth client ID used above is given as the “Application ID” retrieved in the last step of “Register an App in Azure”.
The secret is a confidential password that is associated with the client application. It is used by SAC to prove its identity to the Azure platform. It is the ‘Value’ retrieved in the first step of “Configure OAuth Credentials”.
The “Token URL” is the endpoint that SAC will use to request an access token. The access token is a temporary authorization that is used by the client application to access the requested data or services.
Creating the Multi-Action
- Add a data action: to publish changes made to the story before exporting.
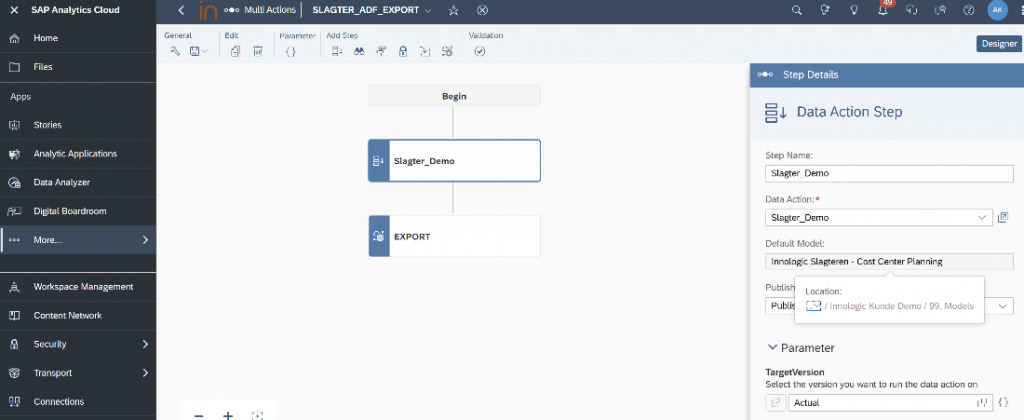
Configure the export API step: To do this, choose the connection made earlier and use the API URL:
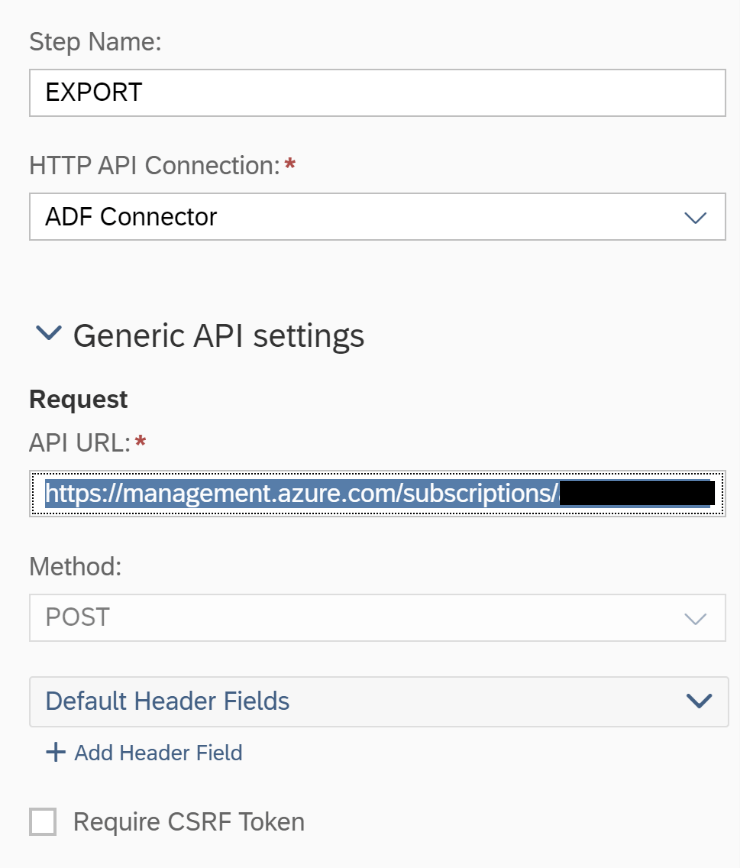
The URL is given by:
https://management.azure.com/subscriptions/{Subscription ID}/resourceGroups/{Resource Group Name}/providers/Microsoft.DataFactory/factories/{Data Factory ID}/pipelines/{Pipeline ID}/createRun?api-version=2018-06-01
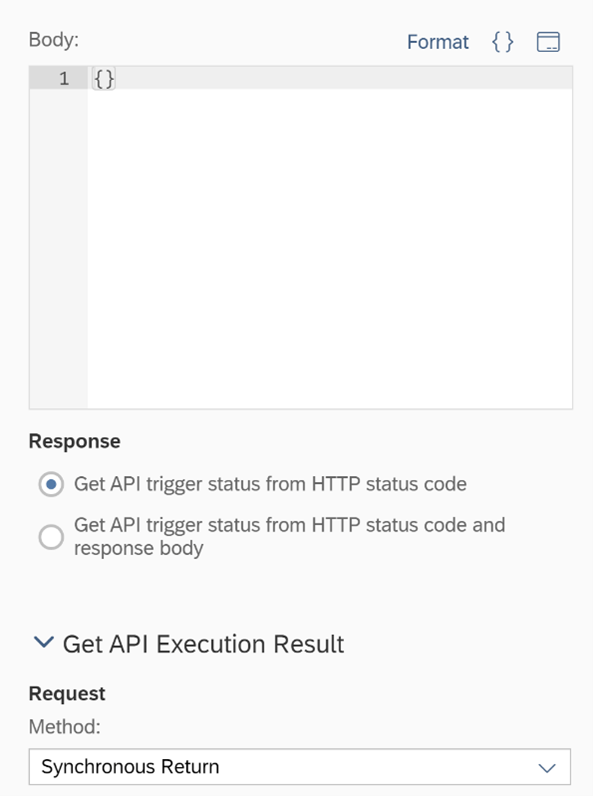
Secondly, choose the request method “Synchronous Return”.
- Add the Multi-Action to a story which is uses the same model as the one in ADF.
Connecting Power BI with ADLS
Retrieve the Endpoint of the ADLS
- Go to your storage account in Azure where the tables are saved and search for endpoints.
- Copy the Data Lake Storage endpoint (not the resource ID).
Configure Power BI
- In Power BI, click ‘Get Data‘ and select ‘Azure Data Lake Storage Gen 2‘.
- Paste the endpoint and add the path to the folder:
https://{storageaccount}.dfs.core.windows.net/{Blob container}/{model_id}
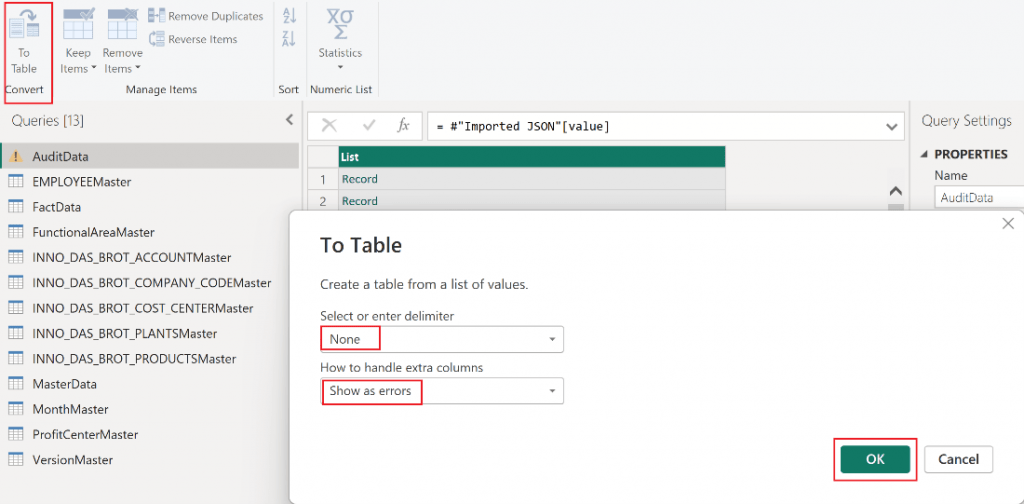
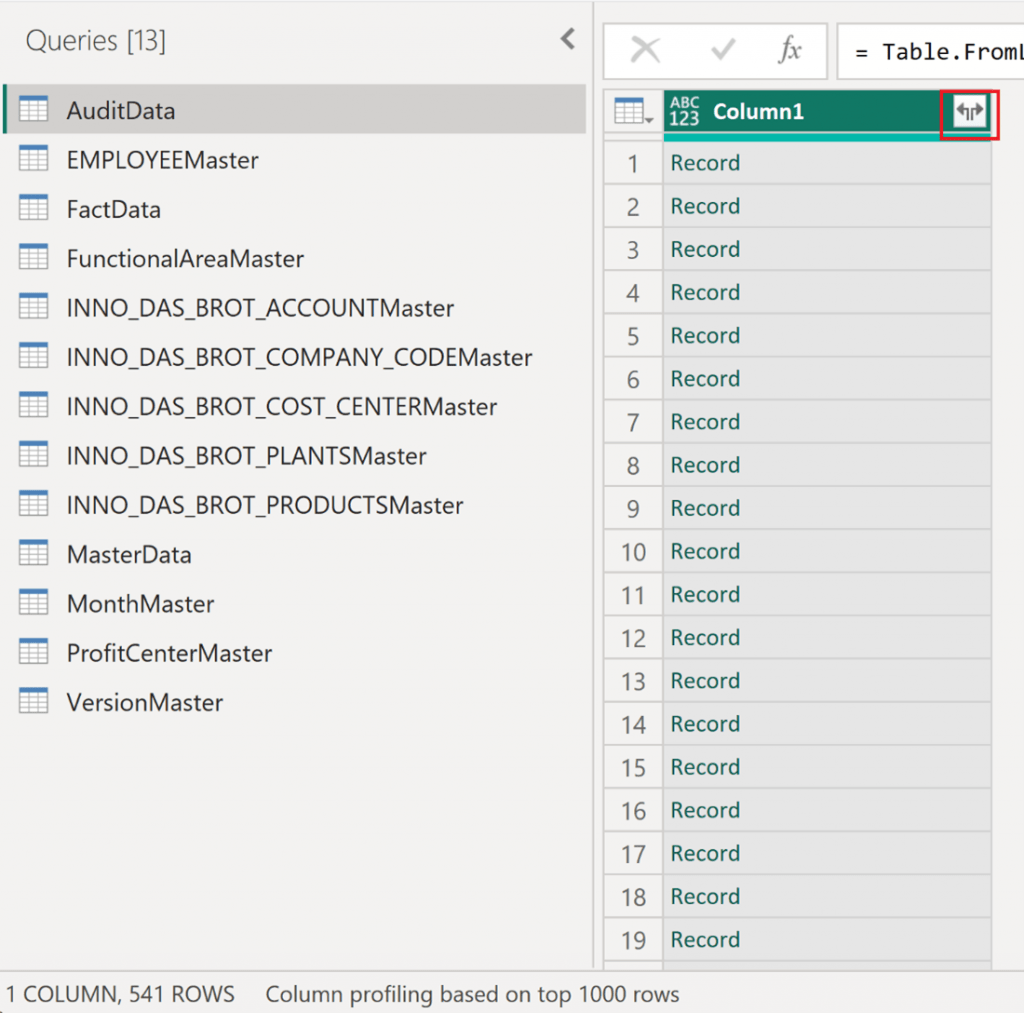
Unpack Data
For each table, unpack the data. Repeat this process for all tables.

Running the entire process
- Modify the Story in SAC: Make changes and trigger the multi-action.
- Monitor ADF: Go to ADF and ensure the pipeline is triggered and completed successfully.
- Refresh Power BI Data: Refresh the data in Power BI to reflect the changes.


