Introduction:
This blog discusses the steps and configurations to transport Integration Packages using Transport Management Service between multiple tenants by exporting it from one tenant and importing it in another.
Customer using SAP’s TMS and having Test and Production Cloud Integration tenants have the option to use the feature to transport and Integration Package from Test to the Production landscape using the TMS service.
This can be achieve using Content Agent Service which will acts like an agent that allows to assemble the SAP CPI content and export it to transport queue.
In this blog we will cover end to end configuration to set up the SAP Cloud Integration(CF) for TMS.
Pre-requisites:
1. Two separate SAP CPI tenants.(They will act as source and Target tenant)
2. Subscription and admin access to SAP CPI Transport Management Service.
3. Sample integration content to for transport from source to target.
Configuration:
SAP CPI:
1. Creating an instance and Service Key for the Content Agent service in the source CF space.
Global Account–>Subaccount–>Service Marketplace–>Content Agent–>Create Instance
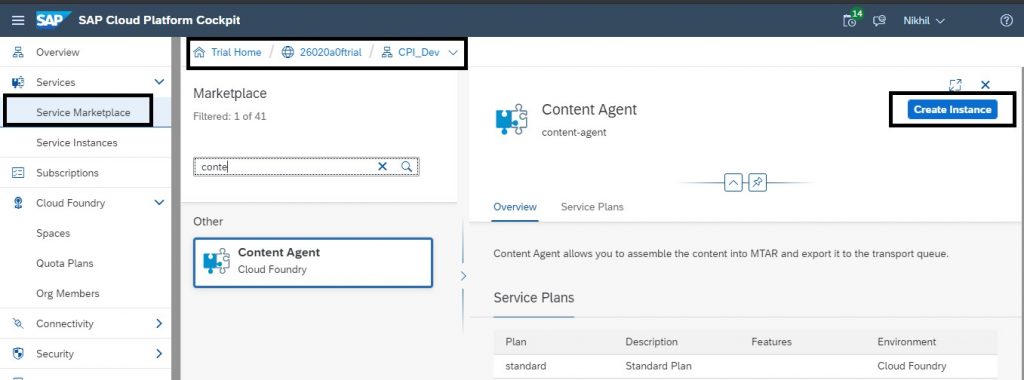
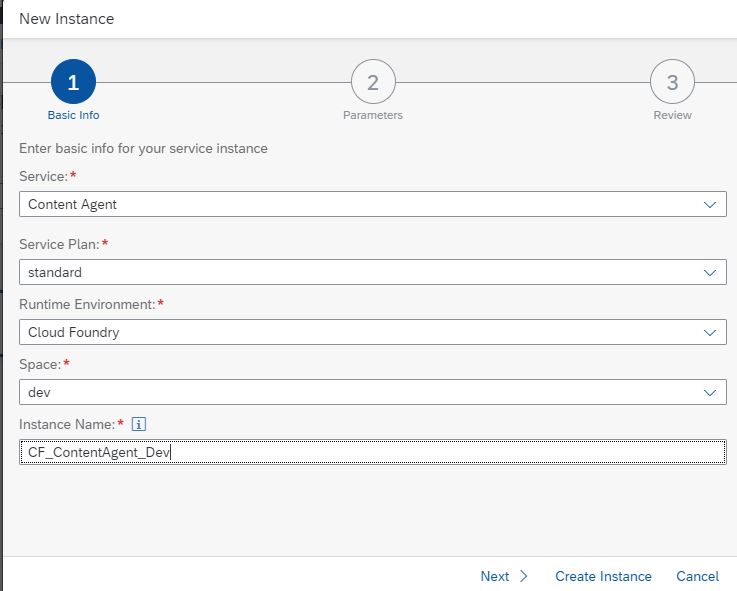
Select next and finish it.
Now Create Service Key for this instance:
You can find Service Instance in previous step under Service Instances. Select Service instance and Create Service Key for it.

Once Service Key created you will get url,clientid,clientsecret which is used in step 4 for destination creation.
2. Creating an instance and Service Key for Process Integration Runtime (PI) service in the source CF space.
Global Account–>Subaccount–>Service Marketplace–>Process Integration Runtime–>Create Instance

Select service plan as api
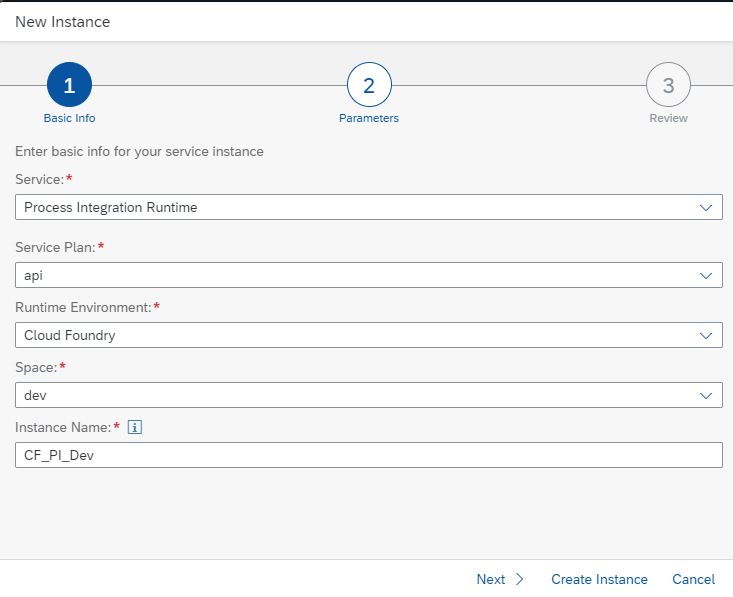
in next step provide “WorkspacePackagesTransport” role to it and finish instance creation.
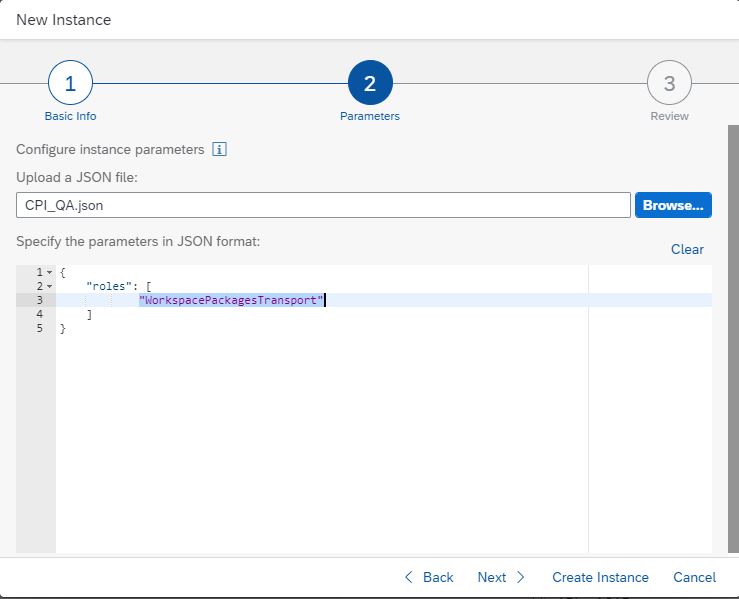
Now create service key for this instance. Follow the same steps as followed for Content Agent service Key creation.
After creation of Service Key you will get url,clientid,clientsecret, which required at creation of destination in Step 5.
3. Creating an instance and Service Key for the Transport Management service in the source CF space.
Global Account–>Subaccount–>Service Marketplace–>Transport Management–>Create Instance

Follow the same steps as in step 1 and create Service Instance and Service key for Transport Management Service.
4. Create destination ContentAssemblyService in Source Tenant.
Global Account–>Subaccount–>Connectivity–>Destinations–>New Destination–>Service Instance

Here Destination name ContentAssrmblyService is case sensitive. Select next it will fetch details form service instance created in step 1.
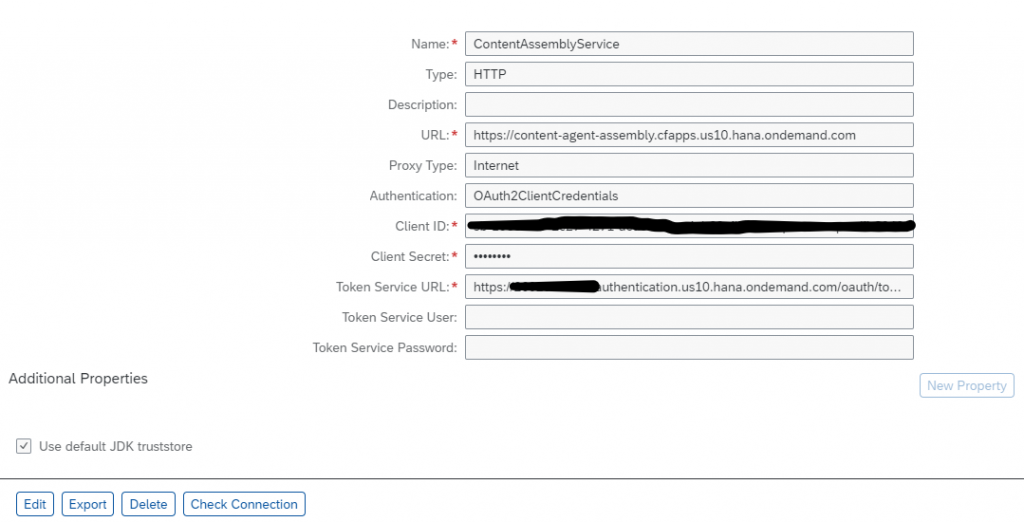
Conection Test:

You can ignore error 401.
5. Create destination CloudIntegration in Source Tenant.
Global Account–>Subaccount–>Connectivity–>Destinations–>New Destination
Name: CloudIntegration (case sensitive)
URL:<SourceTenantUrl>/api/1.0/transportmodule/Transport
Authentication:OAuth2ClientCredentials
Token Service URL: tokenurl form service key
Provide Client ID and Client Secret from service key created in step 2.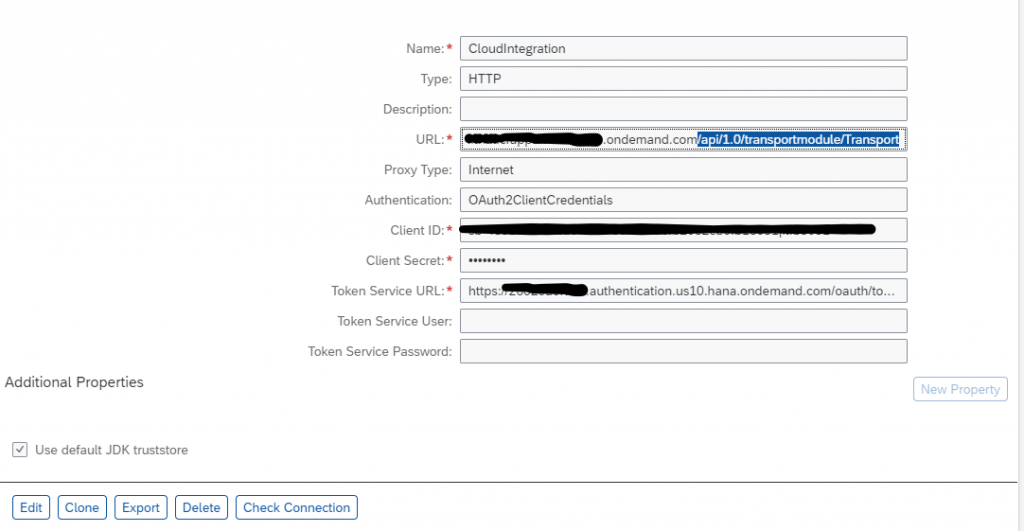
Connection Test:

You can ignore error code 401.
6. Create Destination TransportManagementService in Source Tenant.
Global Account–>Subaccount–>Connectivity–>Destinations–>New Destination–>Service Instance

Here Destination name TransportManagmentService is case sensitive. Select next it will fetch details form service instance created in step 3.
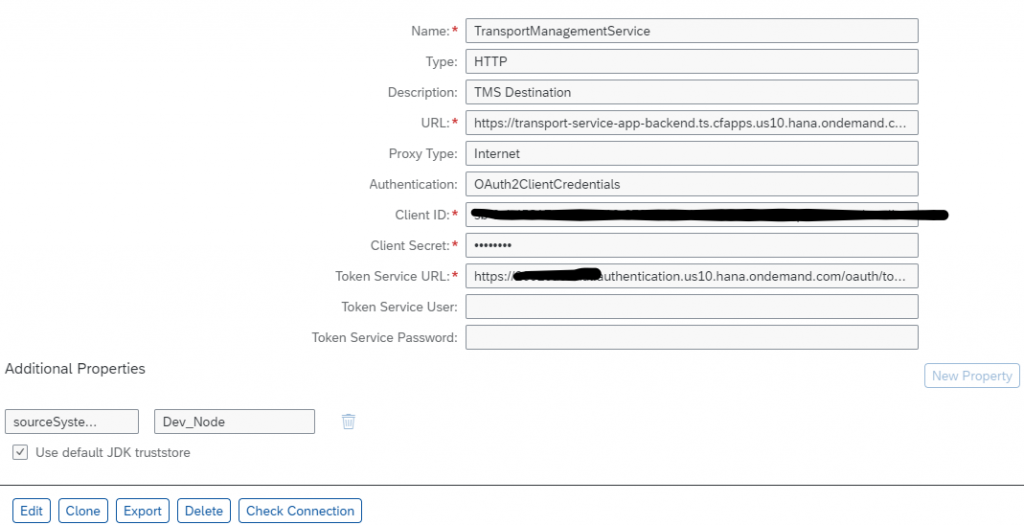
Add Additional property:
sourceSystemId=<Source_Node_Name> (This is node which is created in step 1 in TMS Config)Connection test:

You can ignore error code 401.
7. Create Destination for Target Tenant in source tenant.
Global Account–>Subaccount–>Connectivity–>Destinations–>New Destination
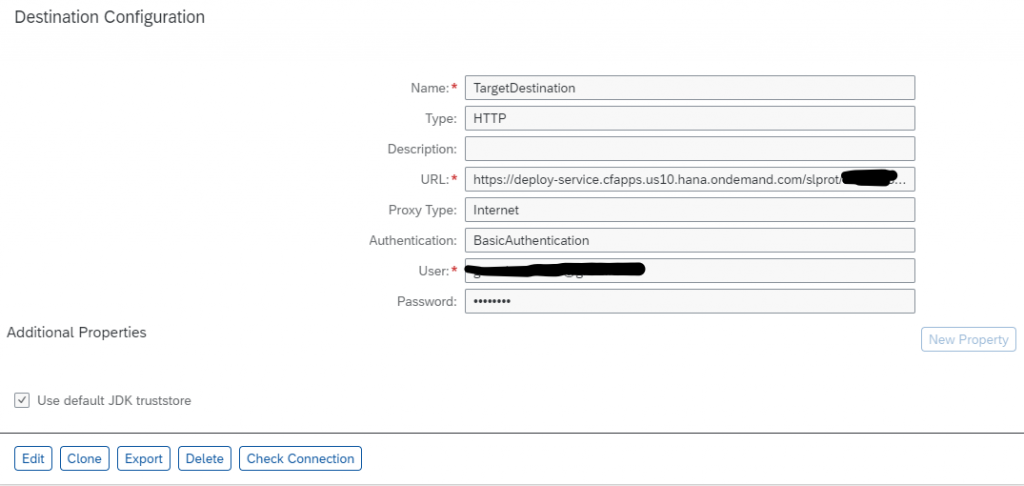
URL:
https://deploy-service.cfapps.us10.hana.ondemand.com/slprot/<OrgNameOfTarget>/<SpaceNameOfTarget>/slpAuthentication: Basic
Connection Test:

8. Enable transport setting to Transport Management Service in Source Tenant.
Setting–>Transport
Find Edit button at bottom of right corner on same page.

Note: To enable this setting AuthGroup.Administrator role required.
Also you need WorkspacePackagesTransport role to transport package from source tenant to target tenant.(To enable transport button in design tab).Below are the steps to assign the same.
a. Global Account–>Subaccount–>Security–>Role Collections–>Add Collection(+)
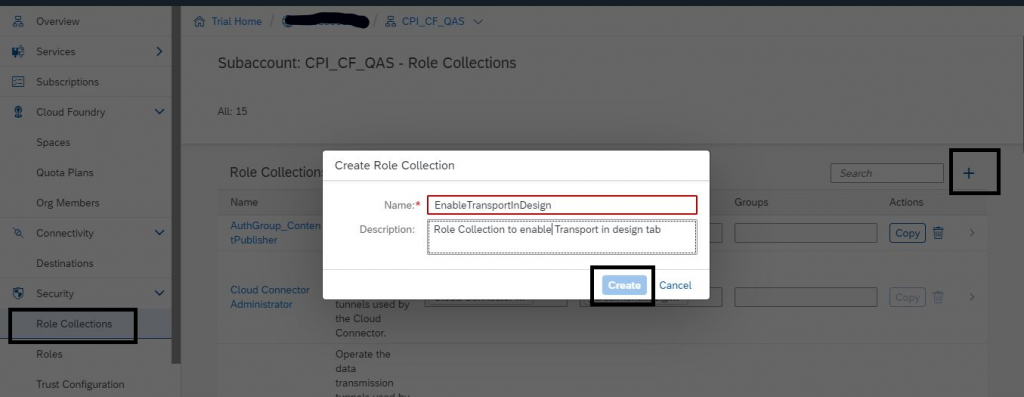
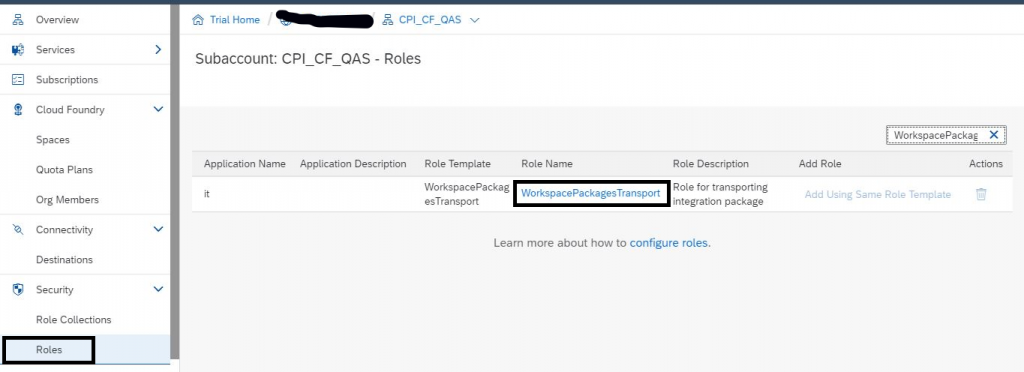
b. Global Account–>Subaccount–>Security–>Roles search for WorkspacePackagesTransport, click on it and assign it to role collection created in previous step.
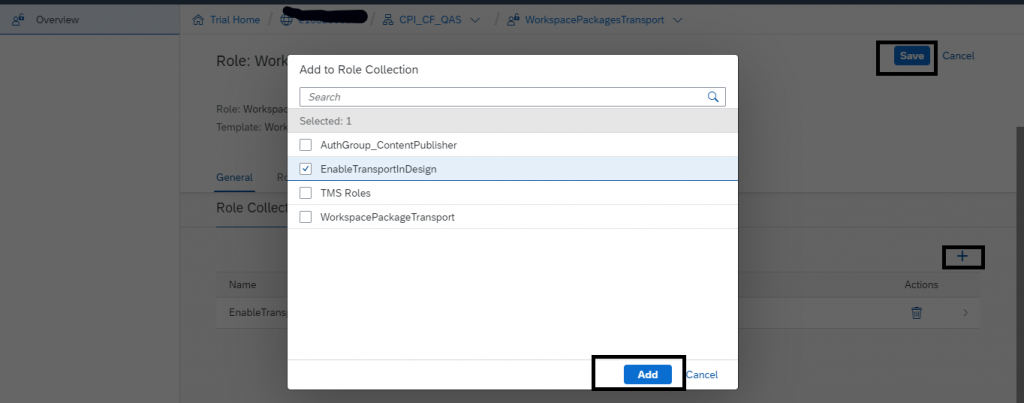
c. Global Account–>Subaccount–>Security–>Role Collections search the collection created in “step-a ” and assign user for this collection.
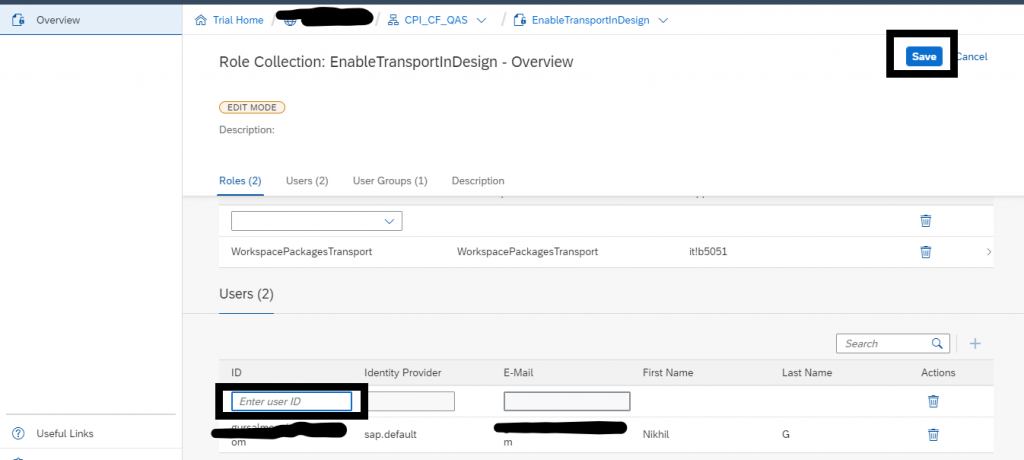
d. Logout and login again to into CPI, You can find transport button is enabled.

Then check configuration for Transport Management Service You will get below result if your destinations are correct.

SAP TMS:
1. Creating Source Transport Node
TMS–>Transport Nodes–>Add Node(+)
Just Provide Name and check Allow Upload to Node. Leave everything as it is(by default) and save it.
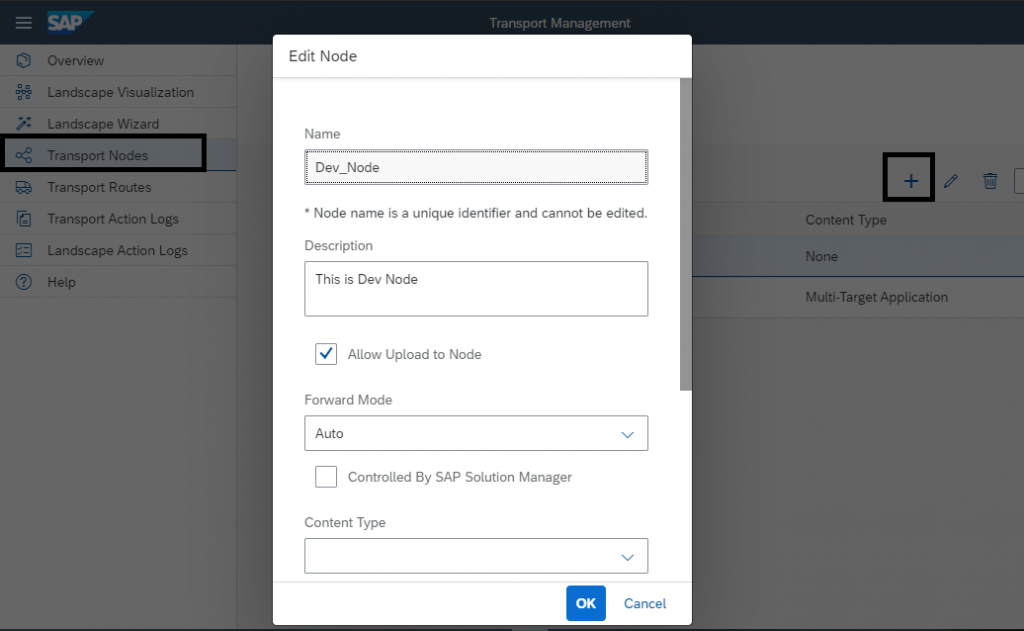
2. Create Target Transport Node:
TMS–>Transport Nodes–>Add Node(+)
Provide Name and check allow upload to node checkbox then select Content Type as Multi-Target Application and Select Destination of Target System which is created in step 7 in CPI Config.
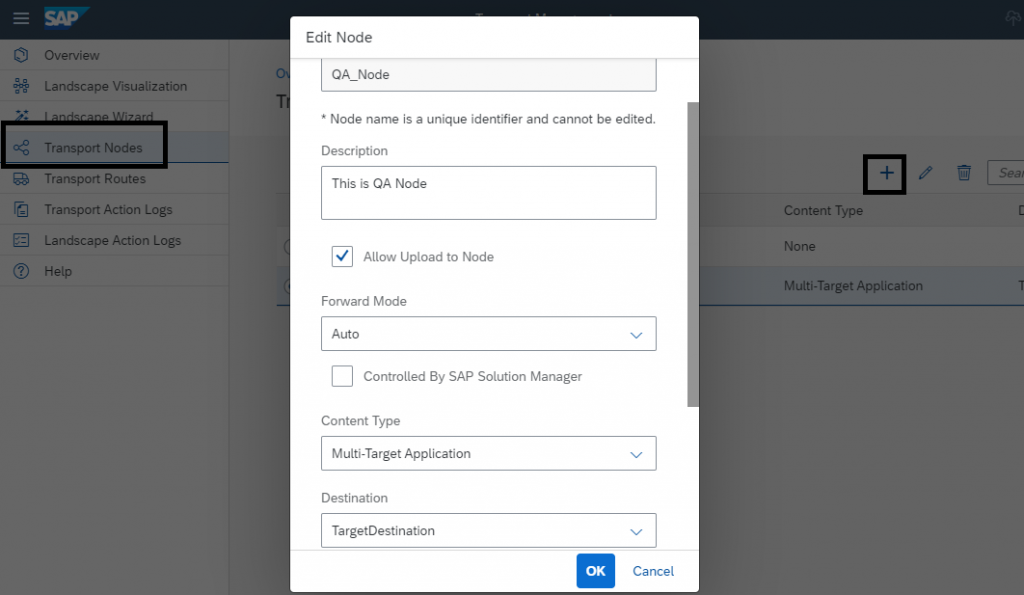
3. Create Transport Route:
TMS–>Transport Routes–>Add Route(+)
Provide name for rote and select the source and target node and save it.
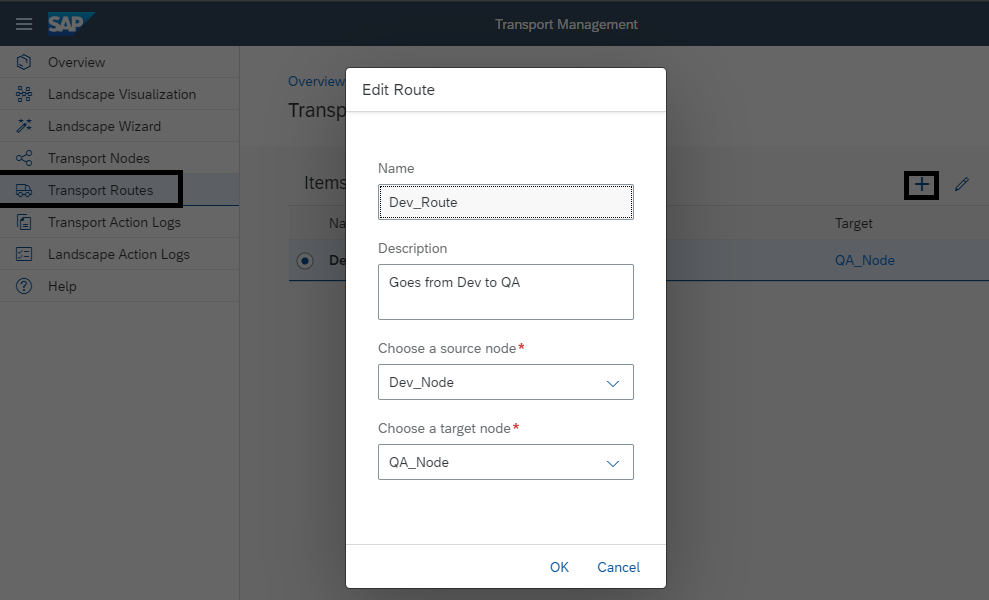
TMS setup is done.
Testing:
1. Select Package from source tenant which need to transport to target tenant.
Provide description for TR.
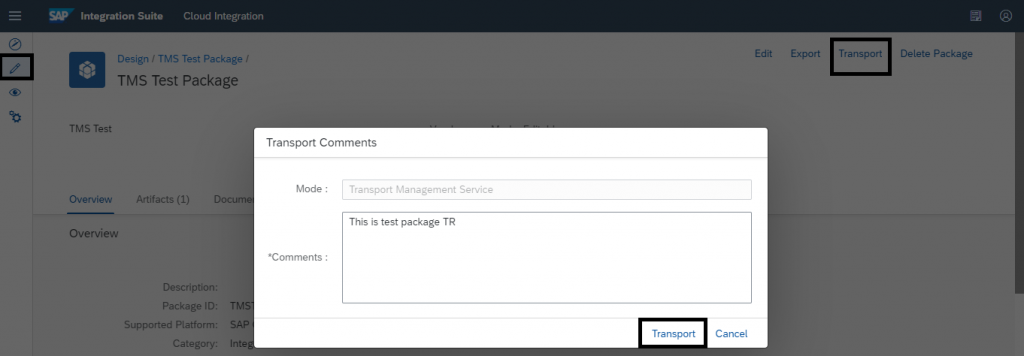
Then click on transport and you will get pop up as below with TR number:

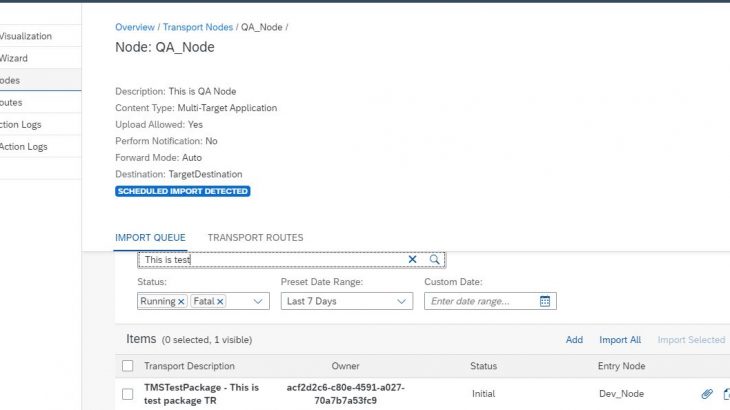
2. In Transport Management you can find this TR in Target Node’s import queue:
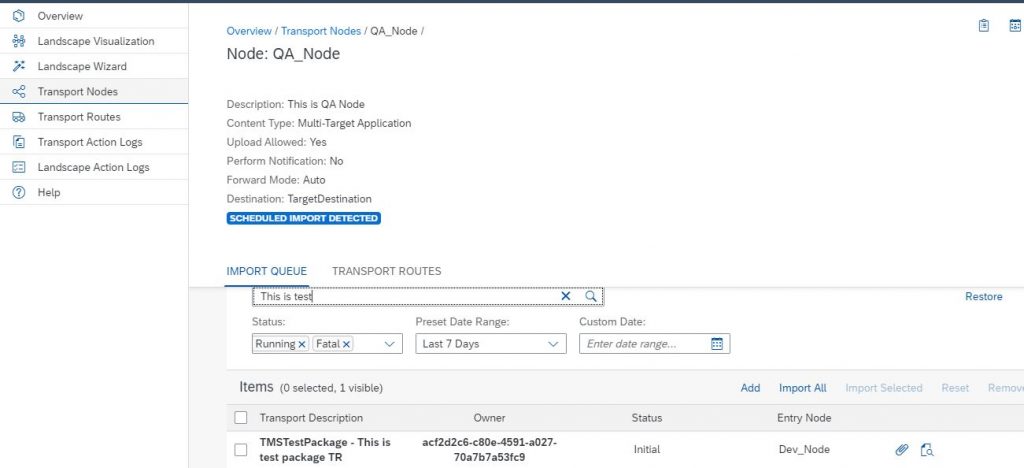
Select TR and click on import. This will take some time and you will find TR status in Transport Action Logs

3. Check the package in your target tenant:

Now we can deploy this artifact in target tenant.
