Introduction
SAP Cloud Integration version 6.54.xx comes with new feature, where in one can create Datatype and Messagetype as reusable design time artifacts in Cloud Integration capability of SAP Integration Suite
This feature is available only in SAP Integration Suite standard and above service plans.
SAP Cloud Integration version 6.54.xx software update is planned on mid of July 2024 (date and time subjected to change).
Create DataType:
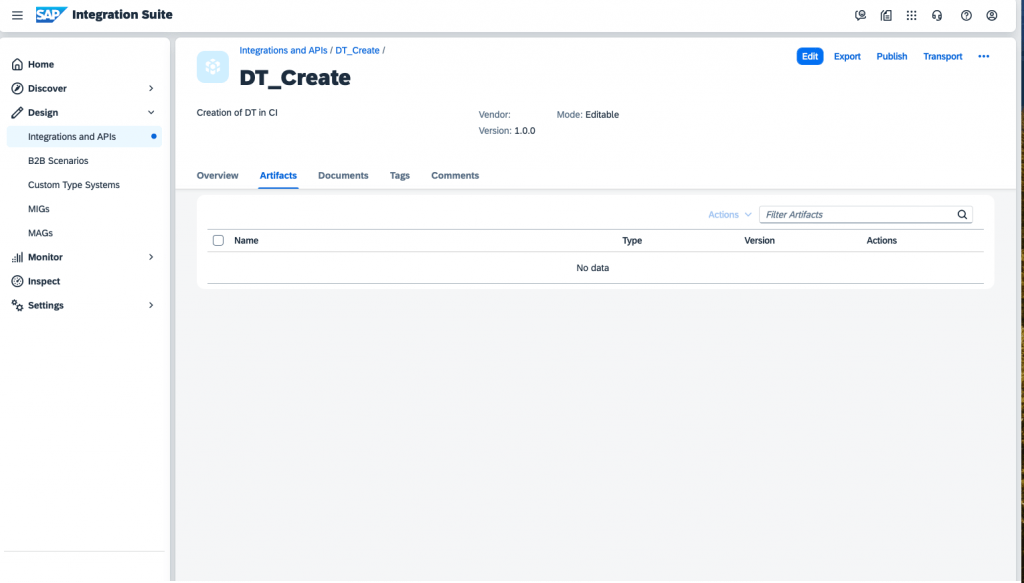
1. Open the Integration Suite Tenant and navigate to Design –>Integrations and API’s
2. Create an Integration Package or open an existing one.
3. Navigate to the Artifacts tab and click on Edit in the top right corner
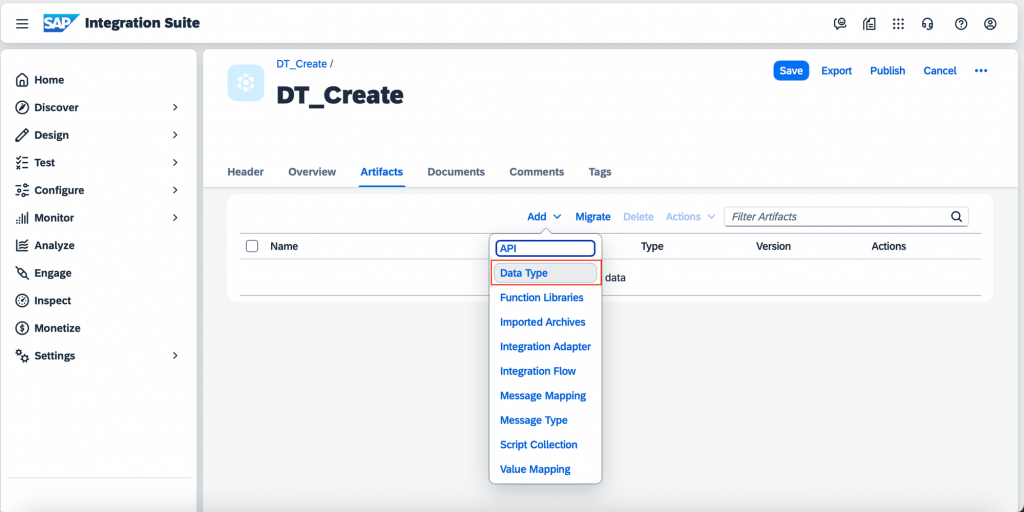
4. Click on Add drop down and select Data Type from the list
5. Add Data Type dialog is displayed with Create (radio button) selected by default.
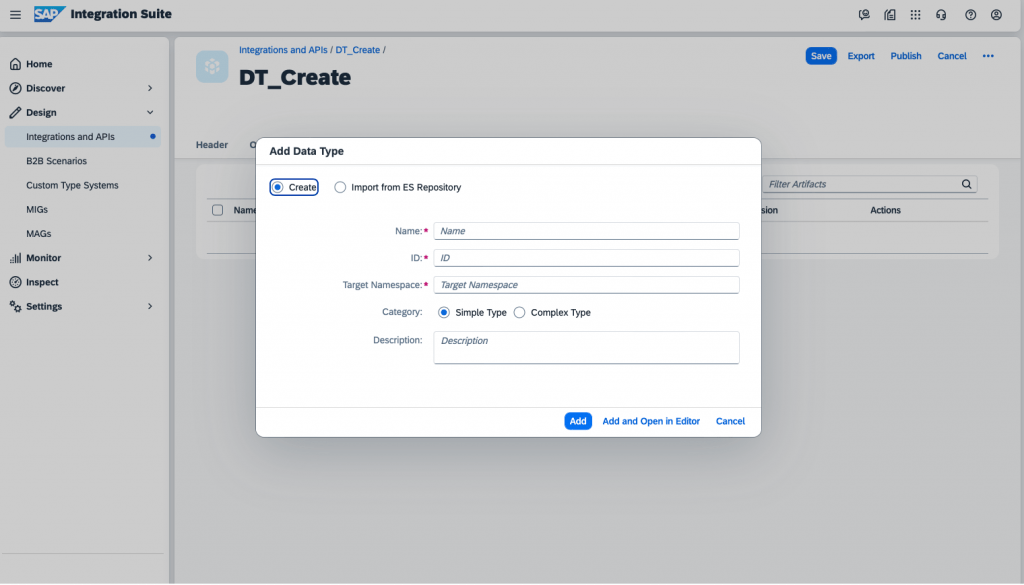
6. Enter the values for the fields Name, ID,Target Namespace, Description, select the category – Simple Type(selected by default) or Complex Type for the Datatype you want to create and click on Add or Add and Open in Editor
7. On Click of Add, the Data Type artifact with the provided name gets created and is listed in the Artifacts list page
8. On Click of Add and Open in Editor, the Data Type artifact gets created with the provided name and the artifact gets opened in the Editor in display mode.
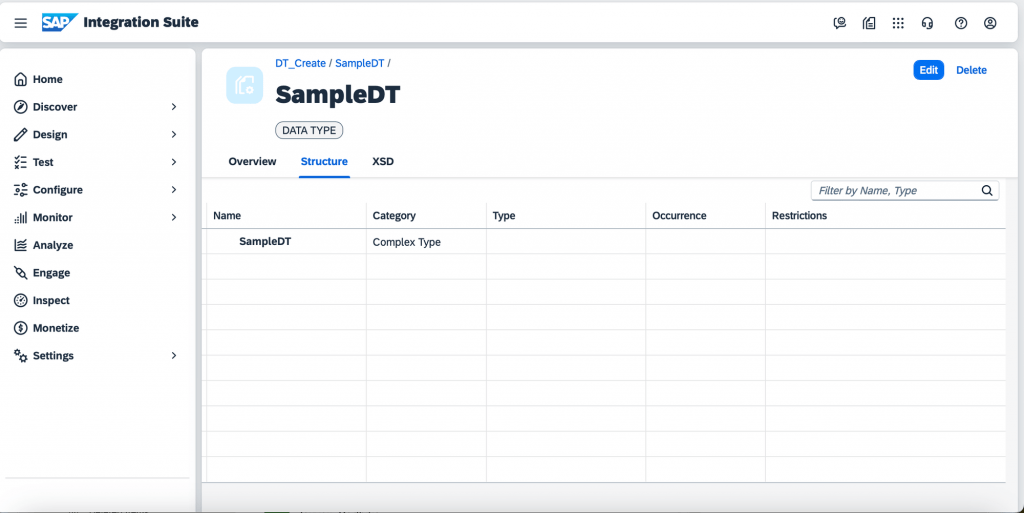
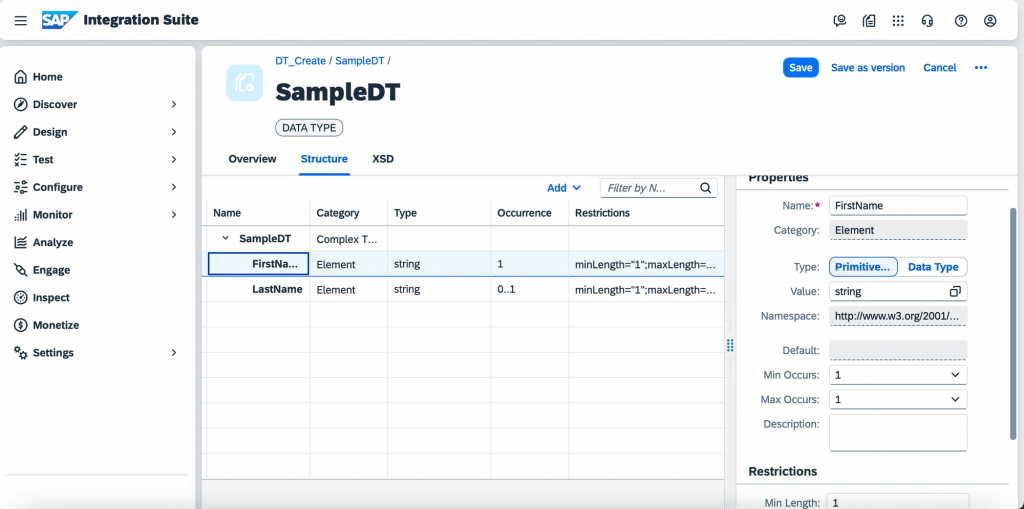
9. The Editor contains three tabs : Overview,Structure and XSD.The Structure is shown by default when the artifact is opened. It displays the structure of the datatype in a tree table with the following columns :
- Name : Contains the Name of the node(element or attribute).For Root node the name is same as the name of the Datatype and it cannot be edited.
- Category : This column shows whether the root element has subnodes or not. For root node it is either Simple type or Complex Type and for submodes it can be either Element or Attribute. You cannot change values in this column.
- Type: This column displays the type with which the node is defined.Here you select a built-in data type or reference to an existing data type for an element or attribute. You must specify a type for attributes.
- Occurrence: Determines how often elements occur.For attributes, you can determine whether the attribute is optional or required.
- Restrictions : This column displays the facets (if any) defined incase the node is defined by a built-in primitive type or a user defined Simple type Datatype
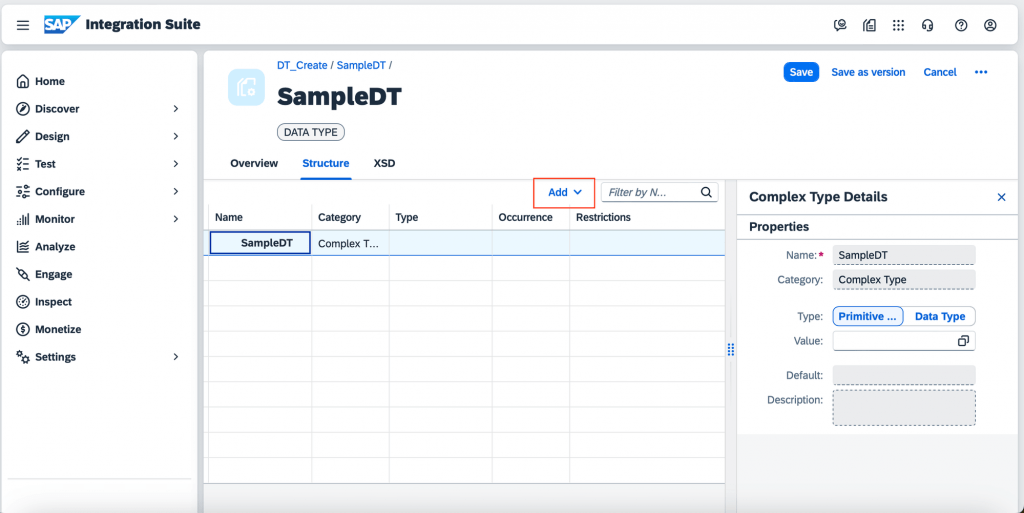
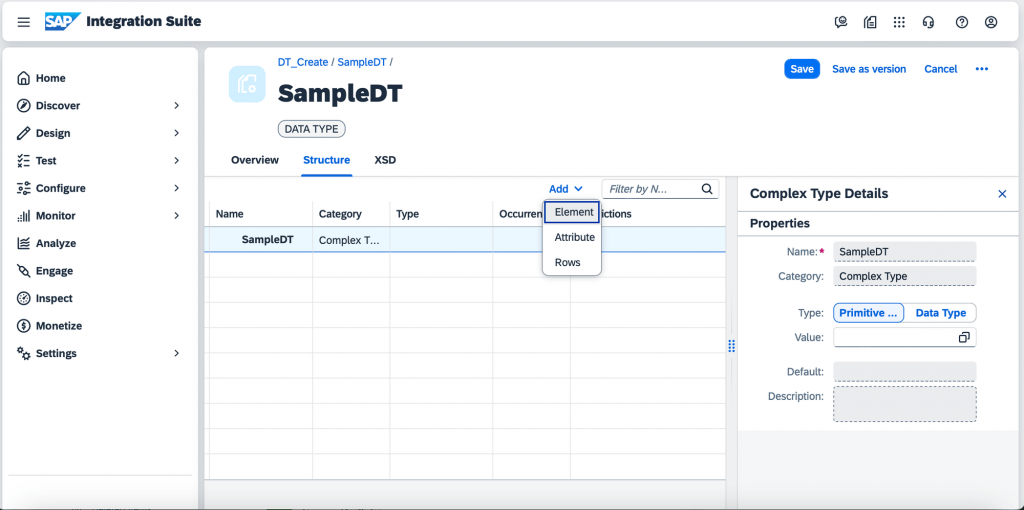
9. Switch to edit mode and to define/build the Structure of the Datatype. On selecting the first row(rootnode),the Add drop down in the table header gets enabled and also the details of the row are displayed in the right side section of the editor.
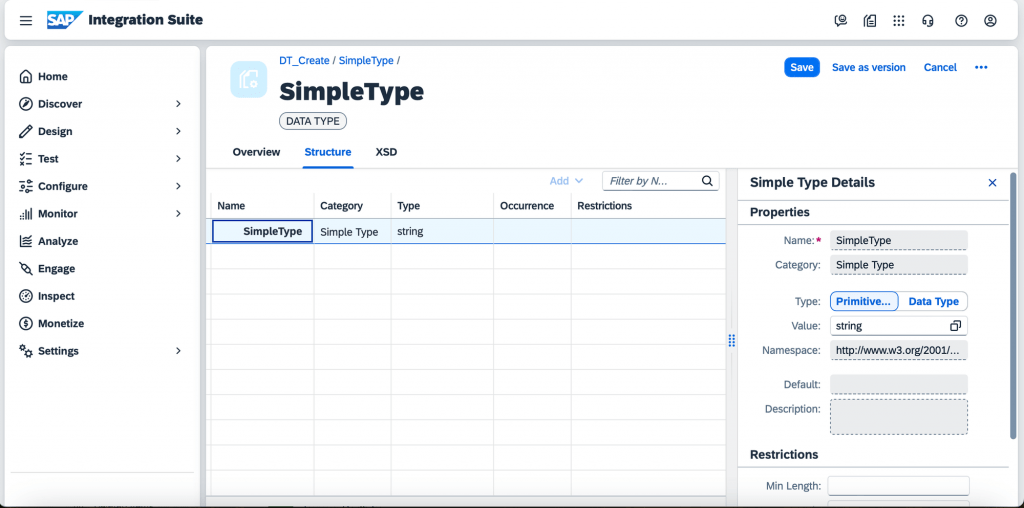
10. Simple Type Data Type :
- No child nodes can be added
- Root node is defined by string built-in primitive datatype.
- Click on the root node and the Properties sheet which contains the details of the node selected is displayed on the right side of the editor. In Edit mode, user can edit the Type, define the restrictions applicable for the Type selected.
11. Complex Type Data Type :
To add child nodes:
- Click on the root node and the Add drop down in the table header gets enabled.
Add –>Element to add child element node
Add –>Attribute to add attribute node
Add –>Rows to add multiple Elements/Attributes
- Click on the newly added node and define the details in the Properties sheet
12. Once the Structure is defined,Click on Save to save the artifact as Draft, Save as Version to save the artifact as versioned artifact.
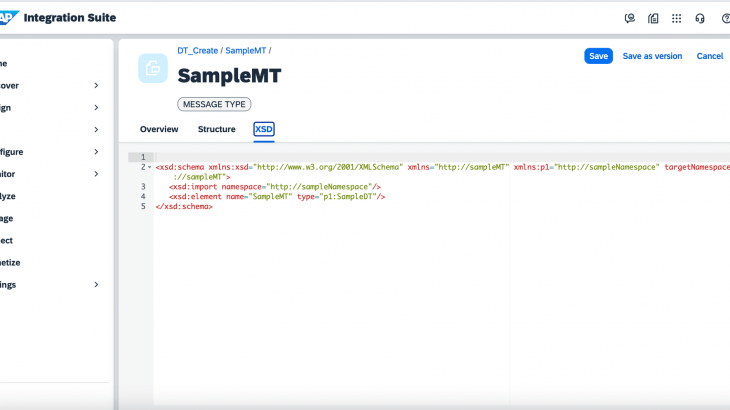
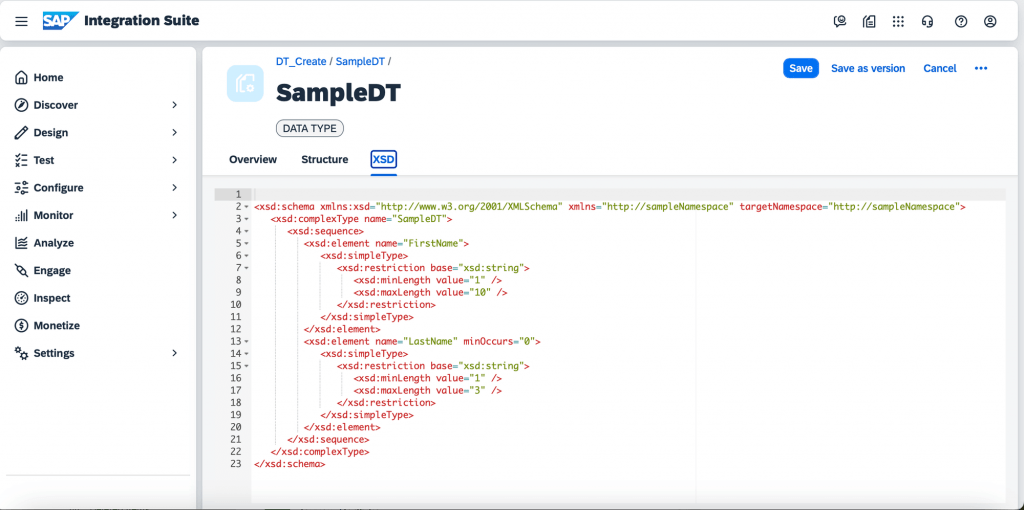
13. XSD tab displays the read only view of the xsd schema of the Datatype artifact
Create MessageType:
1. Open the Integration Suite Tenant and navigate to Design –>Integrations and API’s
2. Create an Integration Package or open an existing one.
3. Navigate to the Artifacts tab and click on Edit in the top right corner
4. Click on Add drop down and select Message Type from the list
5. Add Message Type dialog is opened
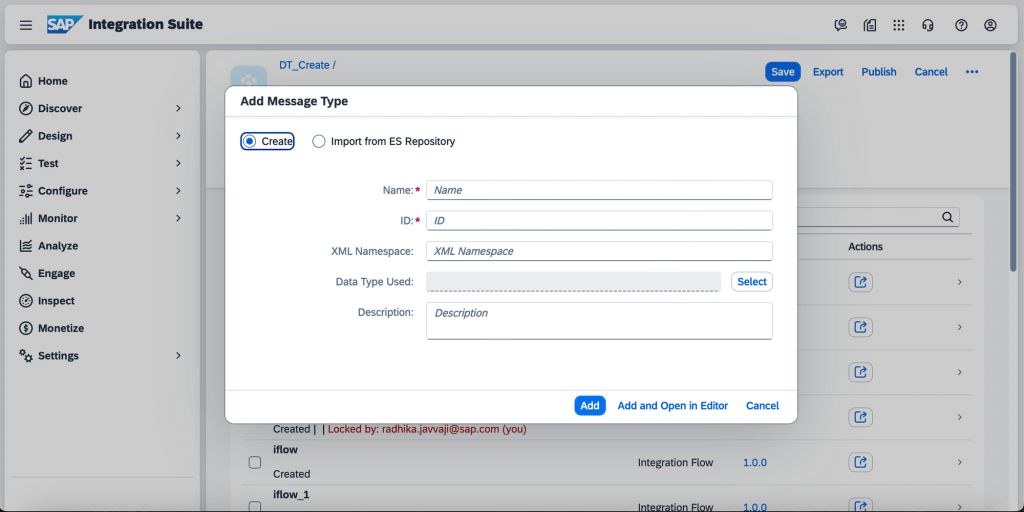
6. Enter the values for the fields Name, ID, XMLNamespace, Datatype to be Used, Description, and click on Add or Add and Open in Editor
7. On Click of Add, Message Type artifact gets created and is listed in the Artifacts list page
8. On Click of Add and Open in Editor, MessageType artifact gets created and the artifact gets opened in the DataType Editor with Structure tab loaded by default in non-edit mode. The rootnode Name would be same as the Message Type name, Category as Element and Type as Data Type Used (if selected in the Add Message Type dialog)

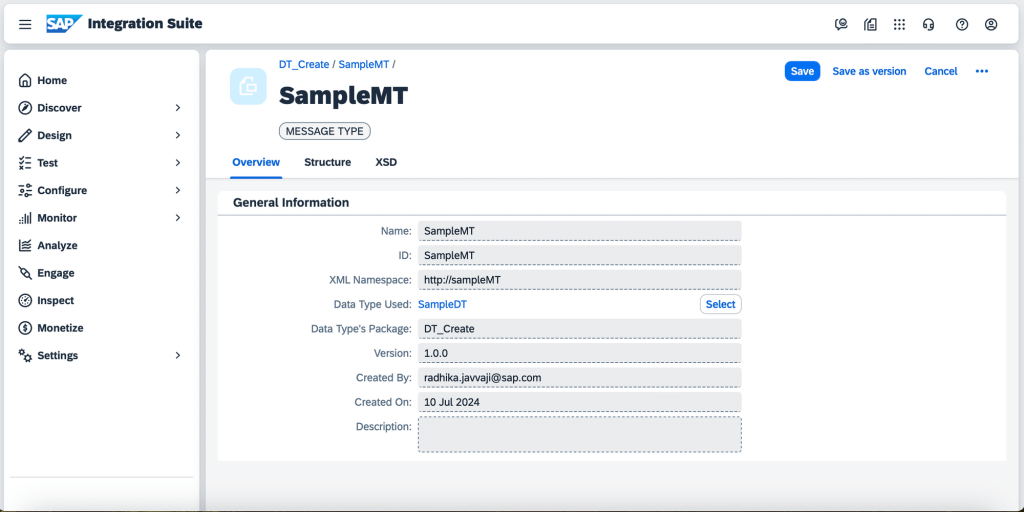
9. Overview tab in Edit mode is as shown below :
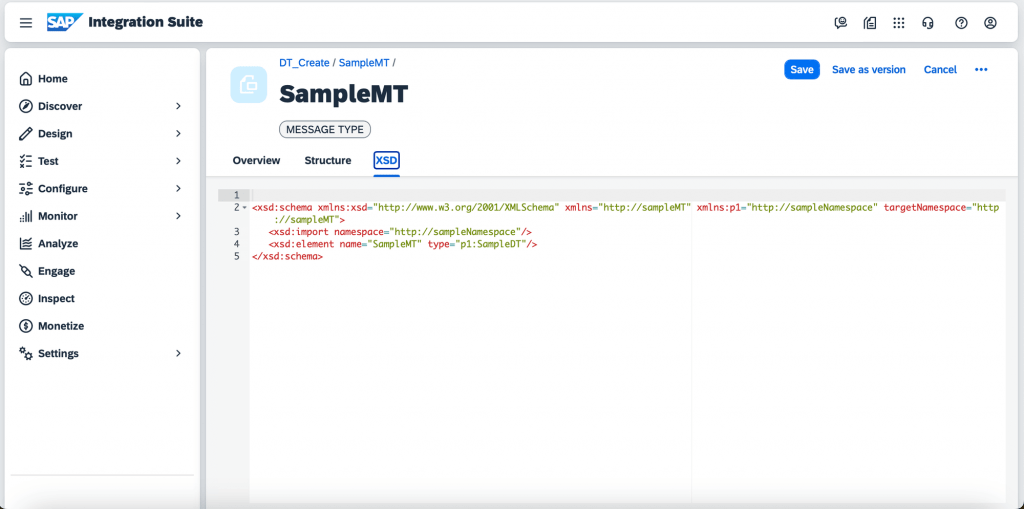
10. XSD tab

11. Datatype Used to create a Message type can be changed in Overview tab or in Structure tab. Switch to edit mode and select the root node in the Structure tab.The properties sheet gets displayed on the right side of the page with Datatype Used field as editable.
12. No other nodes(child nodes) are editable in the Message Type artifact.


