This blog post gives details on how to create a JSON sample file for a data product in the Data Marketplace of SAP Data Warehouse Cloud via a database tool DBeaver. DBeaver is a SQL client software application that act as a general database engine for developers, SQL programmers, database administrators and analysts. The community version of DBeaver has advantages of free multi-platform database tool and supporting all popular databases such as MySQL, PostgreSQL, Oracle, SAP HANA etc.
How to download and install DBeaver: https://dbeaver.io/download/
The entire process of creating a sample data – from setup to HANA connection and a JSON file generation – including 5 steps with some additional explanations are following:
1. Setting up a database user in SAP Data Warehouse Cloud
- As a first step, you need to have a database user (DB) in SAP Data Warehouse Cloud in order to connect to HANA Cloud in DBeaver. In Space Management, you can create a DB user for data consumption and data ingestion. In this case, you only need to read the sample data views in DBeaver and then export it as a JSON file. As a result, the DB user setup can be done as following:
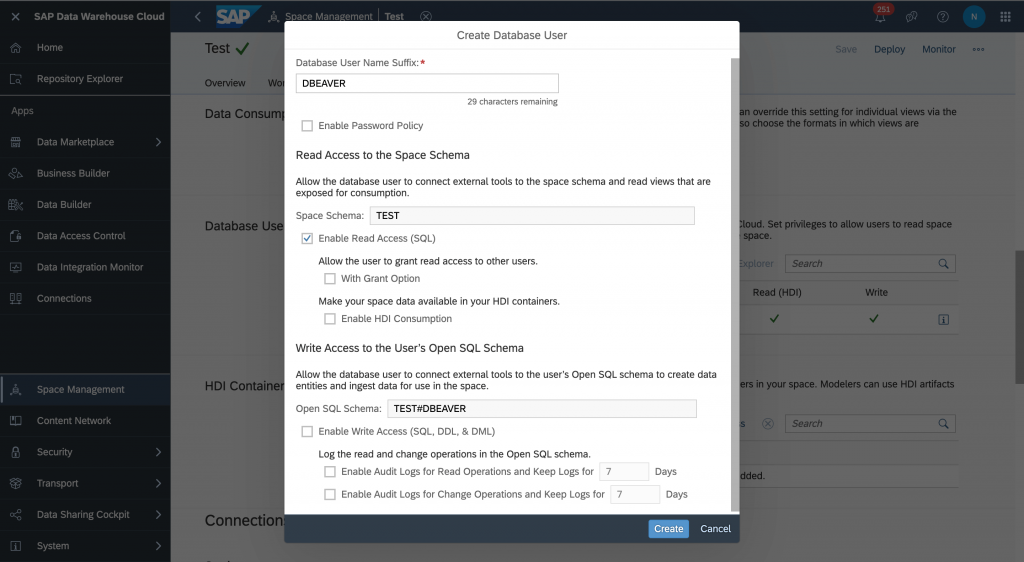
- Database User Settings:
2. Create a SQL view which consists of a small amount of data (e.g filter on 1000 rows) of the data product and can present how the data product looks like.
- As sample data is just an exemplar of the actual data product so that the data consumer can get a glimpse of what contains in the data product, we only need to select the small amount (some rows) data from the original view which is used as a source for the data product. Create a SQL view as following:
SELECT * FROM “View_1” limit 999
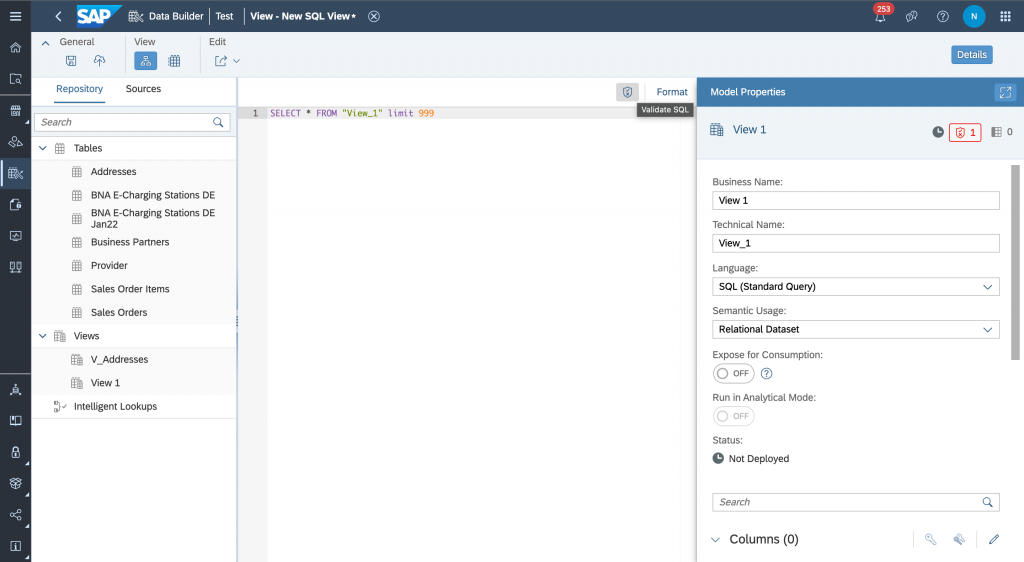
- Then validate SQL to check if there is any error in the SQL statement. Set expose for consumption so that it can be seen in DBeaver.
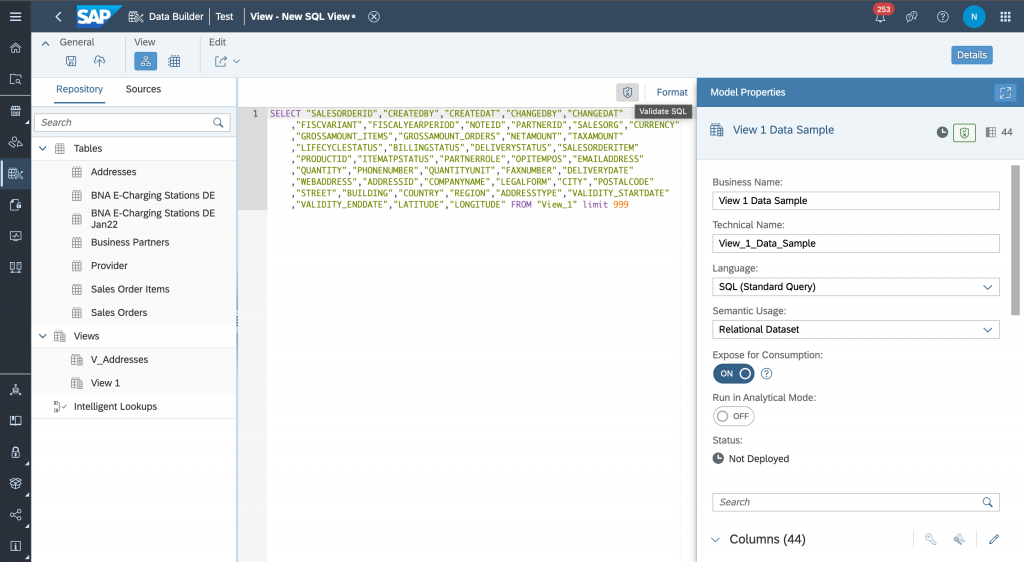
- Then save and deploy the SQL view.
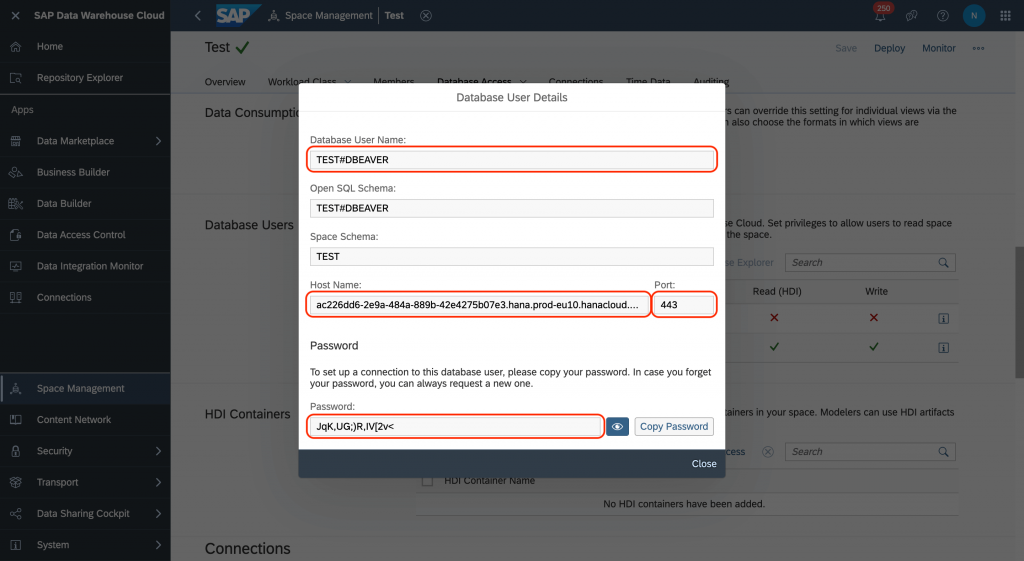
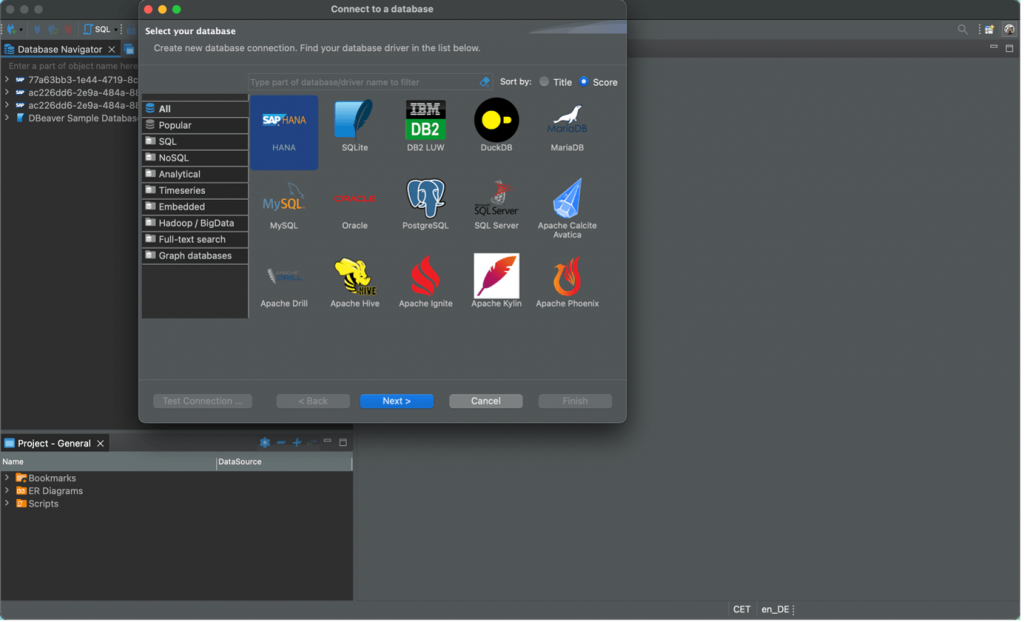
3. Connectivity with HANA Database in DBeaver
- After creating a DB user in SAP Data Warehouse Cloud, you need to connect to HANA Database using this user.
- New Database Connection (the + button on the top left) → HANA → Next
- The Connection Settings should be matched with the information of the DB user:
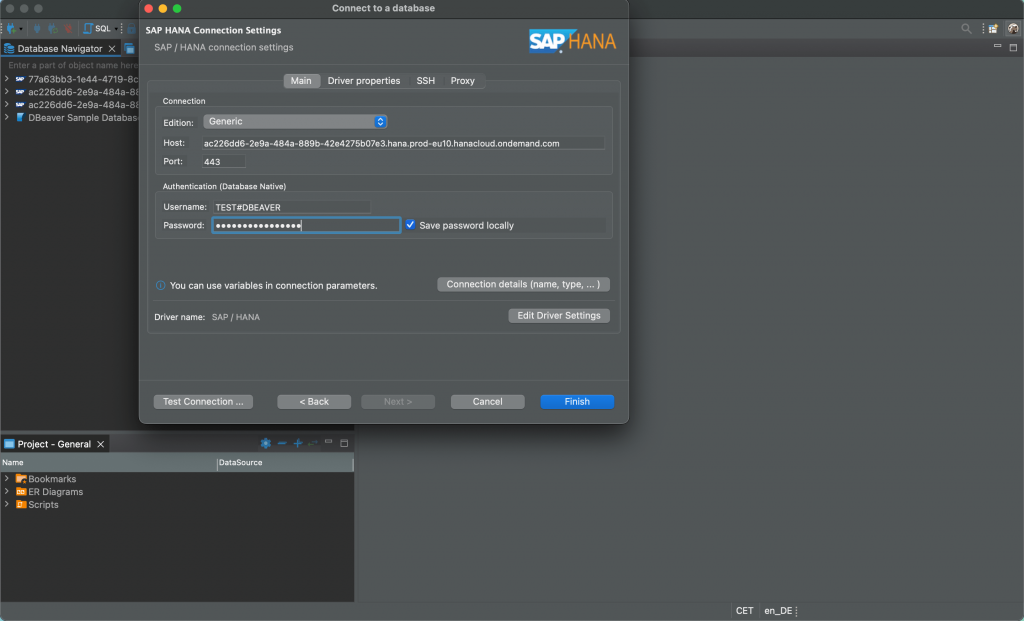
- Click Finish to connect to the HANA Database.
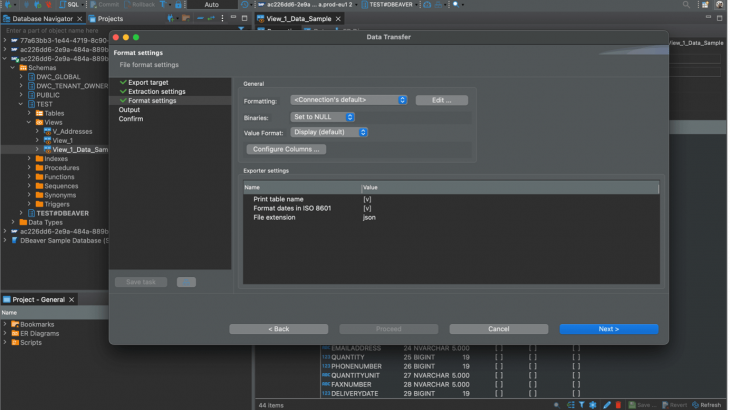
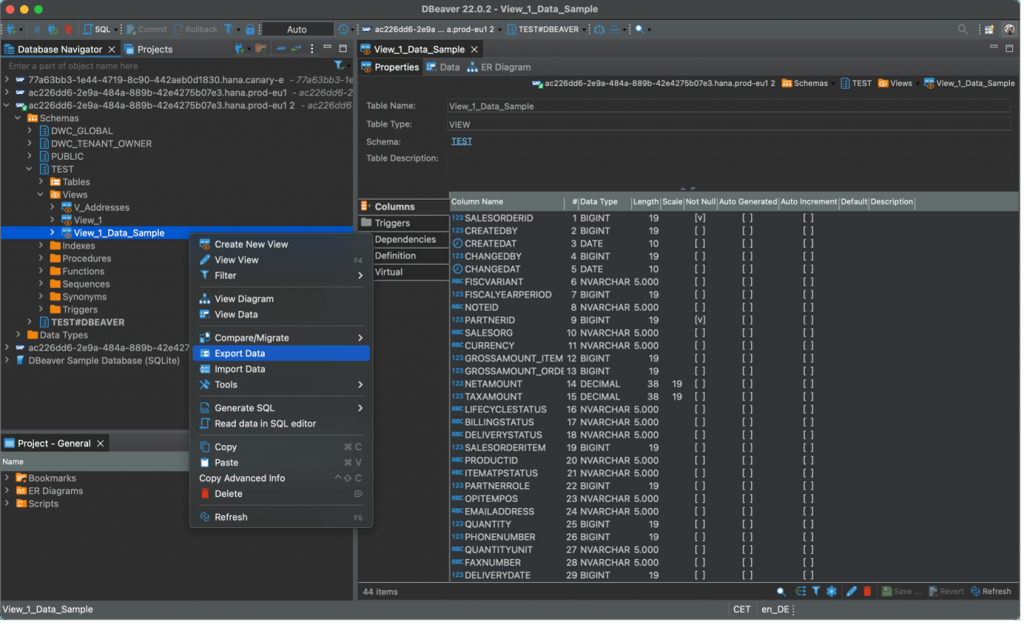
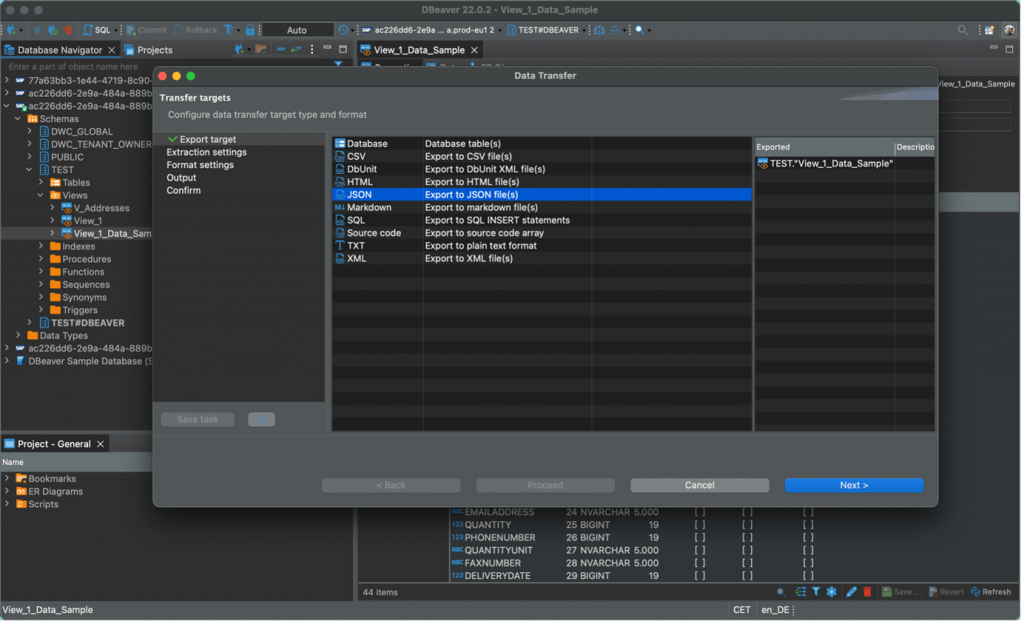
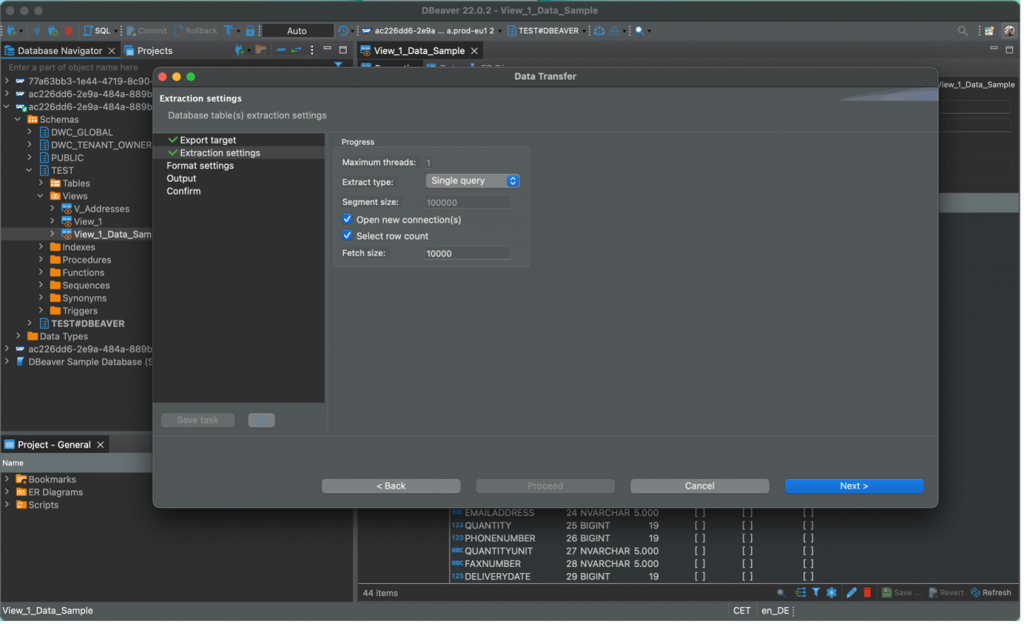
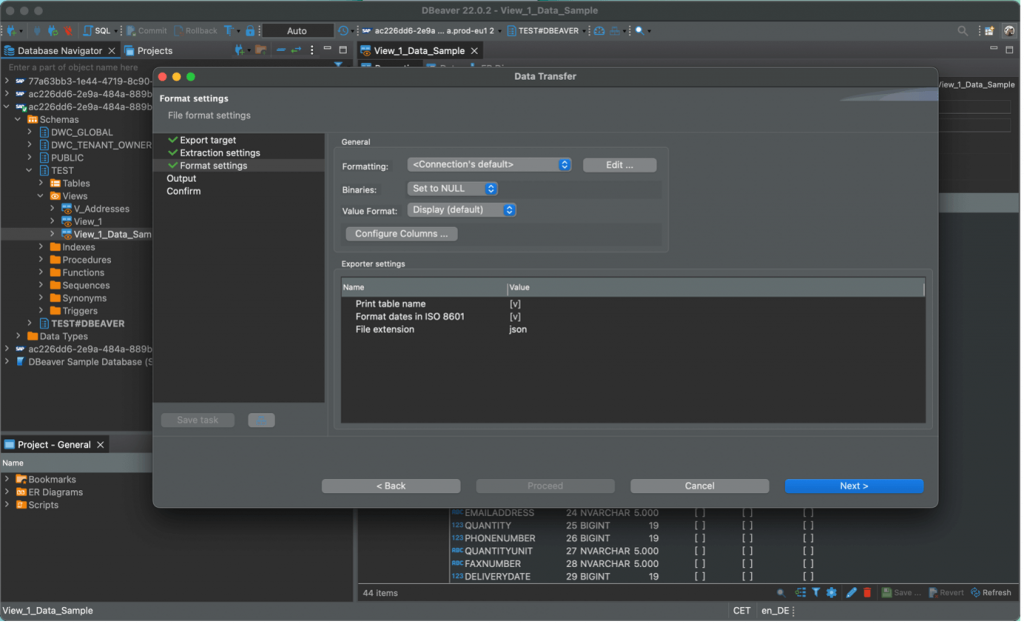
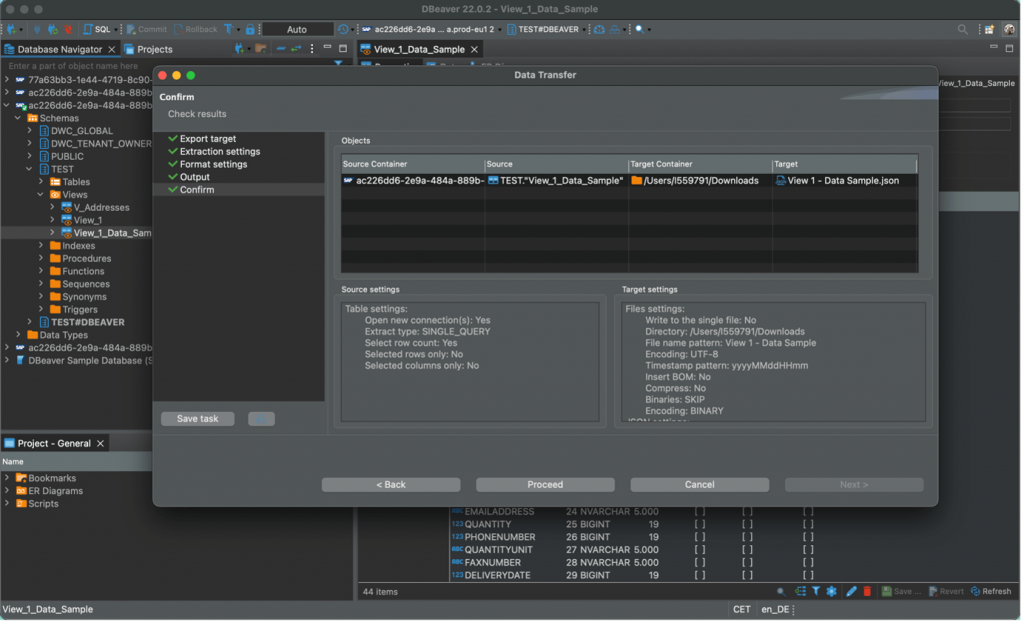
4. Generate a JSON file for the sample data
- After connecting to HANA Cloud, go the connection you just created on the Tab Database Navigator.
- HANA Connection → Schemas → TEST → Views → View_1_Data_Sample → (right click) Export Data
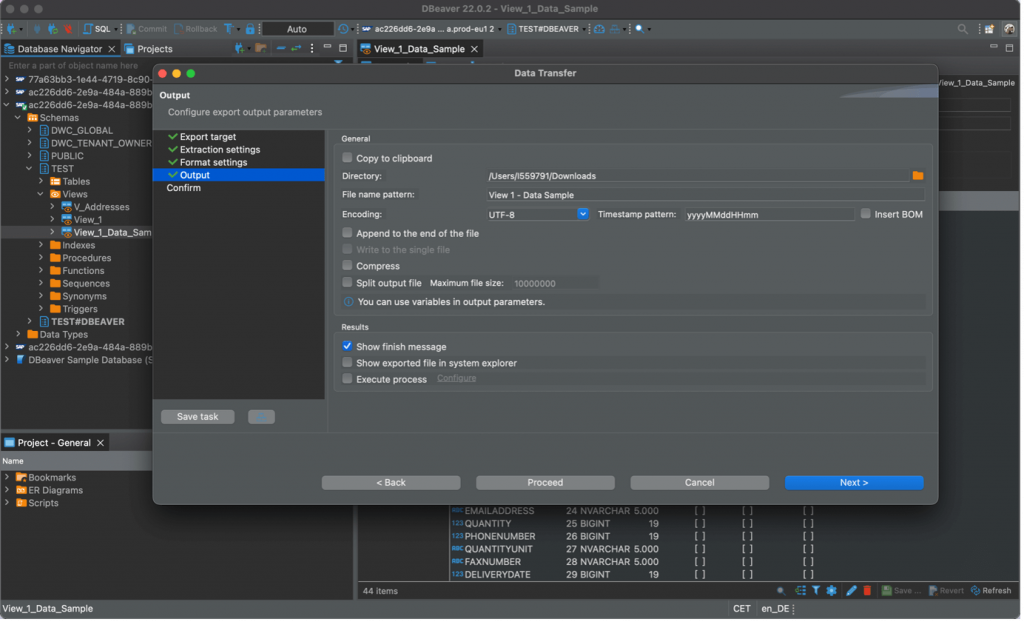
- The next steps should be done as following:
- Note: ‘Directory’ as where you choose to save the exported JSON file and ‘File name patterns’ as the name of the file.
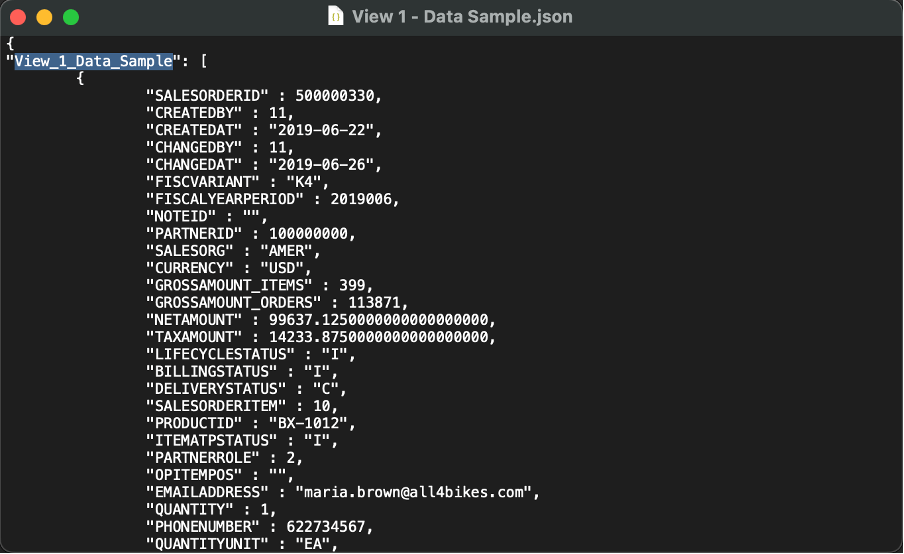
5. Format the JSON file
- In order to read the JSON file in the Data Marketplace, the exported JSON file should be formatted as following:
- Open the JSON file in the Text Edit, change the name of the value (in this example “View_1_Data_Sample”) into “data”. Then save.
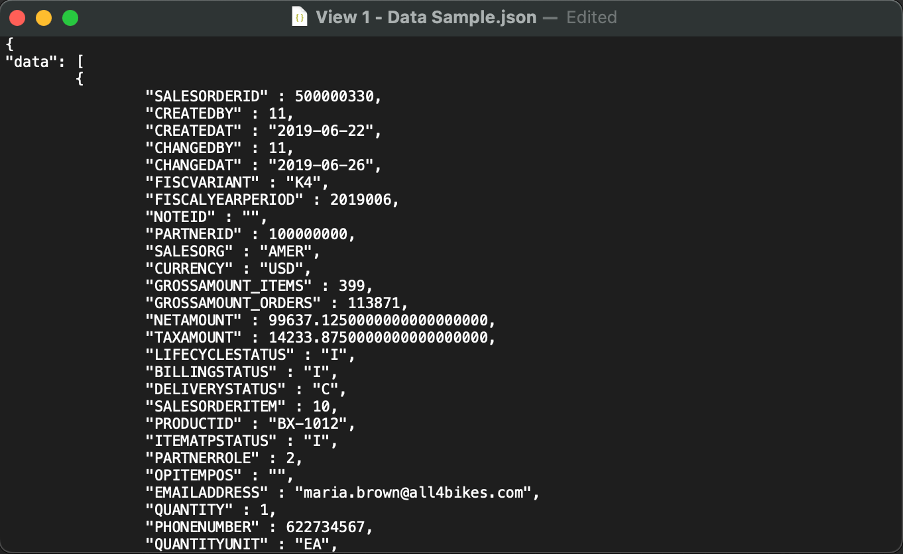
After finishing the generation process, the JSON file is ready to be uploaded as the sample data for the data product in the Data Marketplace.


