Introduction
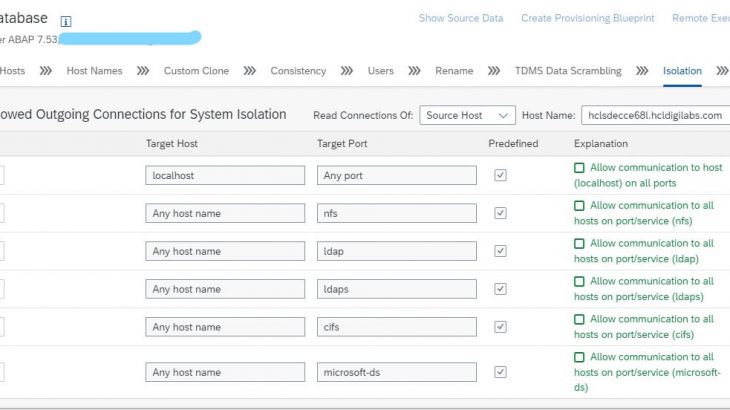
This blog post will cover the process for Database refresh through SAP Landscape Management System, Enterprise Edition (3.0).
Disclaimer
Any code lines included are only examples and are not intended to be used in any productive system environment. The Code is only intended to better explain and visualize the features of the SAP Landscape Management Automation Studio. No effort has been made to make the code production quality (e.g. security, error handling etc). If you use any of the code shown, you are doing it at your own risk.
Information in this blog could include technical inaccuracies or typographical errors. Changes may be periodically made.
Configuration Steps
1. Create the action configuration files on source for database backup (OS Level)
2. Create ASE backup script on source (OS Level)
3. Create the action configuration files on target for custom SWPM (OS Level)
4. Create Dark Mode SWPM script on target for custom SWPM (OS Level)
5. Create Provider Definitions (LaMa)
6. Design Custom Provisioning (LaMa)
7. Assign custom provisioning process to instance (LaMa)
The Environment is as follows
- LaMa 3.0 Enterprise Edition SP23
- Source system : ECC 6.0 with SID – E68
- Target system : Similar to source system with SID – E69
- SAP HostAgent version 7.21 Patch 46
Configuration File — Source
The connectivilty of LAMA to SAP system is through SAP Host Agent. So the configurstion files are stored in directory /usr/sap/hostctrl/exe/operations.d and end with “.conf”
Username: $[PARAM-PRISAPSYSTEM:#tolower#required]adm
Name:SOURCE_DB_BACKUP
Description: Create Source DB backup
Command: /usr/sap/db_scripts/E68_DB_dump.sh $[PARAM-PRISAPSYSTEM:#required]
ResultConverter: flat
Platform: Unix
Line 1: Specifies the username to execute the script. The SID is passed as a variable (i.e. E68) and this is converted to lower case and “adm” appended to it. Therefore username will be “e68adm”. #required indicates that the parameter is mandatory for execution of this operation.
Line 2: Name of the operation
Line 3: Description
Line 4: The full path of the script and the arguments to be passed.
Line 5: No special handling is performed
Line 6: Only applicable to Unix/Linux hosts (will not be available on Windows hosts)
Set the below permissions:
- chown root:root SOURCE_DB_BACKUP.conf
- chmod 755 SOURCE_DB_BACKUP.conf
SYBASE DB Backup Script – Source System(E68)
We will be using the “isql” command to perform the backup.
Create a directory /usr/sap/db_scripts.
Create .sh file named “E68_DB_dump.sh”
#!/bin/bash
SID=e68
sidadm=sybe68
dump_file=`echo $SID`_DB_DUMP
log_file=/tmp/dump$SID\.log
path1=`eval echo “~$sidadm”`
. $path1/.sapenv.sh
. /sybase/$SID/SYBASE.sh
isql -X -Usapsa -S$SID -P <Password>-o $log_file <<EOF
use master
go
select getdate()
go
sp_dump_history @database_name = $SID
go
dump database $SID to ‘/backups/$dump_file’
go
EOF
echo “Script Completed” >> $log_file
date >> $log_file
Configuration File — Target System (E69)
Go to directory /usr/sap/hostctrl/exe/operations.d
Create the file TARGET_DB_SWPM.conf
Name: TARGET_DB_SWPM
Username: root
Description: Non-Interactive mode SWPM
Command: /usr/sap/scripts/ Non-Interactive _mode_swpm.sh
ResultConverter: flat
Platform: Unix
Set the right permissions:
- chown root:root TARGET_DB_SWPM.conf
- chmod 755 TARGET_DB_SWPM.conf
The above configuration file will run as root and the script will execute software provisioning manager (SWPM) in dark mode. This means it is an unattended run of SWPM and we will not go through the usual dialog when running it.
We need to also create a configuration file for a dummy step to stop the default software provisioning manager from executing. This will just execute an echo command. The real software provisioning manager execution will be done as replacement to the restore backup step when designing custom provisioning.
Create the file custom_swpm_echo.conf
Name:custom_swpm_echo
Command: echo ‘executing dummy SWPM’
ResultConverter: flat
Platform: Unix
Set the right permissions:
- chown root:root custom_swpm_echo.conf
- chmod 755 custom_swpm_echo.conf
Create Parameter-File for Dark Mode SWPM — Target
Before we can run unattended swpm in a script we need to create the parameter-file. To do this run swpm in interactive mode and when you reach the summary screen do not proceed further.
We need to run SWPM and record all parameter which are needed for system refresh through SWPM. We will execute all this step till preparation and will stop on parameter summery. Don’t execute SWPM.
Go to the directory of SWPM
Run – ./sapinst
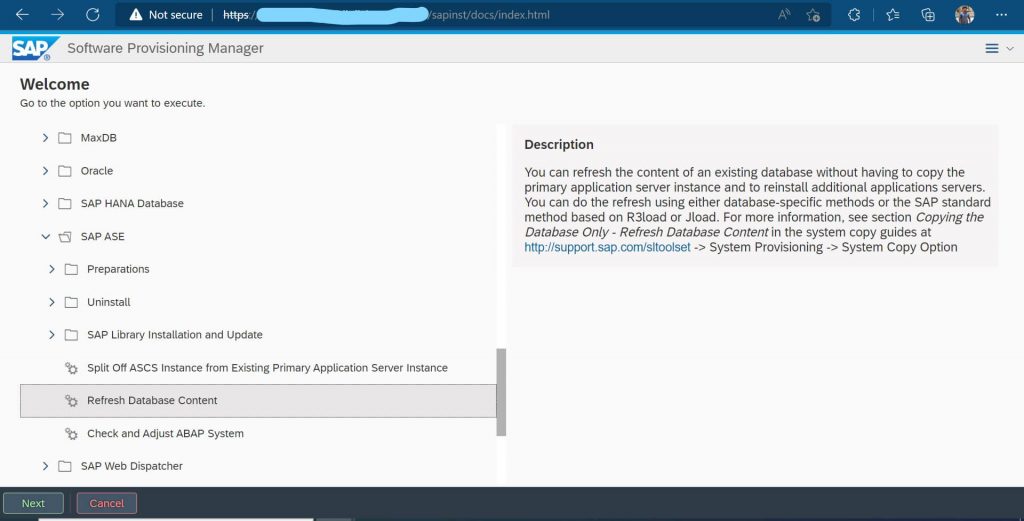
In a web browser go to URL https://<hostname>:4237/sapinst/docs/index.html
Login As root user
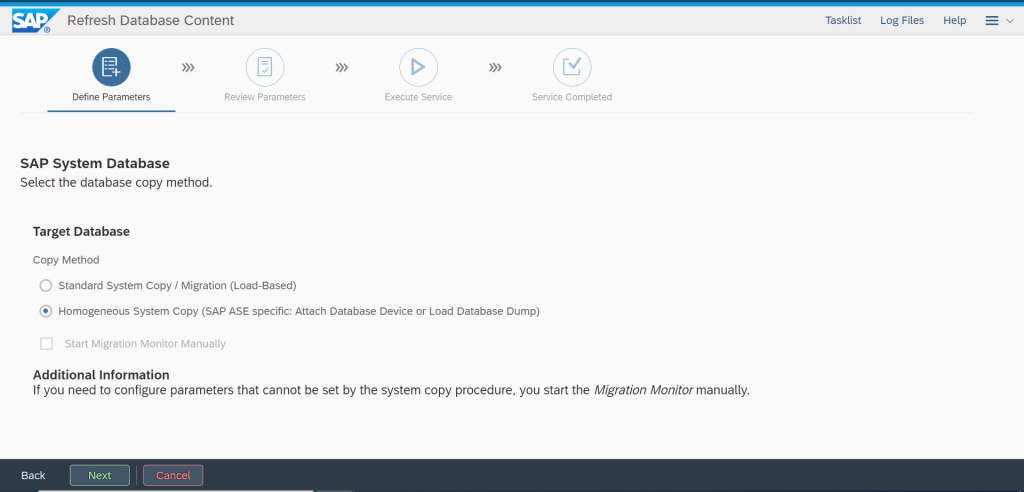
After login select the SWPM option Generic -> SAP ASE -> Refresh Database Content
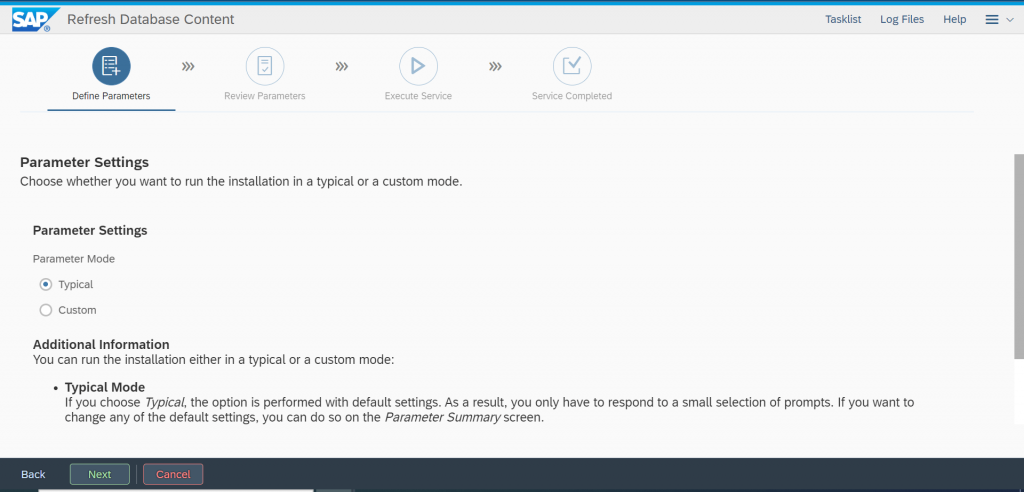
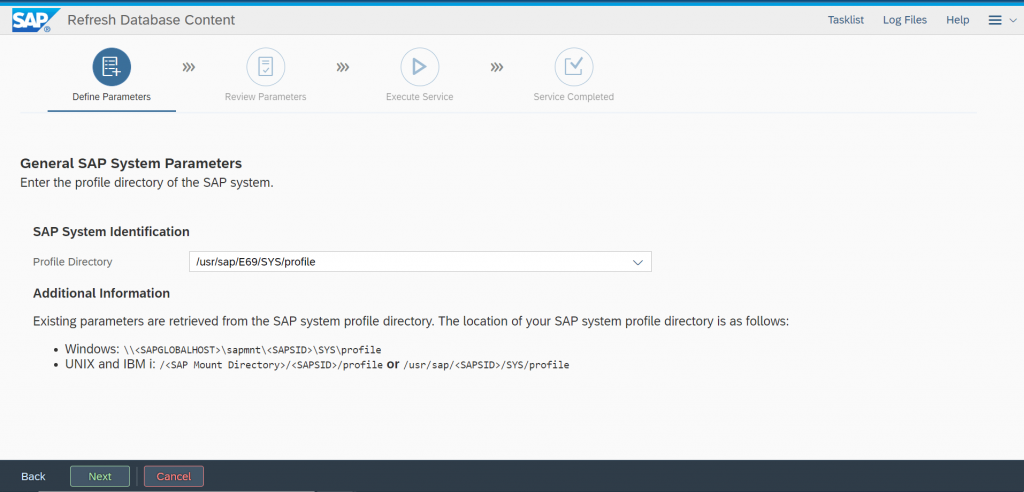
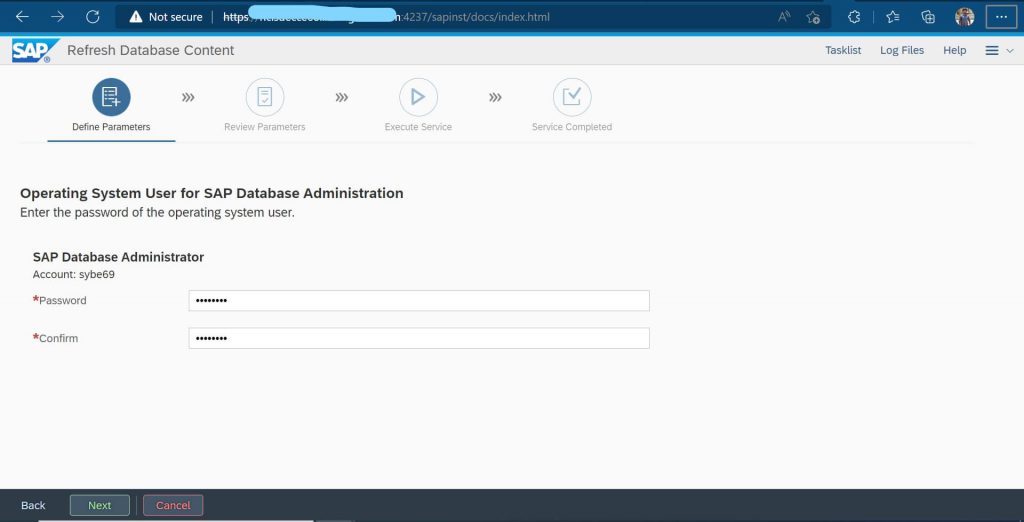
Enter password for target database administrator — sybe69
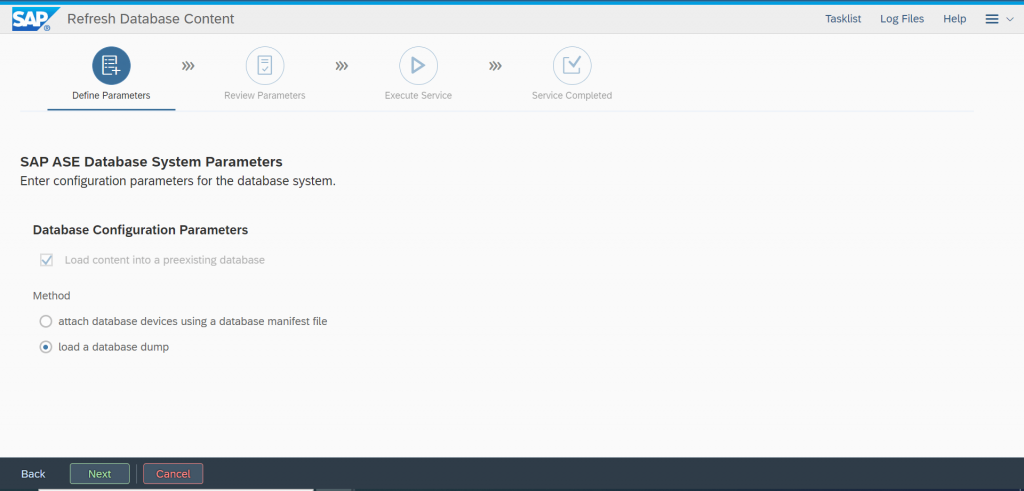
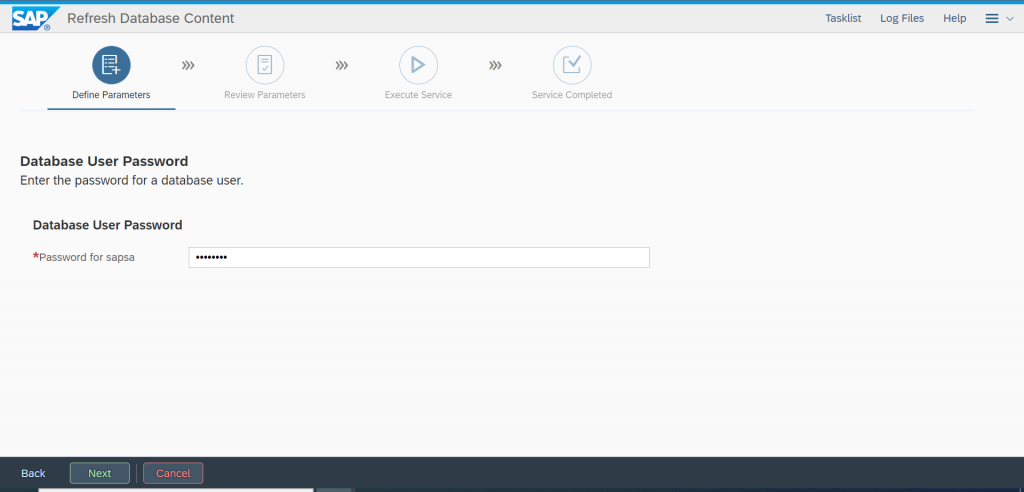
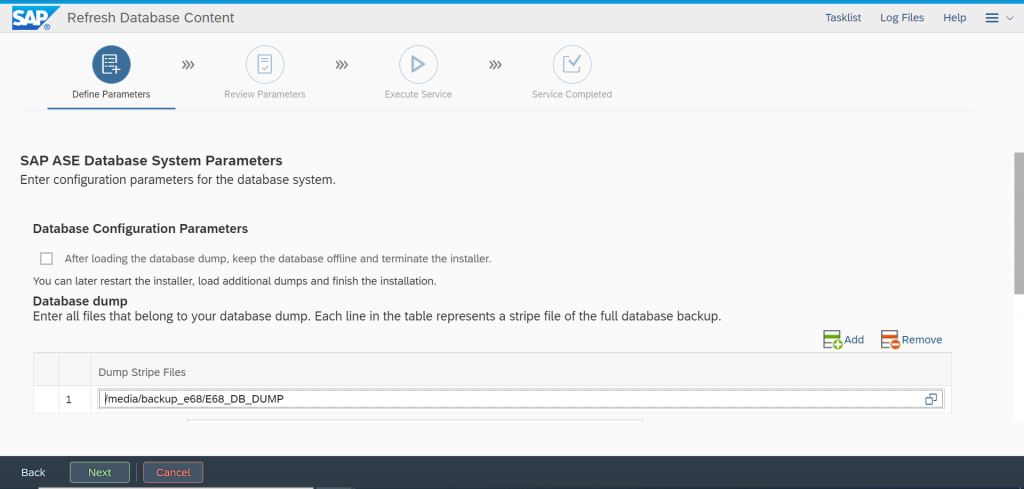
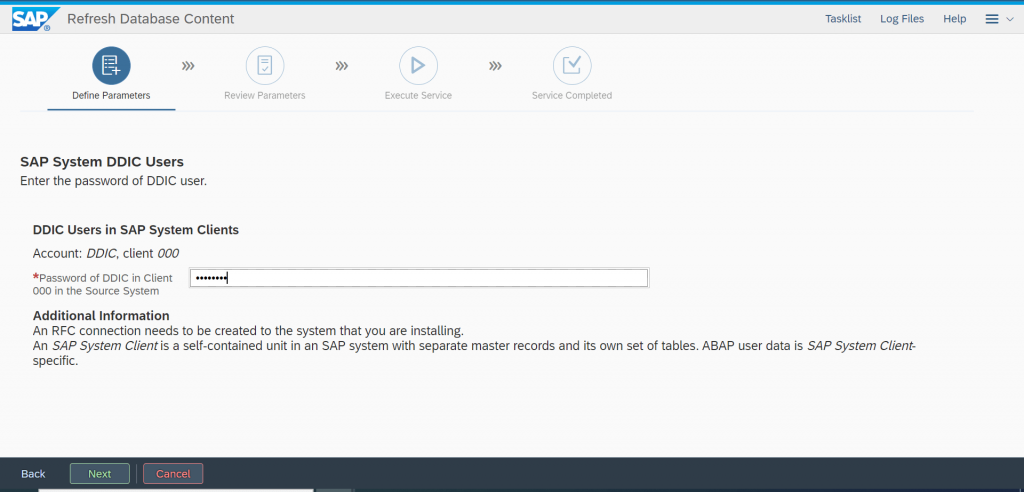
When you reach “Review Parameter ” screen – STOP here and do not close it.
At OS go to the directory /tmp/sapinst_instdir/GENERIC/SYB/DBREFRESH/
- Copy inifile.param from sapinst dir to <SID>_infile.params

- Copy whole sapinst dir to other location /tmp/sapinst_instdir/work

Now Restart ABAP (Central and AS instances). This is needed otherwise the unattended swpm will fail.
Now go to /usr/sap/scripts
Create file with “vi Non-Interactive _mode_swpm.sh”
SCRIPT(TARGET)- Non-Interactive _mode_swpm.sh
#!/bin/sh
# Non-Interactive _mode
# This where DB load happens plus all other post load steps
SWPM_DIR=/media/SWPM
LOG_DIR=/tmp
LOG_FILE=lama_swpm_log
# Call sapinst to perform the actual load from dump and post steps
$SWPM_DIR/sapinst ‘SAPINST_INPUT_PARAMETERS_URL=/work/sapinst_instdir/GENERIC/SYB/DBREFRESH/<log_dir>/QNM_inifile.params’ ‘SAPINST_EXECUTE_PRODUCT_ID=NW_DBRefreshOnly:GENERIC.SYB.PD’ ‘SAPINST_SKIP_DIALOGS=true’ ‘SAPINST_SLP_MODE=true’ ‘SAPINST_START_GUI=false’ ‘SAPINST_START_GUISERVER=false’
#
echo “Script Completed” >> $LOG_DIR/$LOG_FILE
date >> $LOG_DIR/$LOG_FILE
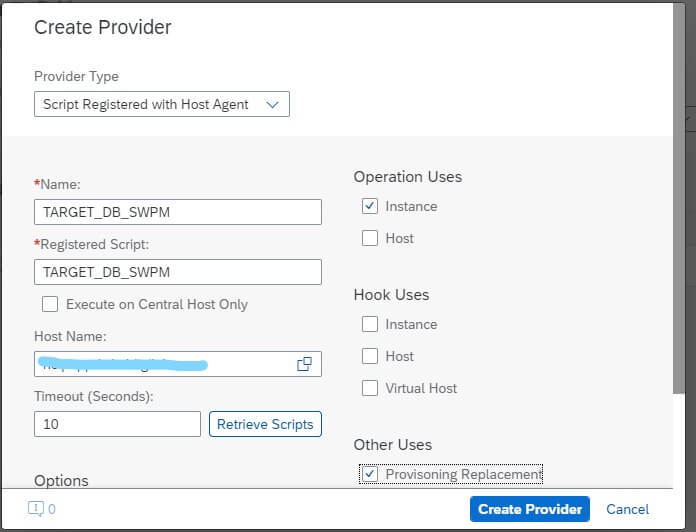
Provider Definition for ASE Backup(Source) – E68
Go to Automation Studio -> Provider Definitions -> Create -> Script Registered with Host Agent

Add the Hostname and click ‘Retrive Scripts’ . Click on SOURCE_DB_SCRIPTS
SOURCE_DB_BACKUP
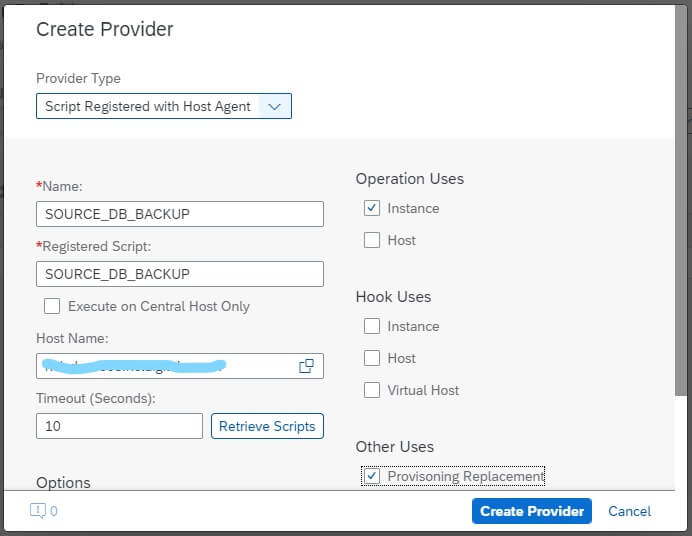
Click on “Create Provider”.
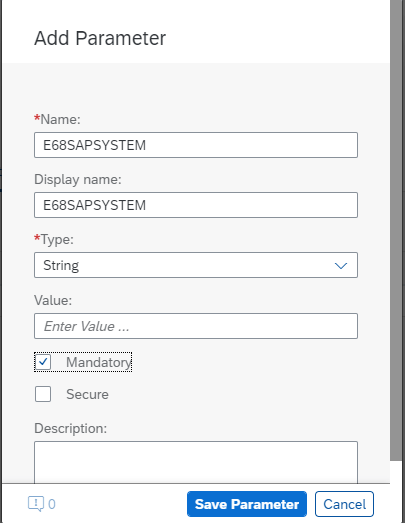
Now, Click on the newly created provider definition -> Parameters then add the below parameter.

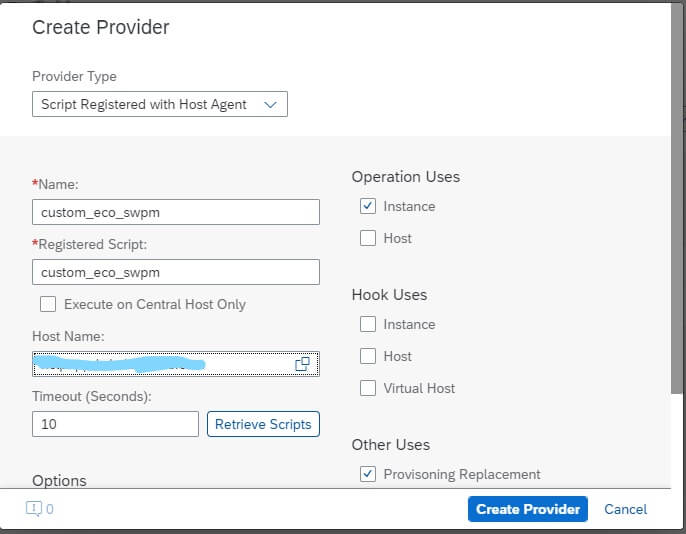
Provider Definition for Custom SWPM- for E69
Repeat the definition creation process for custom swpm on Target System.
Now, Create a dummy provider definition to replace the default software provisioning manager step.
Create a Custom Provisioning Process
Open Automation Studio -> Custom Provisioning and click on “Create”
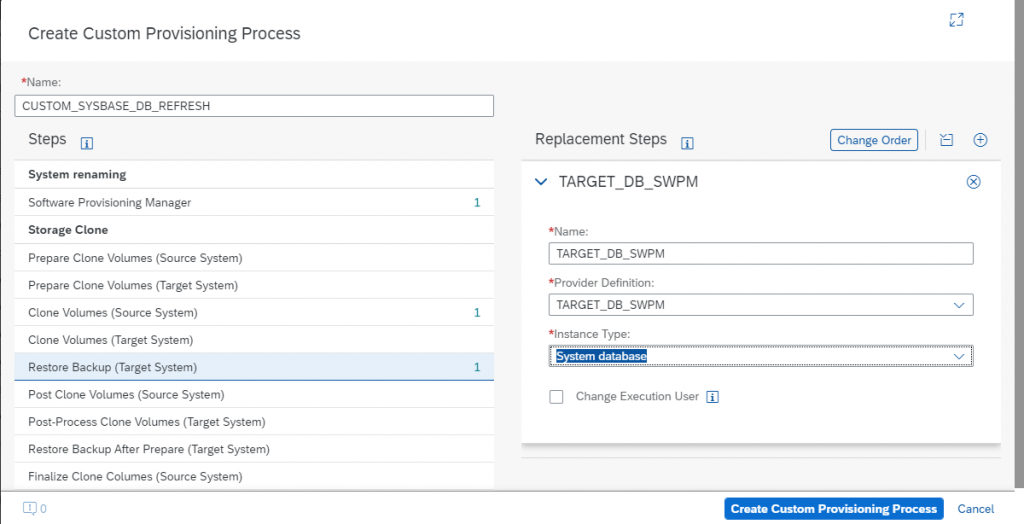
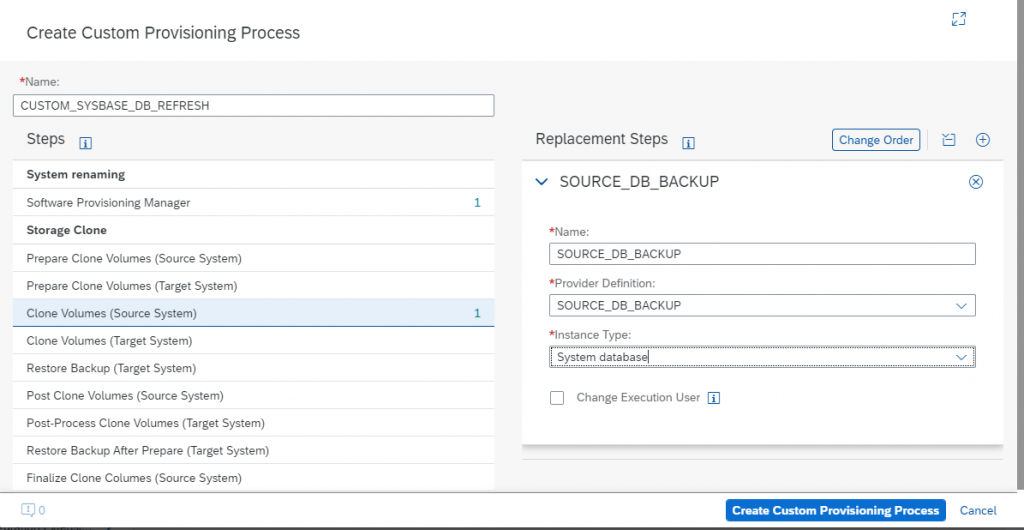
We have to replace some pre-existing steps with our custom steps.
Below are the replacements to be made:
- Software Provisioning Manager – custom_swpm_echo
- Clone Volumes (Source System) – SOURCE_DB_BACKUP
- Restore Backup (Target System) – TAGET_DB_SWPM
All the replacement steps are done first before clicking on “create” button.
Since we are doing database refresh using backup and restore we do not need to clone any volumes.
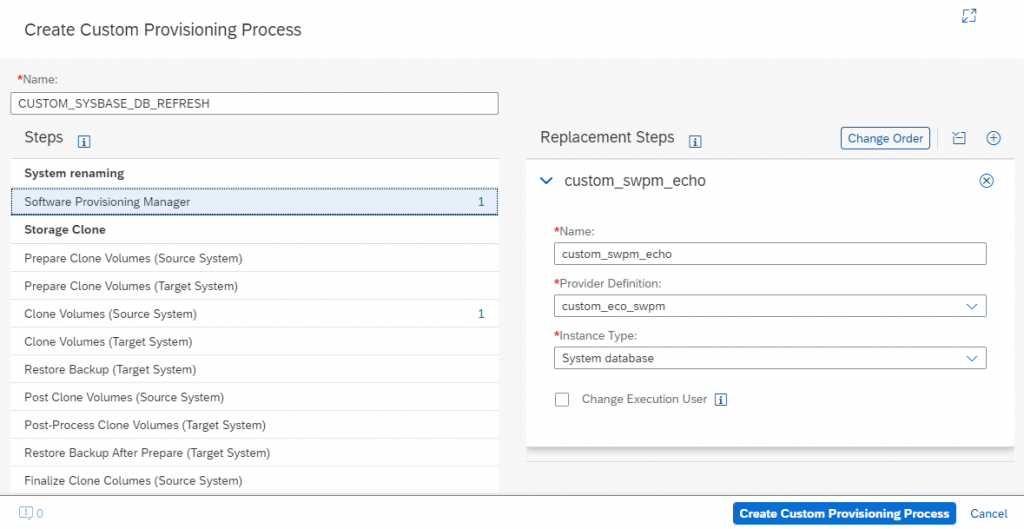
Now, Click on “Create Custom Provisioning Process”
Assign Custom Provisioning Process to Instance
We now need to assign this custom provisioning process to the instance which should use this process rather than the default process.
Open the LaMa Configuration screen. Configuration -> Systems
Find the source system E68 and click edit. Navigate to Provisioning & RFC tab. Select the above custom provisioning process from the drop down and check mark the box. Click save.
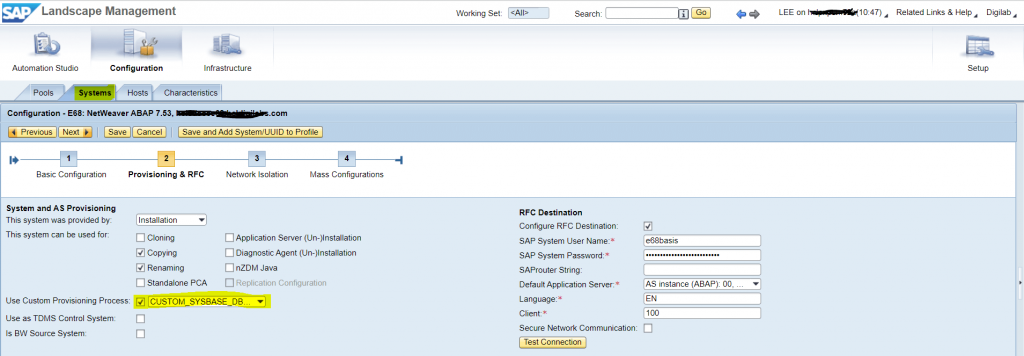
Repeat the above for Target system – E69
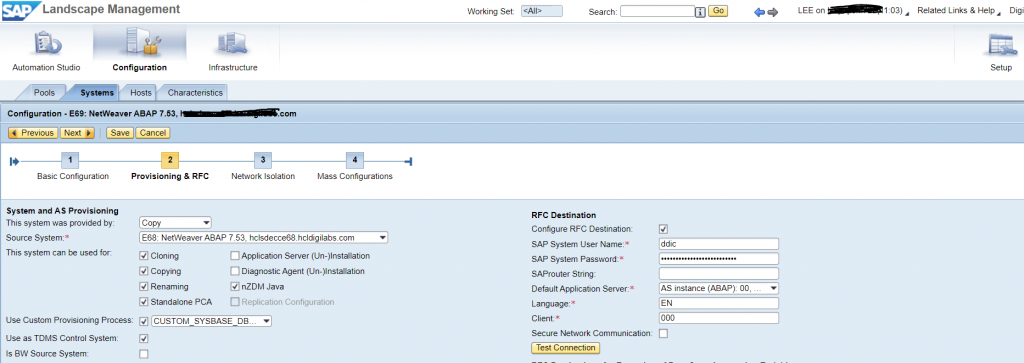
Now, we can see 2 systems in Custom Provisioning.

Execution –
Select Provisioning -> Systems -> E69-> Provisioning -> Refresh Processes -> Refresh Database
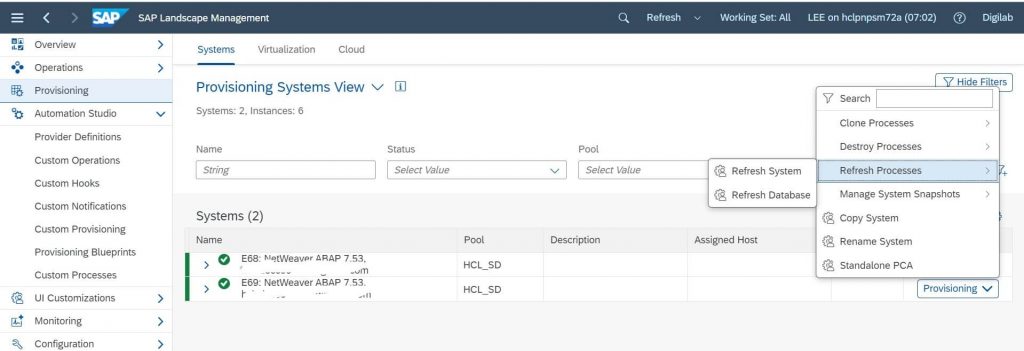
Export directory should be made earlier and adm has write permissions.
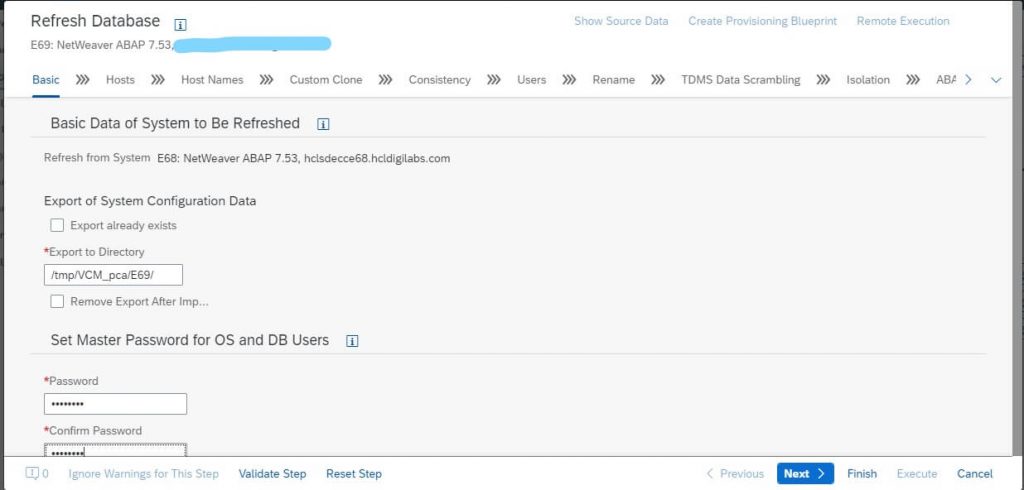

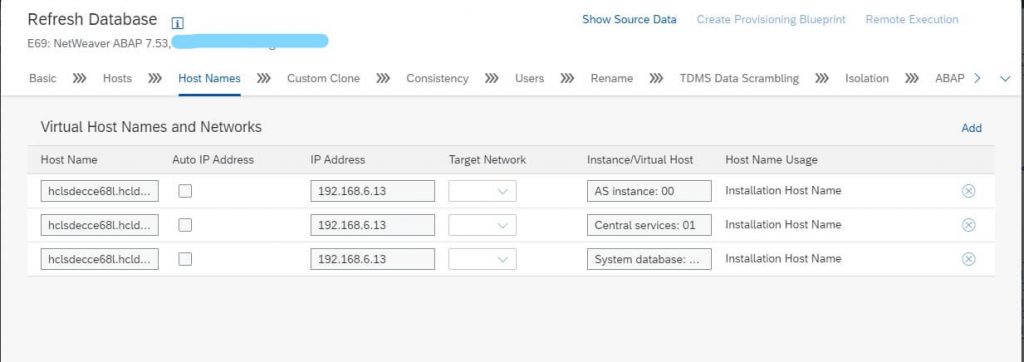

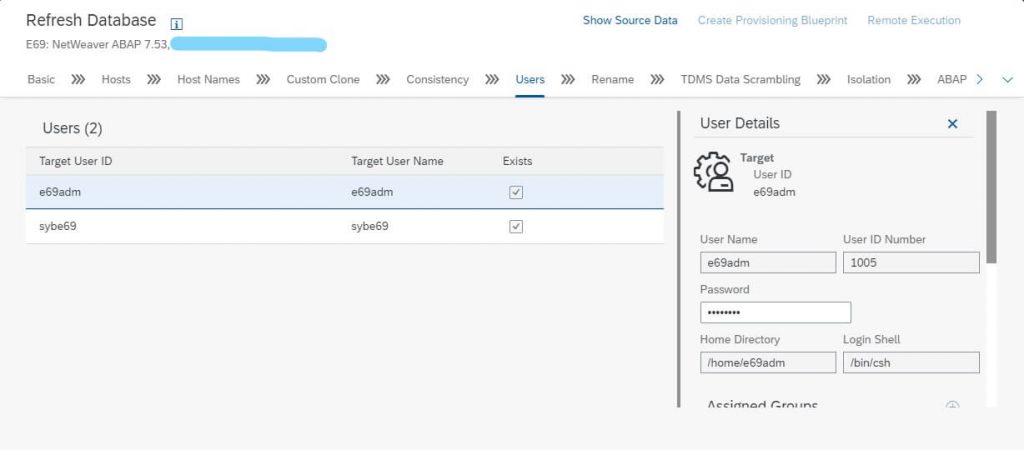
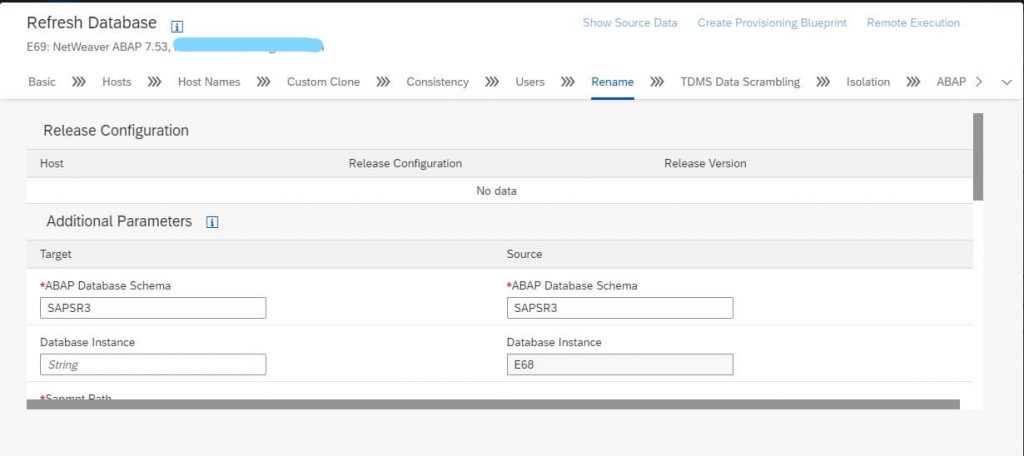
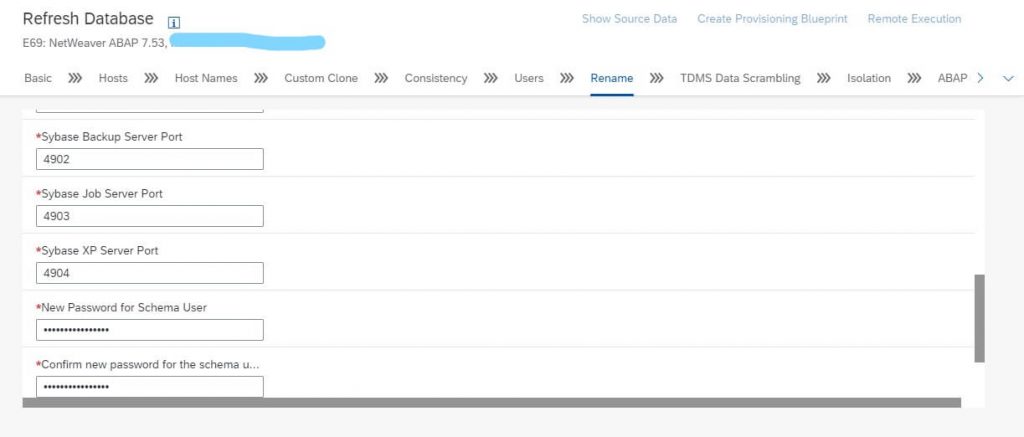
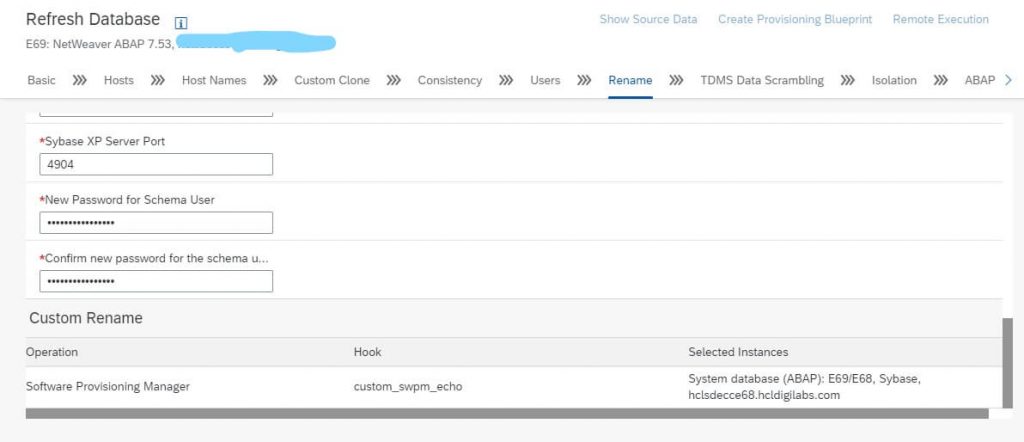
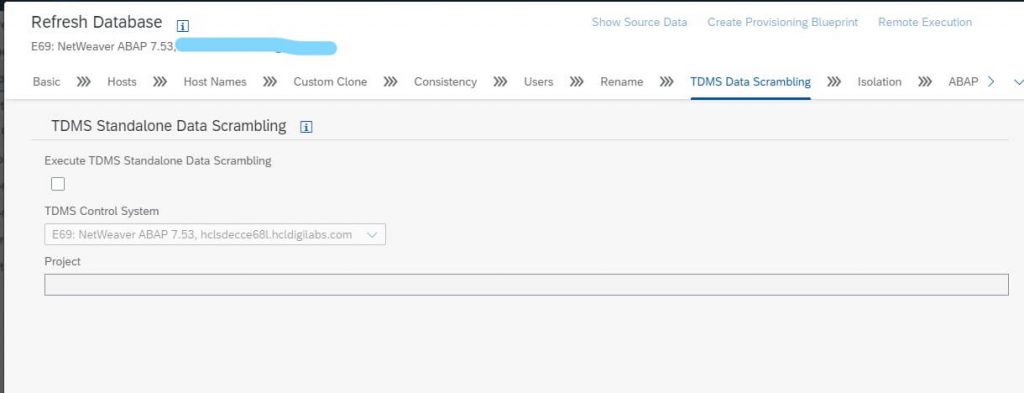
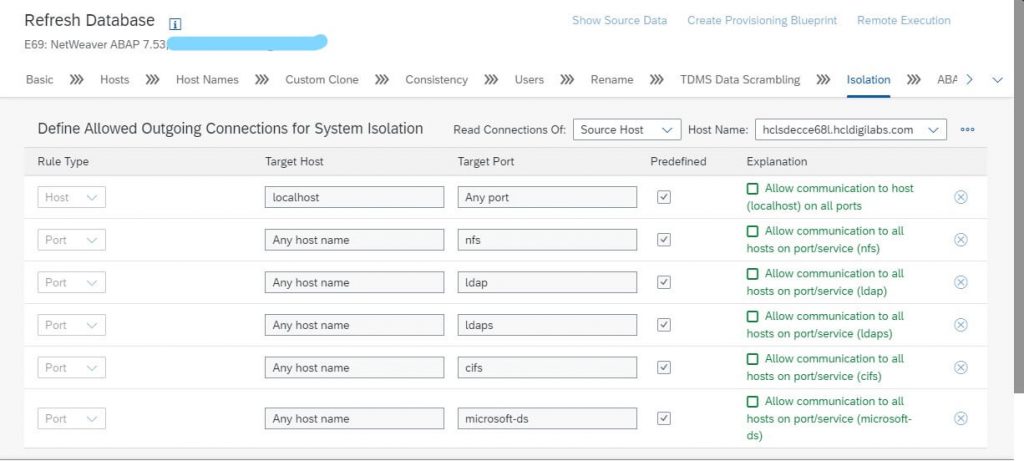
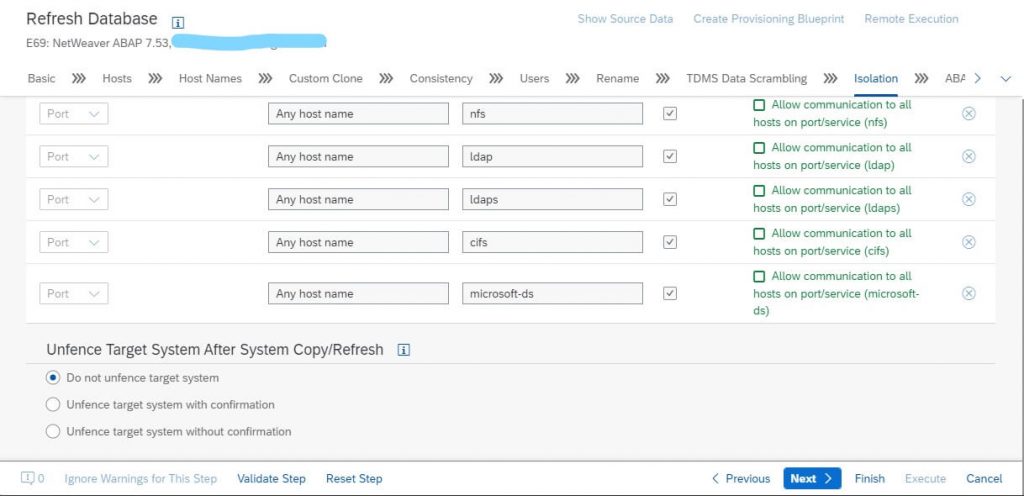
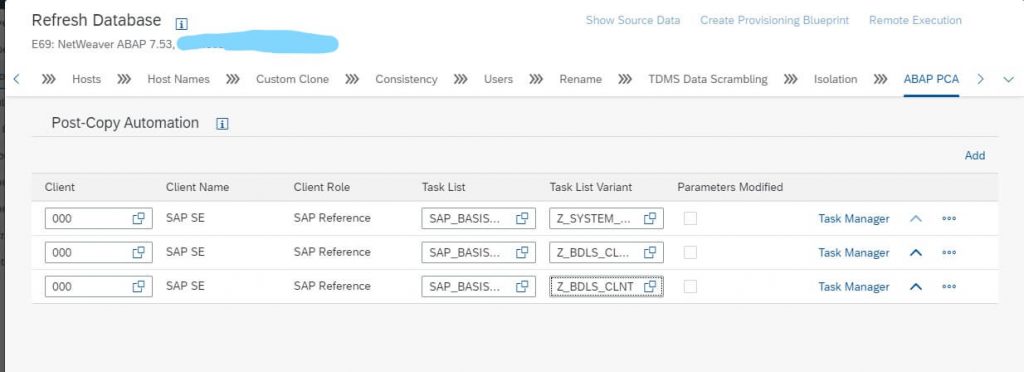
Now, the Refresh process can be started by clicking on Execute. But before that you can save save this as a Provisioning blueprint so as to not repeat the above steps again.
Create a provisioning blueprint of your provisioning procedure. The current provisioning process remains active. While the provisioning process is active, the system stays locked and you cannot execute the provisioning blueprint created or any other operation on this system. The provisioning blueprint contains all default parameters and activity steps. You can then parameterize the provisioning blueprint and reuse it several times without navigating through the provisioning workflow.
Click “Execute”
You can now monitor the progress in Monitoring section.
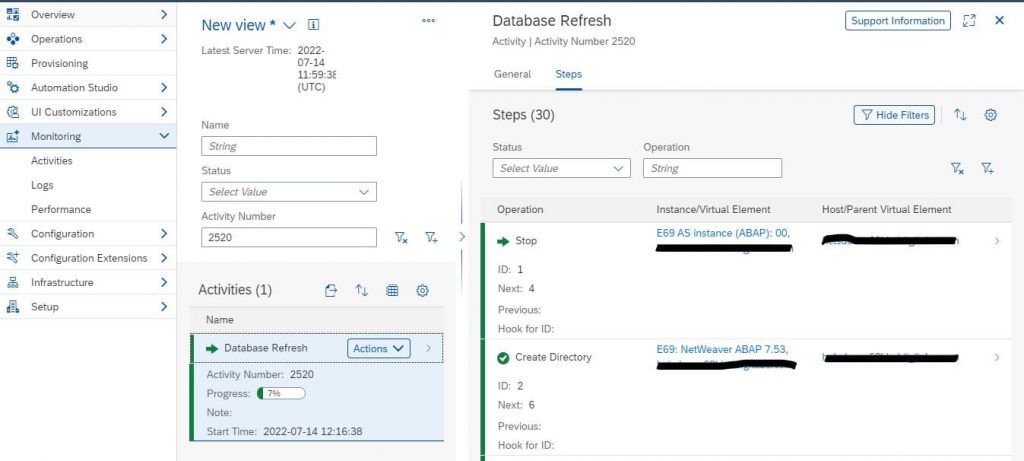
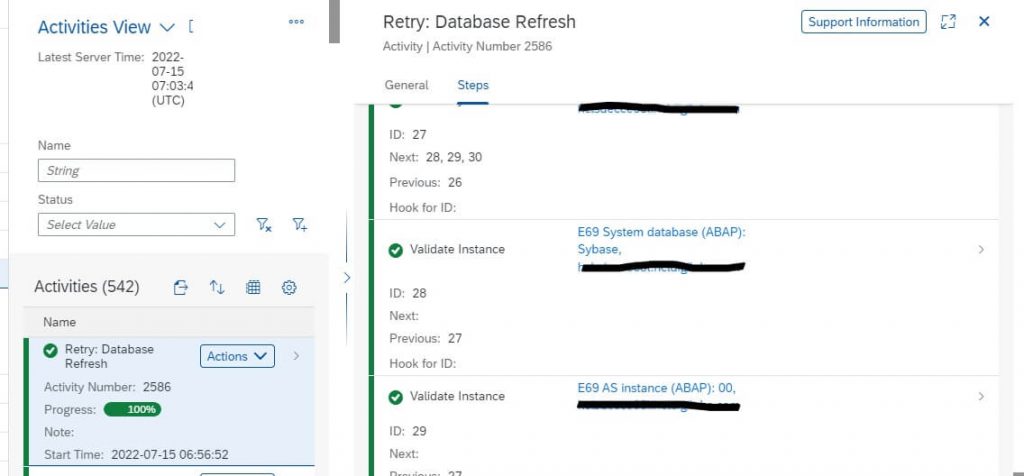
You can also check the log files located in /usr/sap/hostctrl/work to check the progress.
The Database refresh for Sybase databse SAP system is now completed and you can use it mutilple times if you have saved your Blueprint.
