Introduction
This blog post describes, how to extract Product Master data Delta via API CDS View and consume the information via Postman from SAP S/4HANA Cloud.
Searching for CDS View
To find the suitable CDS View we need the View Browser application.
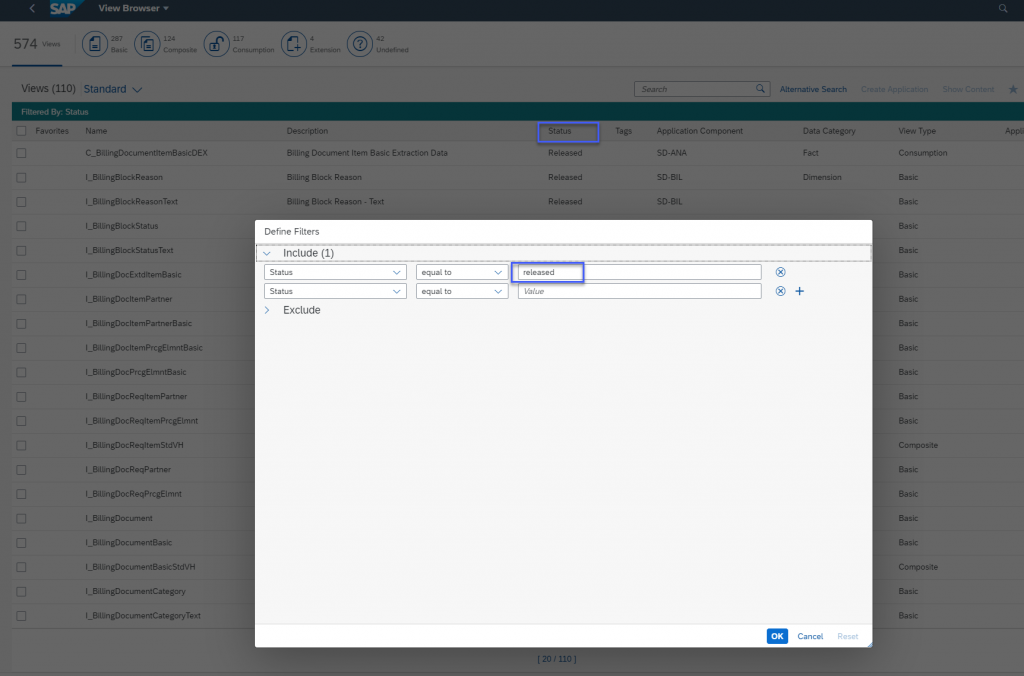
Firstly we need to filter only by released CDS Views:
For this business-case we can use simple search by business unit and select I_Product CDS View:

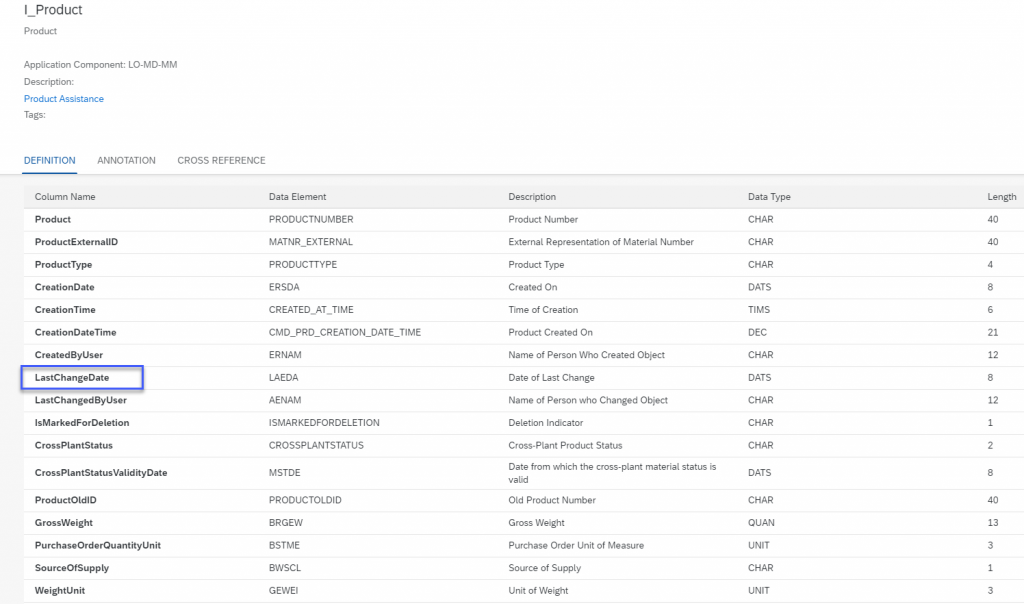
We can check content of the CDS View by clicking on it. As the CDS view contains all basic fields related to Product and LastChangeDate field, it fits our needs:
Creating CDS View of API type
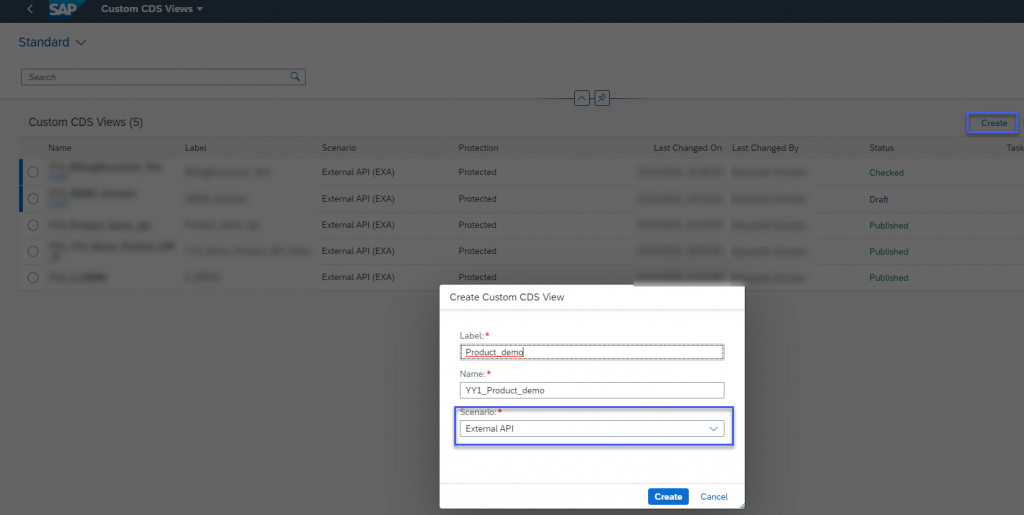
Now, when we identified necessary standard CDS View, let´s create Custom CDS view of API type. We will use the Custom CDS Views app for this. There we need to click New, provide label to the CDS view and select Scenario “External API“:
In the new window we need to type name of the selected View (I_Product) in search field and select the necessary CDS View:
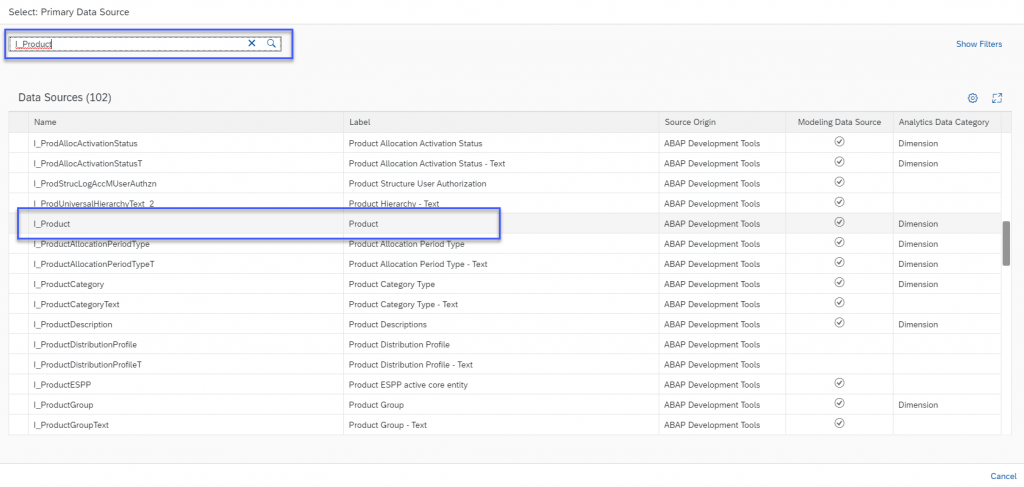
Now this view is set as the data source. In more complex scenarios it is possible to select associated Views and combine information via joins.
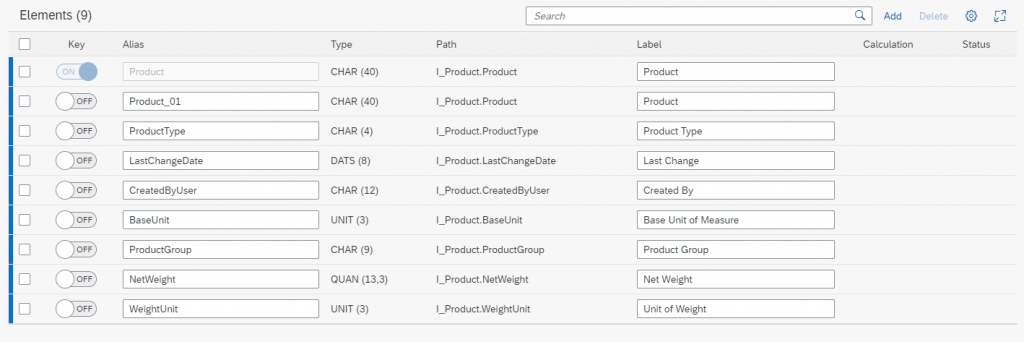
Let´s go now to the Elements tab and select necessary information from the View:

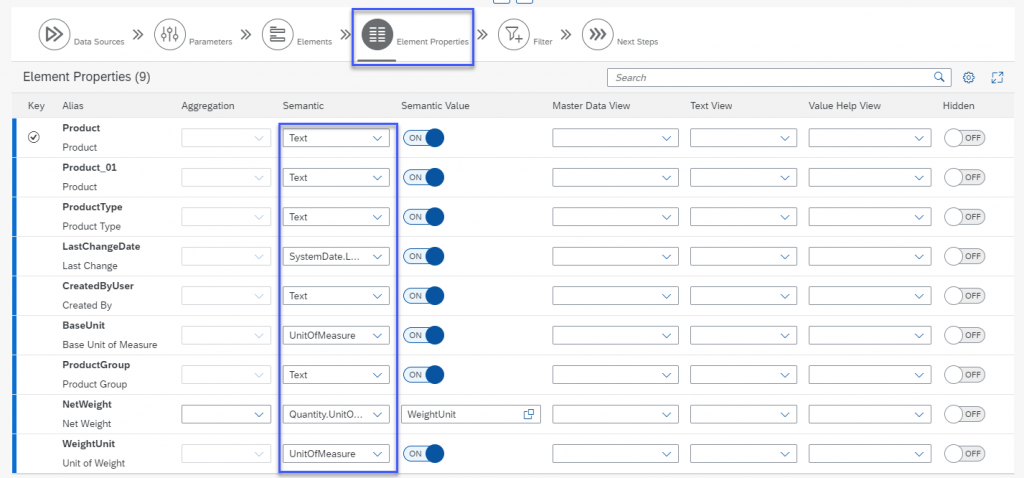
Once the elements are added, we need to set up their Properties:
And, as we need to extract delta, let´s go to Filter tab and customize the CDS View so, that it will extract information only for the current date:


Creating Product
To check the extraction of delta we need to create Product master record. We will do it in the application Manage Product Master Data:

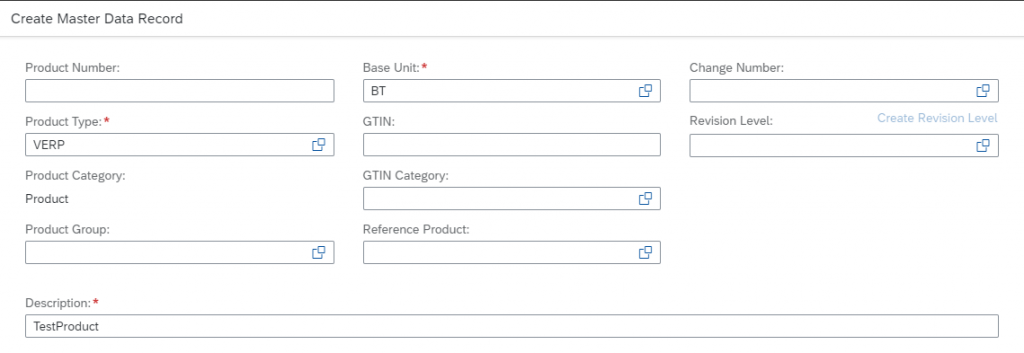
Testing the CDS
Once we created the record let´s go back to our CDS View in the App Custom CDS Views.
Firstly we need to check all done entries:

Once the check is finished, we can preview the data, which will be extracted via this CDS View:

In the preview table we can see recently created Product:

When everything is checked, we can go back and publish the CDS View:

Preparing to consume the CDS view as API
To be able to check our results via Postman, firstly we need to create communication scenario, user, system and agreement for our Custom CDS View.
We will create communication scenario in the app Custom Communication Scenarios:
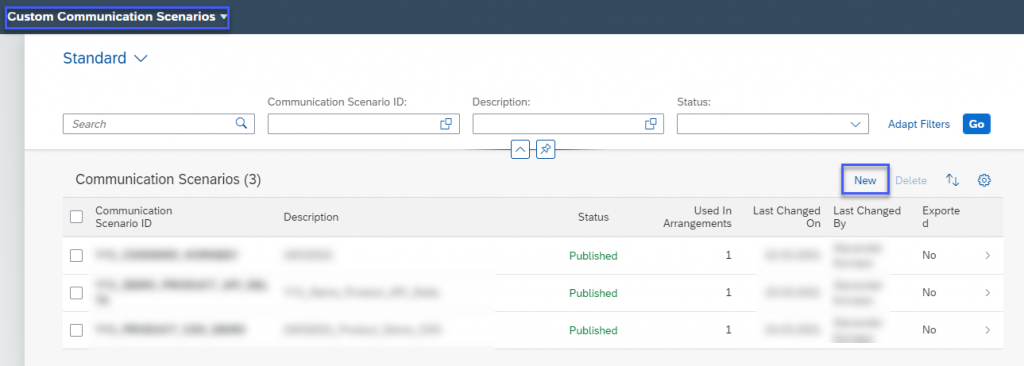
Provide any name of the scenario and on the next screen add Inbound Service:

Select the created earlier Custom CDS View:

Now it is possible to check and publish the scenario:

As the next step – we need communication system with communication user. These settings we can do in the app Communication Systems:
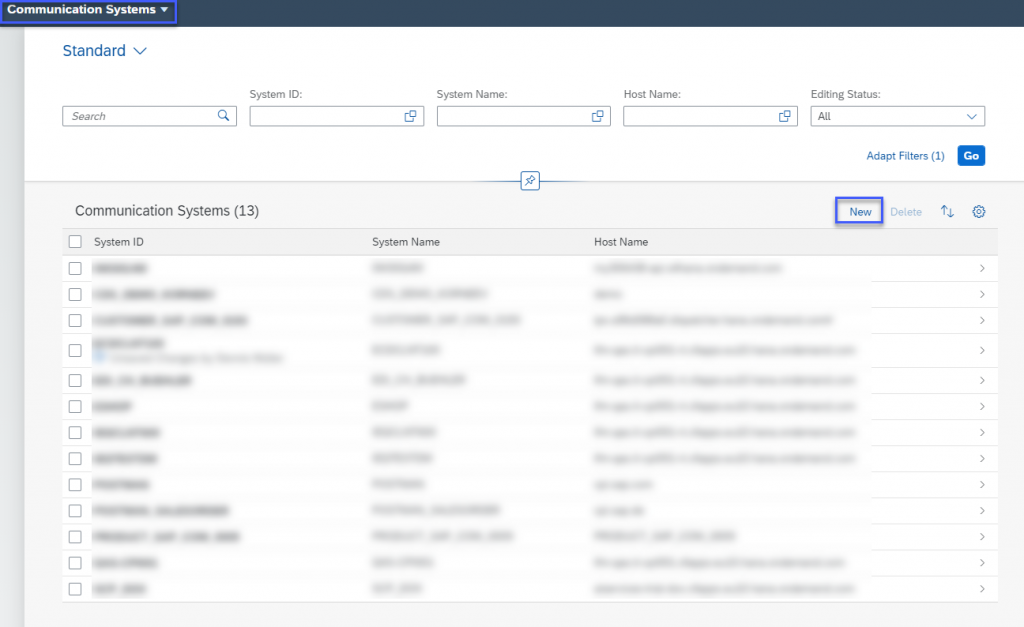
Provide any name to the System and on the next screen fill fields Host Name, Logical System and then Scroll down to the part Users for Inbound Communication:

Click on the “+” symbol and select then “New user“:

Provide any User Name and Description, click Propose Password and note down entered User name and the proposed password:
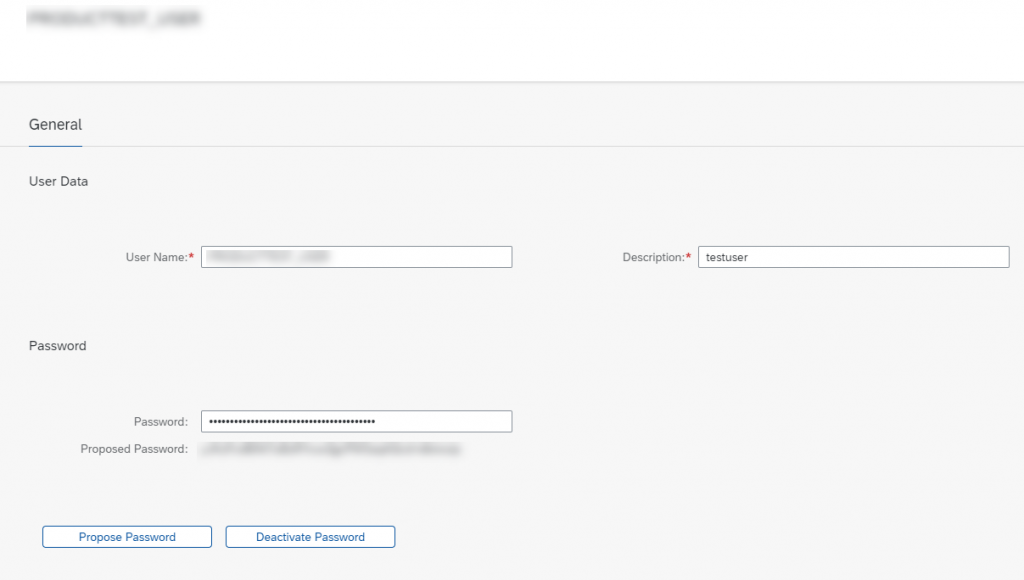
Then click Create and Ok. Save the Communication System.
Going further we need communication arrangement. To create it we will use the app Communication Arrangements:

Here we need to enter the name of the Custom Communication Scenario, we created earlier:
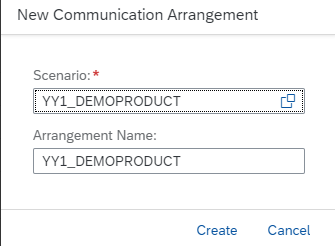
And the only thing we need to provide in the Communication Arrangement further is Communication System, which we created. Corresponding Communication User will be mapped automatically. Copy OData V2 link from this page:
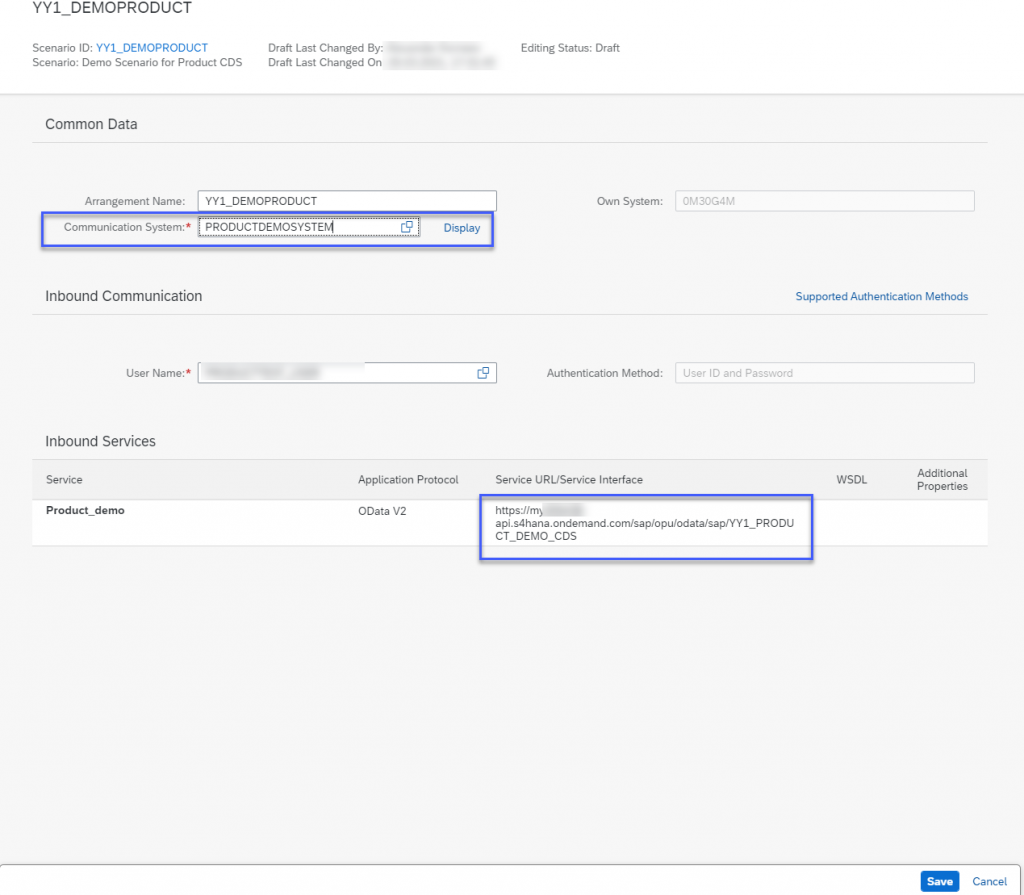
Testing in Postman
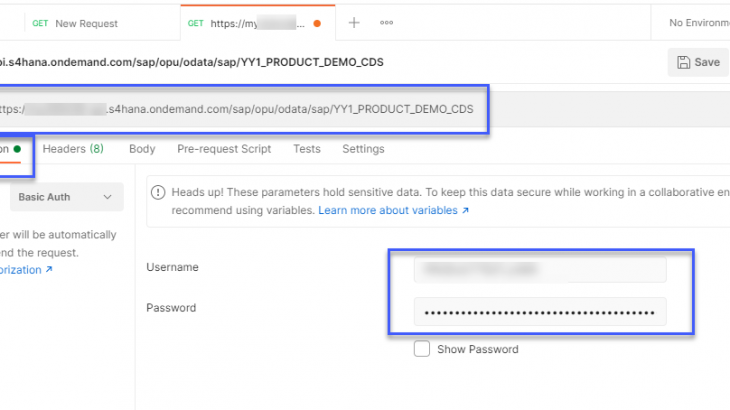
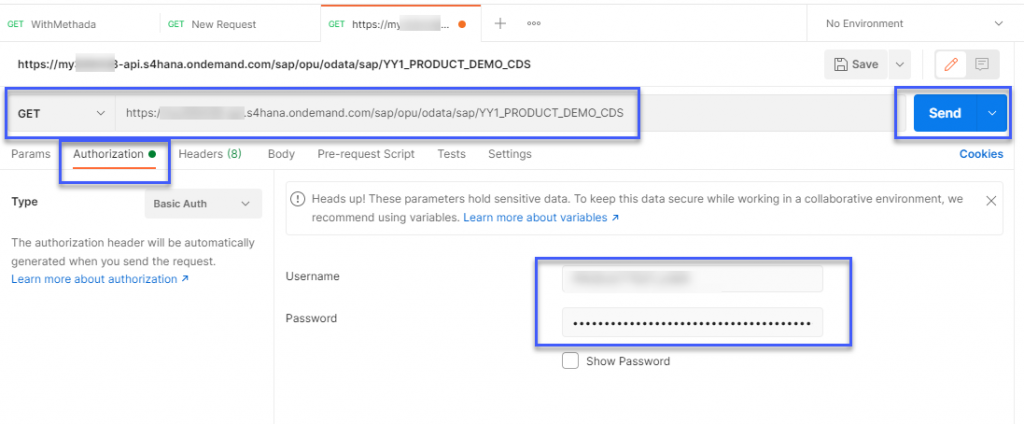
Create new Tab in Postman and enter the copied link. Provide credentials on Authorization tab of the Inbound Communication User, you created earlier. Click Send to test the API:
If the response status is 200 OK, extend the URL with “/$metadata” and send the request again. Find EntityType Name in the response and copy it:
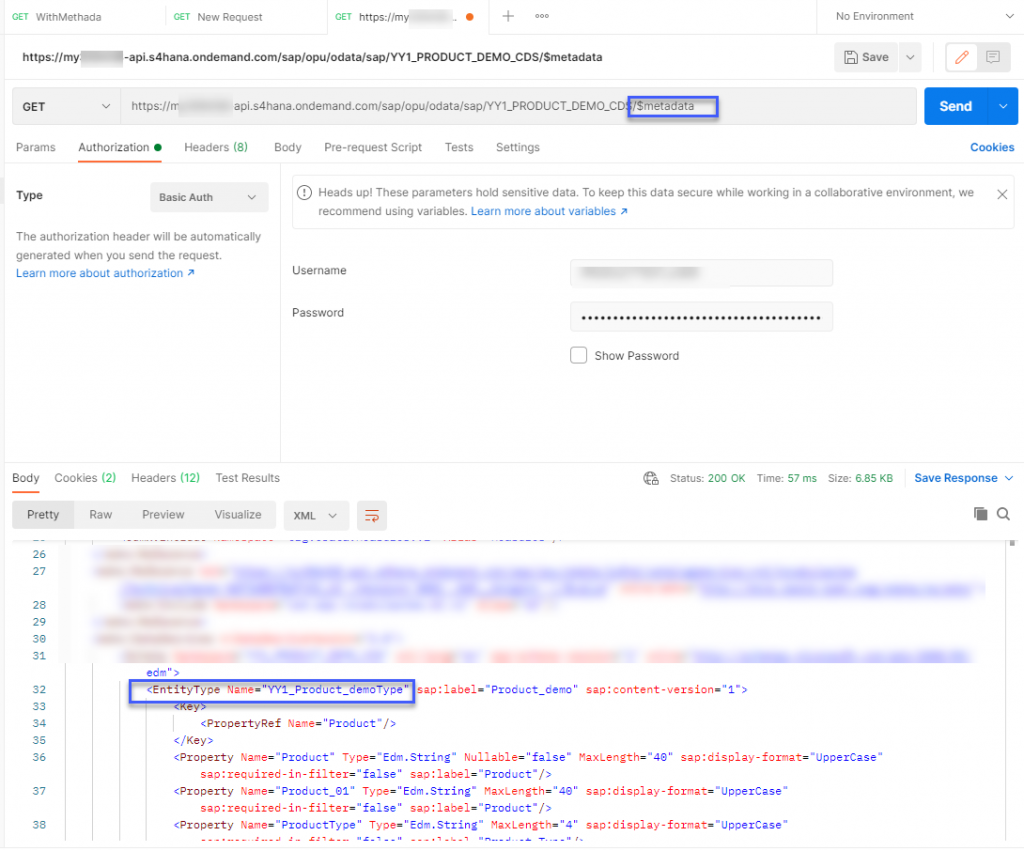
Extend the URL with the copied name and delete “Type” in the end of the URL, send the request again:

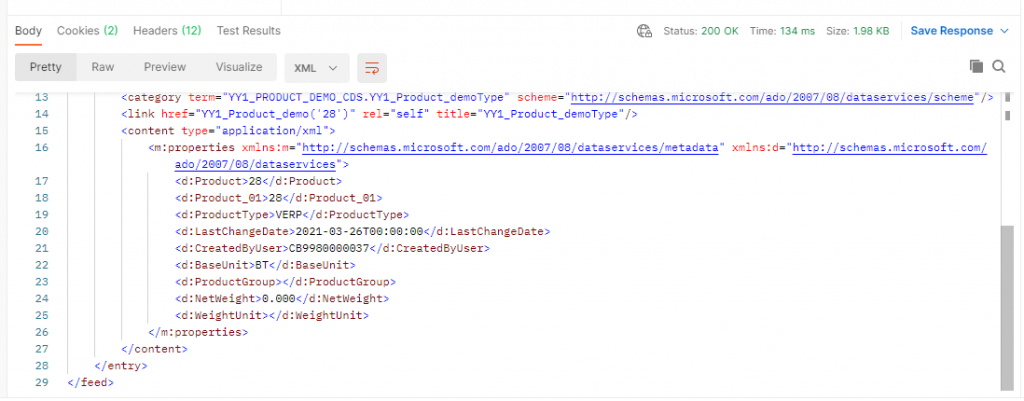
Finally, in the reply you can find the same data, which were available in the preview of CDS Views results:
