In this blog post, we’ll show you how to create a user in SAP Integrated Business Planning (SAP IBP).
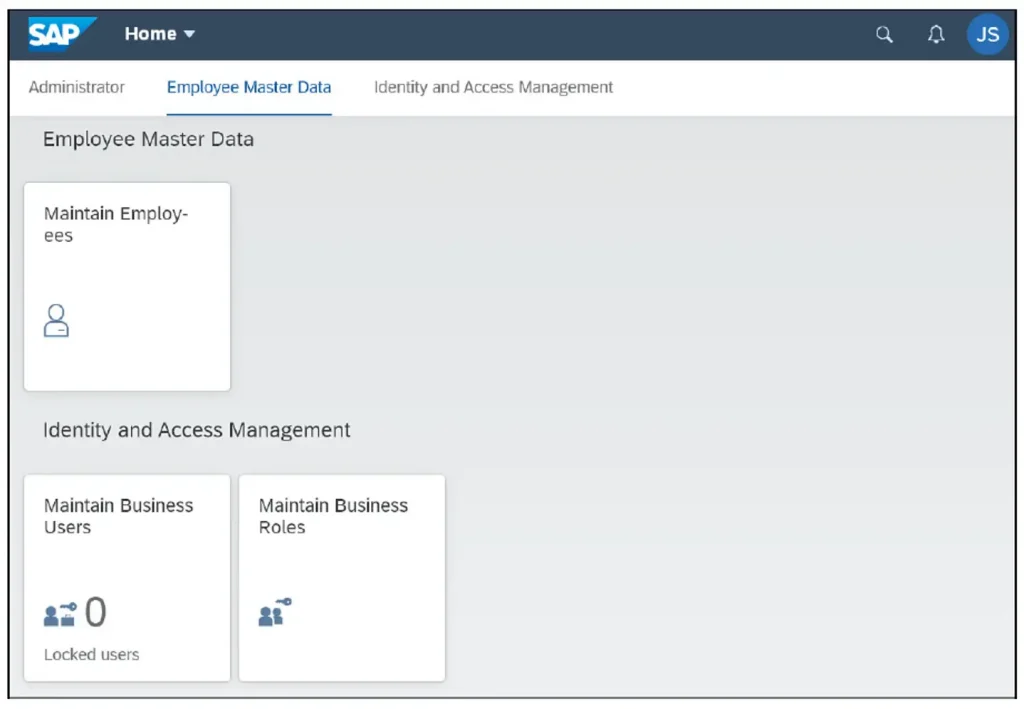
The first thing an administrator needs to do is to log into SAP IBP via SAP Fiori launchpad. Here they will have access to the Maintain Employees app and Identity and Access Management apps (see figure below). Using these apps, the administrator can manually create the users in SAP IBP.
Manual User Creation
To create a business user manually, follow these steps:
- Create an employee and a business user.
- Upload the business user to Identity Authentication.
- Assign business roles to the business user.
In this example, Identity Authentication acts as an identity provider for business user authentication (see below).
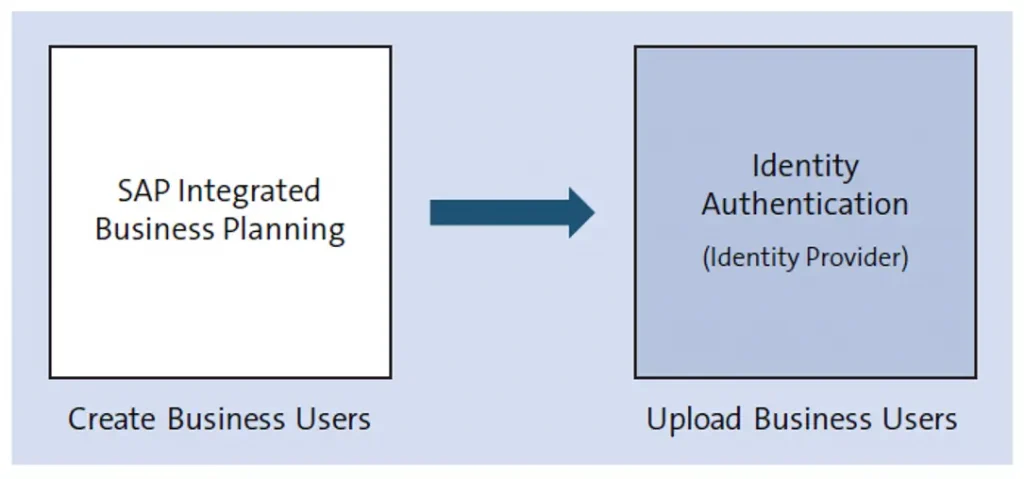
However, you can also use an external identity provider system. In such a scenario, Identity Authentication needs to be set up in a proxy mode.
Create an Employee and a Business User
As a first step, the administrator creates employee data. As shown in the figure below, the administrator can create a single employee via the Create button (1) or import the employee data from the comma-separated values (CSV) file via the Import button (2). SAP IBP also provides a sample Download Template that the administrator can download to understand the data format.
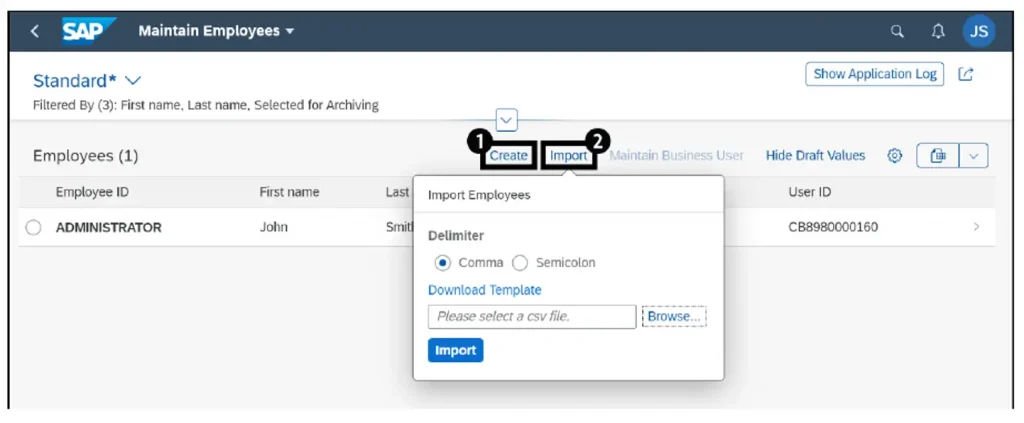
SAP IBP creates the employees and the corresponding business users after the data file upload is completed, as seen in the table below. The import functionality is useful during the initial system setup where the administrator needs to upload a large number of business users. In import mode, employees and corresponding business users are created in a single step.

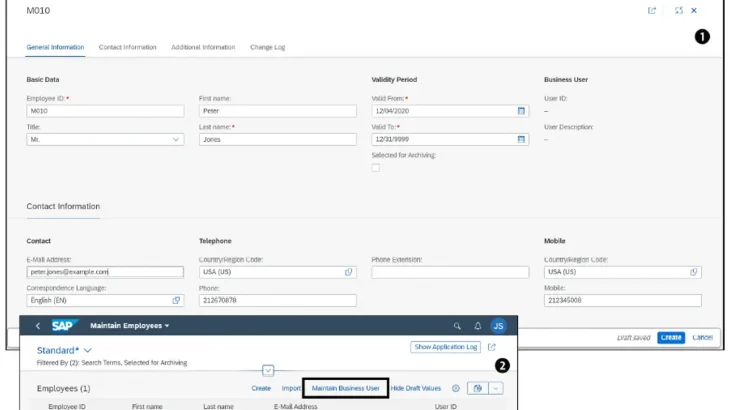
The next figure shows the single employee creation method. In this case, the administrator needs to provide employee data to create an employee (1).
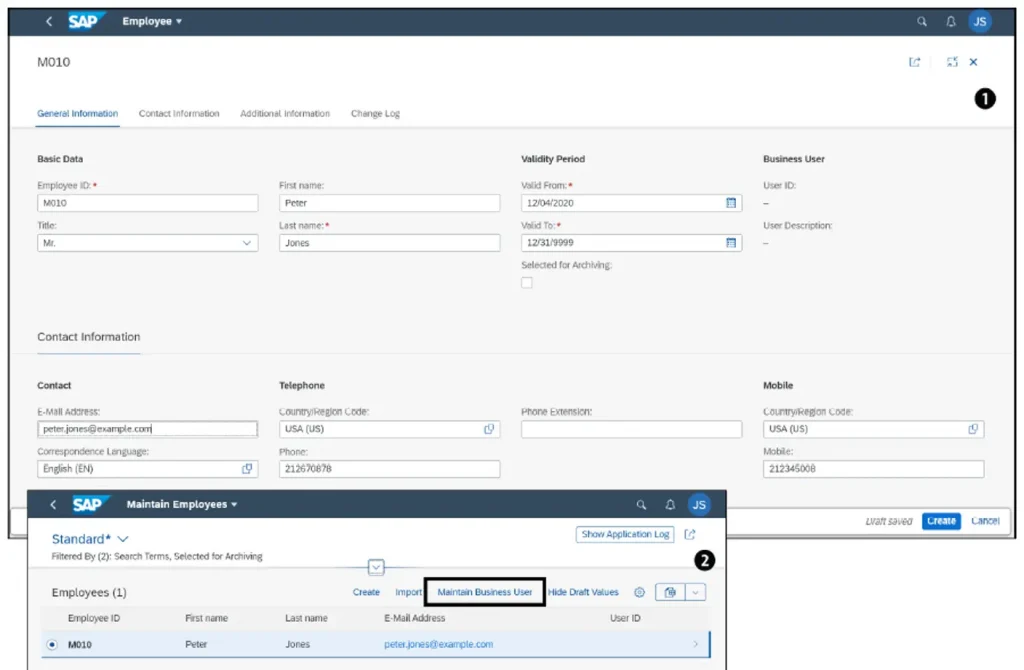
Afterwards, the administrator needs to use this newly created employee to create the business user by selecting the employee and clicking on the Maintain Business User button Similarly, you can use the Maintain Business Users app to create the business user for new employees. Unlike the import mechanism, this is a two-step process. The creation of a single business user functionality is useful for ongoing user administration activities.
Upload Business User to Identity Authentication
After the business users are created in SAP IBP then the next step is to upload these business users in the Identity Authentication system. This is a two-step process.
First, as shown in the figure below, the Maintain Business Users app lists all the business users in SAP IBP. You can use the download option Download for IDP to download the SAP IBP business users.
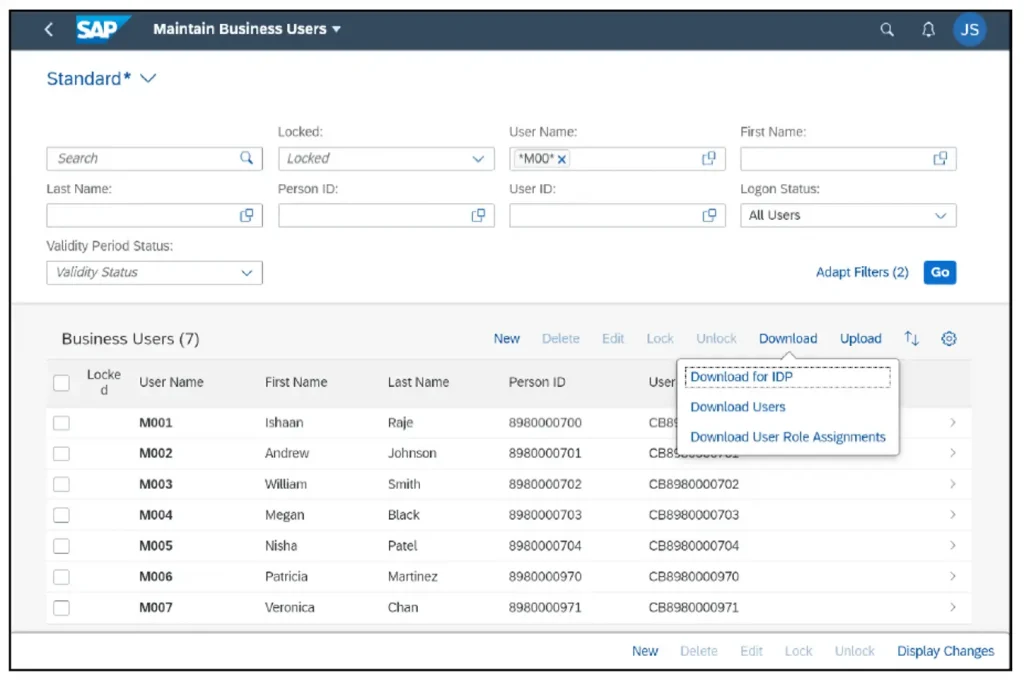
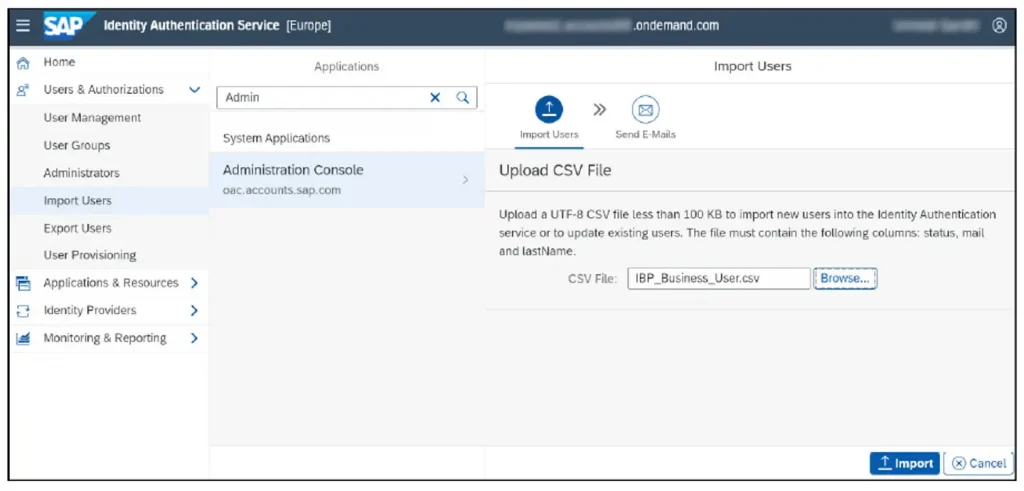
Log on to the Identity Authentication system. As shown in the next figure, navigate to User & Authorizations > Import Users > Administration Console. Select the CSV file created in the first step, and click on the Import button. This will create the business users in the Identity Authentication system. Next, go to the Send E-Mails tab, and click on the Send button to send activation emails to all the business users that aren’t active yet.
Assign Business Roles to a Business User
Assigning business roles to the business user is an important step to ensure that the user has the required access to SAP IBP data. This can be done via the Maintain Business User app or the Maintain Business Roles app. Let’s review both the options.
Assign Business Roles via the Maintain Business User App
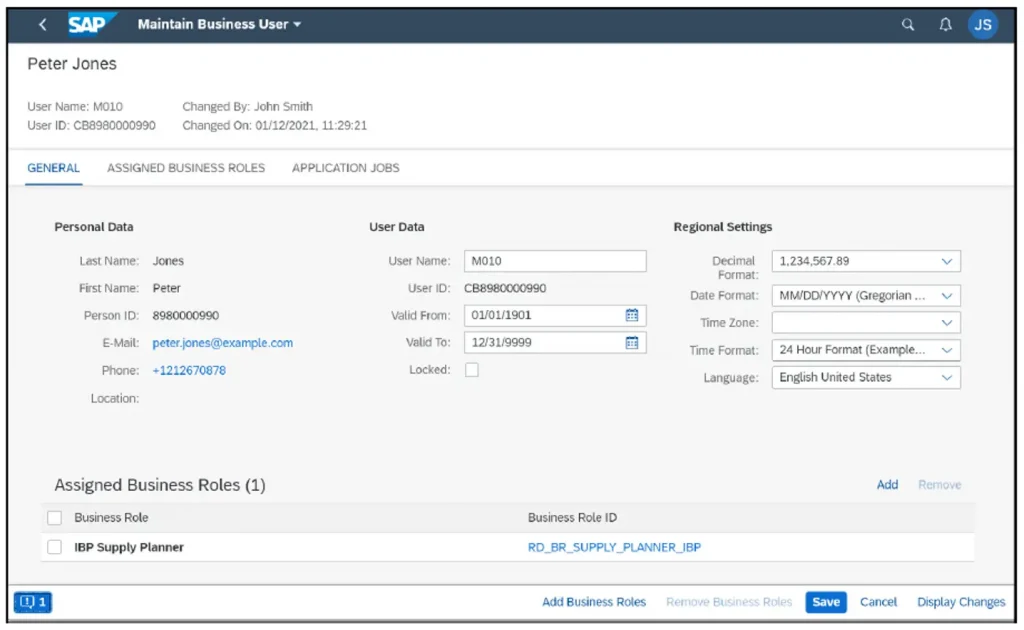
You can upload the business role assignment, or, as shown in the figure below, you can select the business user in the Maintain Business User app. Go to the ASSIGNED BUSINESS ROLES tab, and assign the desired business role.
Assign Business Role via the Maintain Business Roles App
Select the desired business role in the Maintain Business Roles app. Go to the ASSIGNED BUSINESS USERS tab, and add one or multiple business users by clicking on the Add button.
This final step completes the manual user creation process.
