
Introduction
In this blog post, we’ll guide you step-by-step through the process of provisioning a SAP Datasphere Free-Tier instance. Whether you’re a data enthusiast, a business analyst, or an IT professional, by following these steps, you’ll have your free-tier instance up and running in no time.
Prerequisites
To create your SAP Datasphere service instance in SAP BTP, you need the following prerequisites:
- A SAP BTP Global Account
- Your global account has a commercial entitlement either via cloud credits (in case of a consumption-based contract) or via a subscription-based contract.
- You are using Google Chrome to properly view popups in SAP BTP.
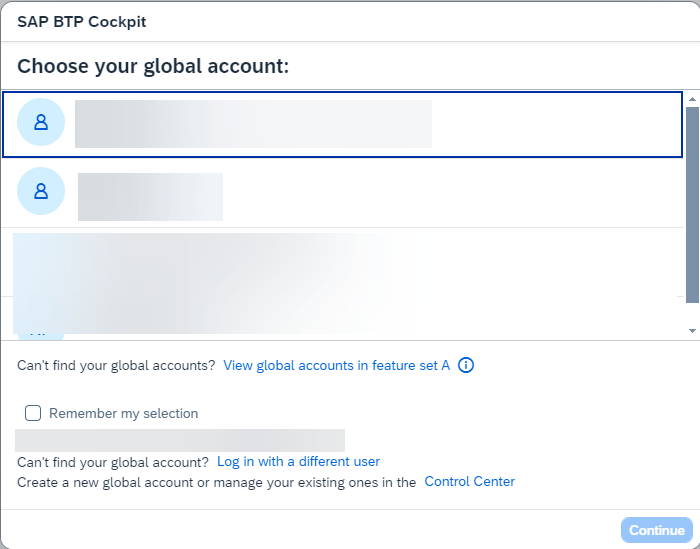
Step 1: Sign in to SAP BTP Cockpit
1. Navigate to the SAP BTP Cockpit
Open your web browser and go to the SAP BTP Cockpit website: SAP BTP Cockpit
2. Log in to your account
Enter your SAP credentials to log in.
Step 2: Set Up a Subaccount
1. Create a Subaccount
In the SAP BTP Cockpit, go to your Global Account and click on “Subaccounts”.
Click on “Create” to add a new subaccount.
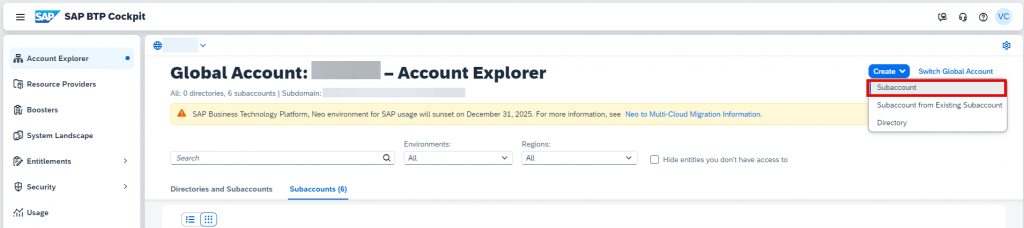
Fill in the required details such as “Name”, “Environment” (choose Cloud Foundry), and “Region”.
2. Confirm the Subaccount
Click “Create” and wait for the subaccount to be created.
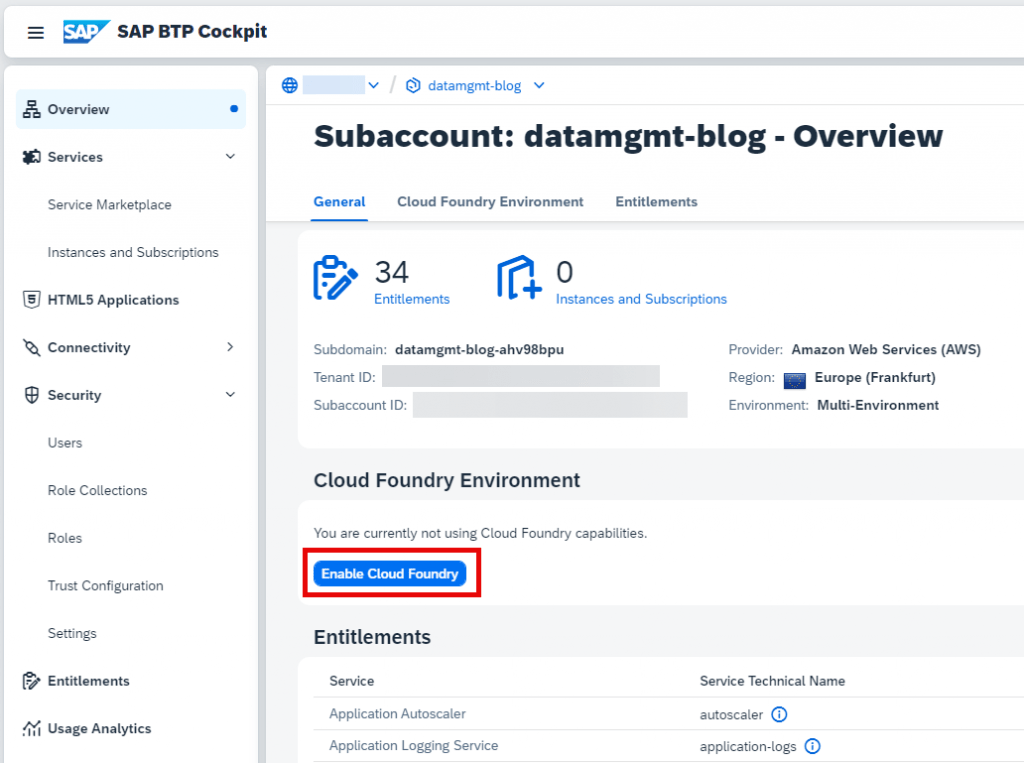
Step 3: Enable Cloud Foundry
Enable Cloud Foundry
In your subaccount, navigate to “Cloud Foundry” and click on “Enable Cloud Foundry”.
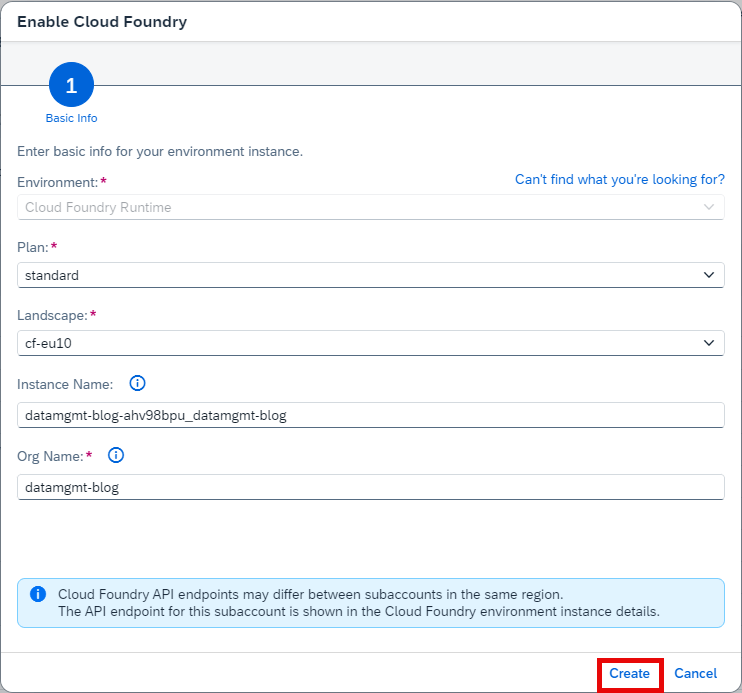
Fill in the required details such as “Plan”, “Landscape”, and “Org Name”.
Step 4: Create a Space
Add a Space
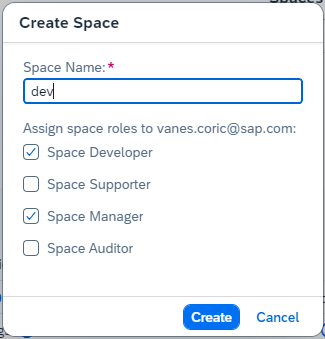
Within the Cloud Foundry section, click on “Spaces” and then “Create Space”.
Provide a name for your space (e.g., “development”).

Fill in the required details for “Space Name” and set the flags for “Space Developer” and “Space Manager”.
Step 5: Assign Entitlements
Manage Entitlements
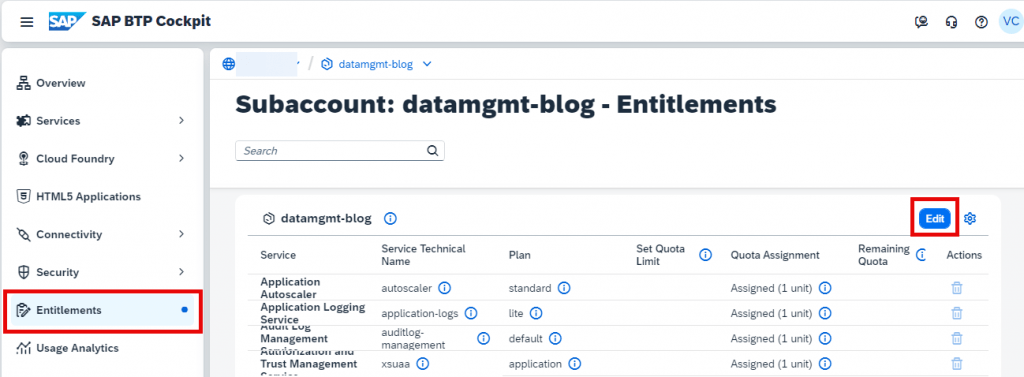
Go to your subaccount, select “Entitlements”, and click on “Edit”.
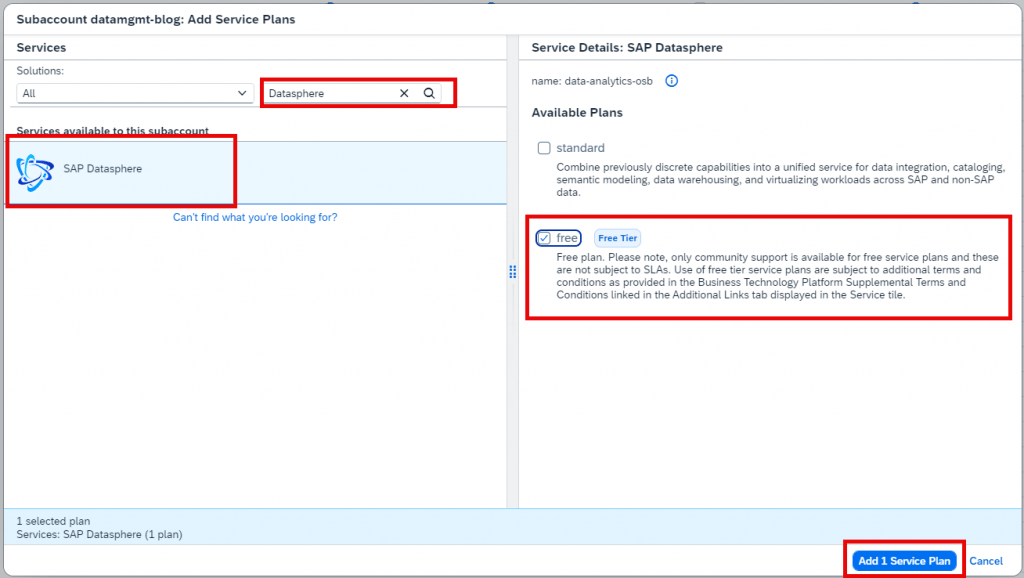
Click on “Add Service Plans”.

Add the required entitlements for SAP Datasphere and click on “Add 1 Service Plan”.
Click on “Save”.

Step 6: Subscribe to SAP Datasphere
Add SAP Datasphere Subscription
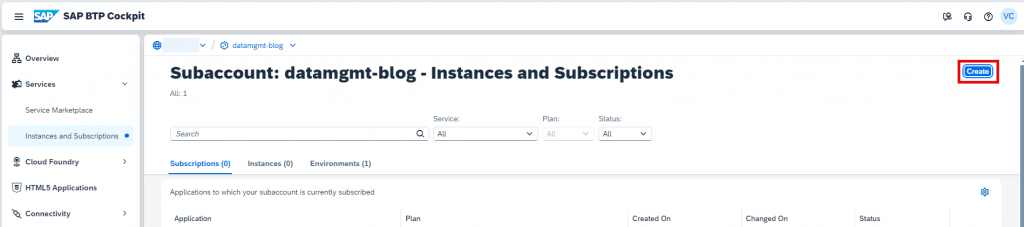
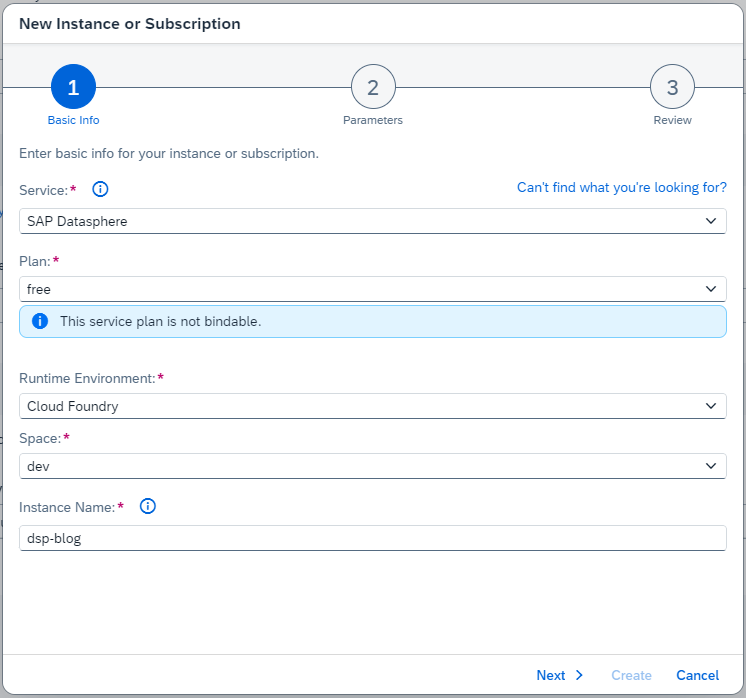
In the subaccount, navigate to “Instances and Subscriptions”. Click on “Create”.
Fill in the required details for “Service”, “Plan”, “Runtime Environment”, “Space” and “Instance Name” as shown below and afterwards click on “Next” and then on “Create”
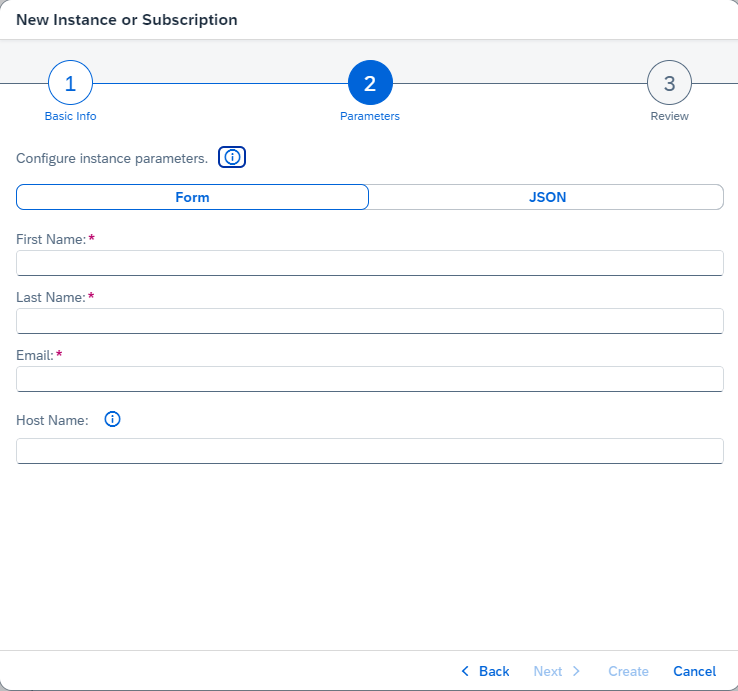
Fill in the mandatory details for “First Name”, “Last Name” and “Email” (This is the Email where the SAP Datasphere link will be sent to).
Step 7: Access SAP Datasphere
After the creation of SAP Datasphere is finished you have two possibilities to access the SAP Datasphere tenant. You can access it through SAP BTP Cockpit or by clicking on the SAP Datasphere link that is provided to you in an Email.
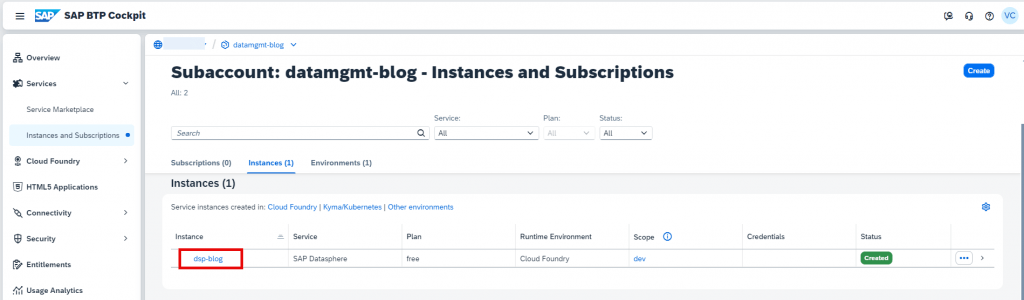
1. Launch SAP Datasphere via SAP BTP Cockpit
Click on “Instances and Subscriptions”, scroll down to “Instances” and then click on the link to launch SAP Datasphere.
2. Launch SAP Datasphere via the link from Email
After provisioning is finished, an email is sent to the email address that was used during the creation of the SAP Datasphere tenant. You can find the email by searching for “Welcome to SAP Datasphere” in your email client. There you will find a link to your SAP Datasphere tenant.


