In this blog, I want to provide the steps we followed to create an OData Service Connection to send data from Datasphere to SAC. By integrating Datasphere Actuals into SAC, we lay the foundation for strategic decision-making, driving business growth and agility.
Sending Data from Datasphere to SAC via OData Service

Our goal for this task is to consume actuals from Datasphere into SAC for reporting and planning purposes. We will combine the actuals from Datasphere with planning data in SAC.
Here is a list of steps we took to import Datasphere actual data into SAC:
1. Identify the OData Source (Data Service URL) in Datasphere
In order for us the identify the Data Service URL we went to the following link. Within this URL, you can see all the assets available within the spaces available in your Datasphere tenant.
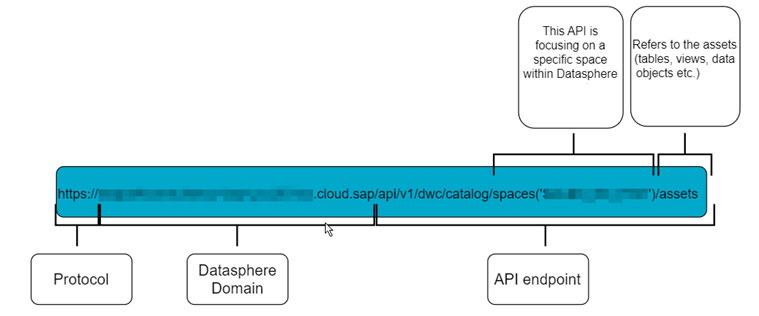
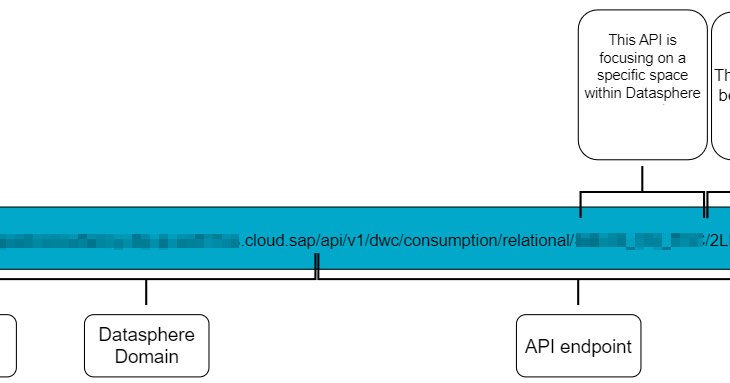
Within this URL, we copied the assetRelationDataURL for the dataset we required. This is your Data Service URL. We then looked up our chosen assetRelationDataURL using the URL in the figure below. This will get us the meta data from the OData Service.
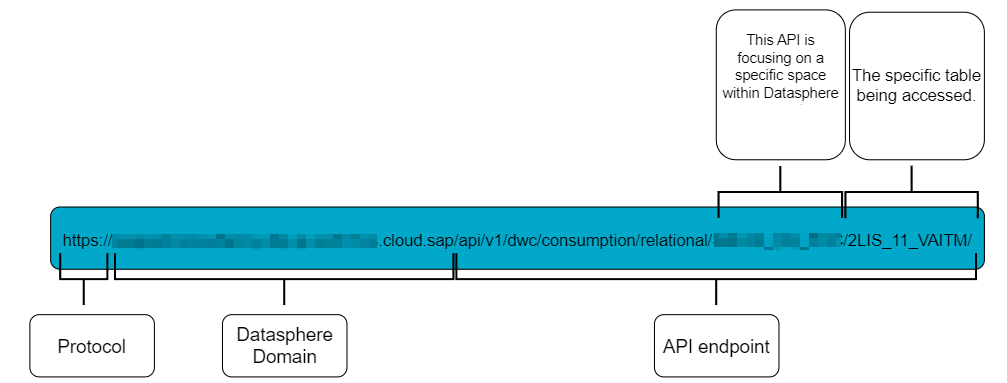
NOTE: To view the data from your chosen asset, add the dataset name again at the end of the URL.
2. Lookup your redirect URI in SAC
The redirect URI in SAC is the specific endpoint URL. The URI is the destination to which the authentication server redirects the user’s browser after authentication has been successfully completed.
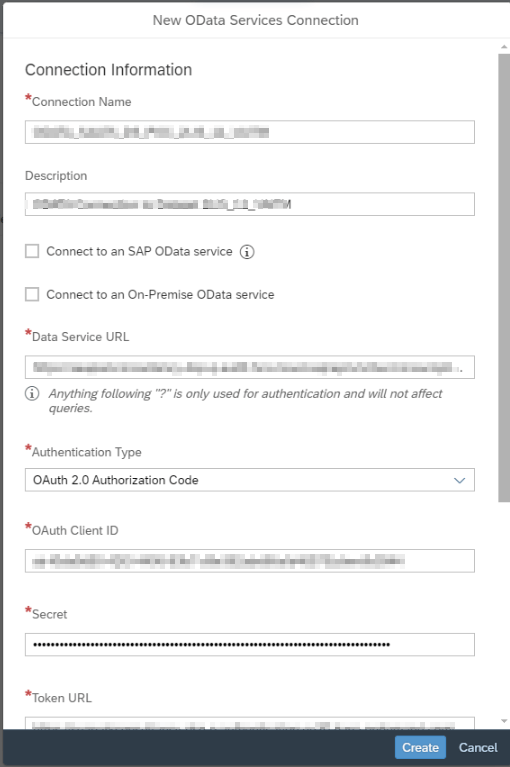
We added an OData Services connection in our SAC tenant. We then change the Authentication Type to OAuth 2.0 Authorization Code. At the bottom of this window, we can see the Redirect URI.

3. Create the OAuth Client in Datasphere
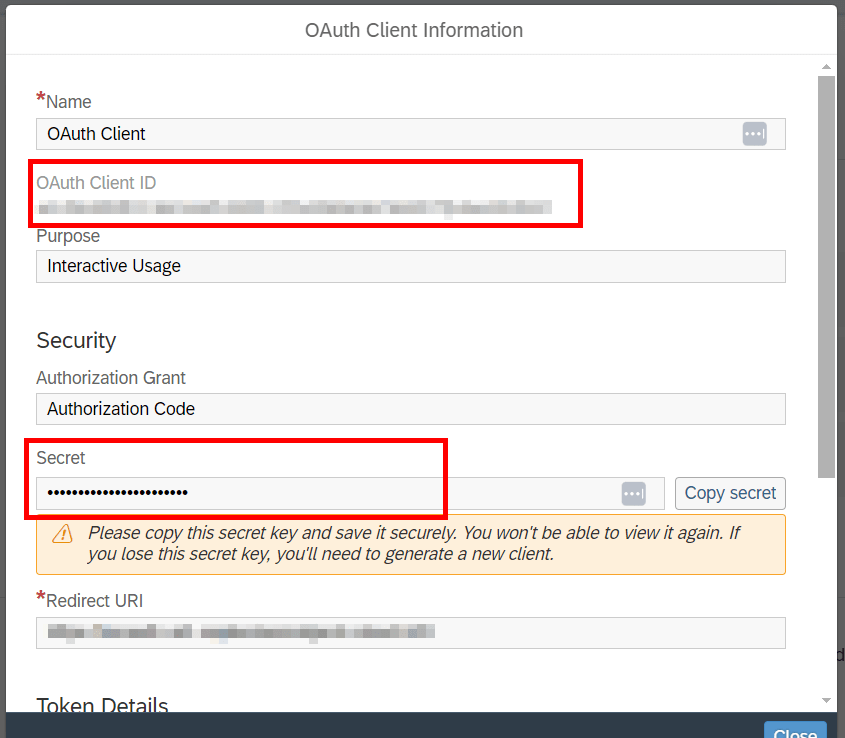
We now want to create an OAuth client in Datasphere. We need the Redirect URI from the above step to create the OAuth client. We do this by going to System >> Administration >> App Integration and click on the ‘Add a New OAuth Client’. Once you paste the Redirect URI and click Add, you’ll get a list of the following information which you will need to take a note of.
- OAuth Client ID
- Secret
- Authorization URL
- Token URL

4. Create OData Connection in SAC
Within SAC, we go to Connections >> Add a Connection and chose OData Service. You need to now add the following connection parameters:
- Data Service URL = assetRelationalDataUrl
- OAuth Client ID
- Secret
- Token URL
- Authorisation URL
5. Import from OData Connection
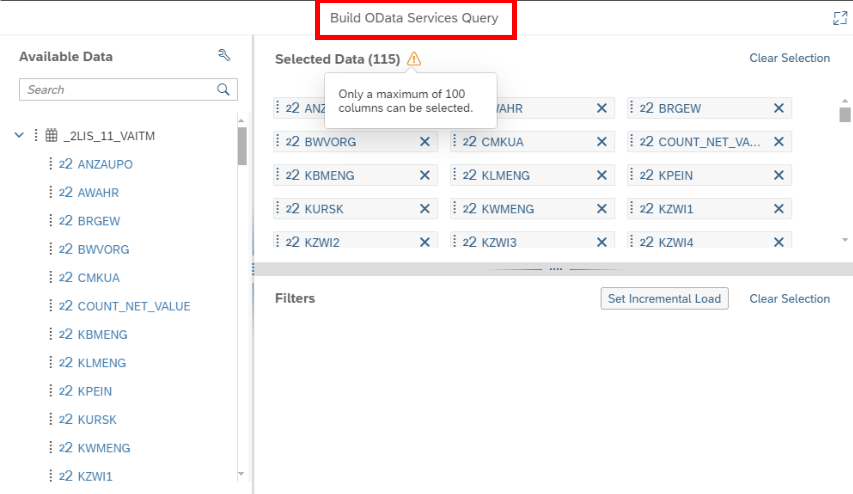
We now need to create a model in SAC. We chose OData Services as the data source and click the new connection we just made. We then create a new query and select which dimensions and measures you want when building that query.
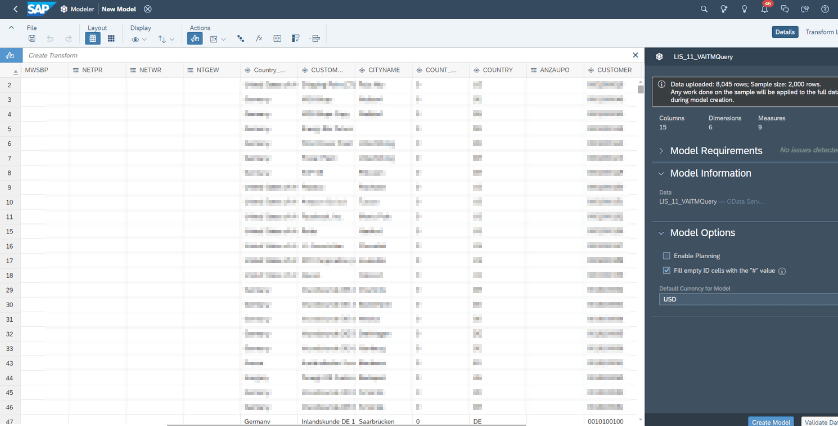
You can see that we have now consumed actuals data from datasphere to SAC! At this stage you can clean data and fix any issues. You have successfully imported the actuals data from OData Connection!!
6. Create Story and Test
As you can see here, we created a story. We added a table to our story. We chose the query we created above as the data source for the table. We added ‘Category’ as a column and using the version management functionality we can choose both the Actual and Plan category. This shows Actual data from Datasphere and Plan data within SAC.


