This is the second blog post on CPI-DS after the Introduction post. Refer to the Part 1 for configuring Data Services Agent, creation of Datastore and importing Metadata objects.
Tasks, Processes, and Projects:
Follow the integration development workflow to set up and test moving data to the cloud.

Task: A task is a collection of one or more data flows that extract, transform, and load data to specific targets, and the connection and execution details that support those data flows.
Process: A process is an executable object that allows you to control the order in which your data is loaded.
Available Actions in Processes and Tasks: Some actions are possible for both processes and tasks, but some actions are possible only for one or the other.
Replicate a Task or Process: You can replicate an existing task or process to the same or different project.
Edit a Task or Process: An administrator or developer can edit a task or process as needed within the UI.
Create a Project:
Select Projects tab -> Create New Project.
You can Select Save & Close, which will create the Project. Or You can select Save and create Task, which will create a Task along with the Project.

Add a Task to the Project:
A task is a collection of one or more data flows that extract, transform, and load data to specific targets, and the connection and execution details that support those data flows. You can create tasks from scratch or from predefined templates.
Tasks contain the following information: Name, description, and project they belong to (Details tab).
Source and target datastores to be used in the task’s data flows (Connections tab).
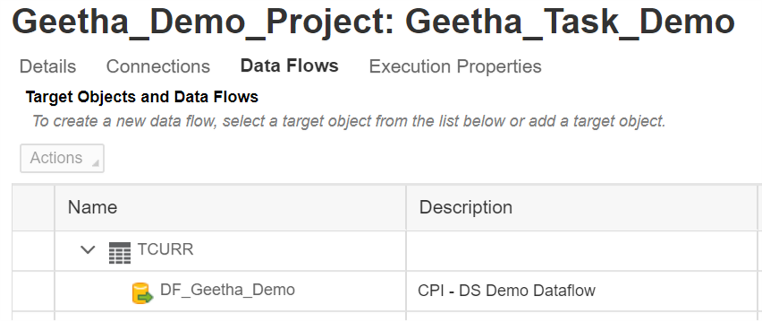
One or more data flows (Data Flows tab). Scripts and global variables applicable to all data flows in the task (Execution Properties tab).
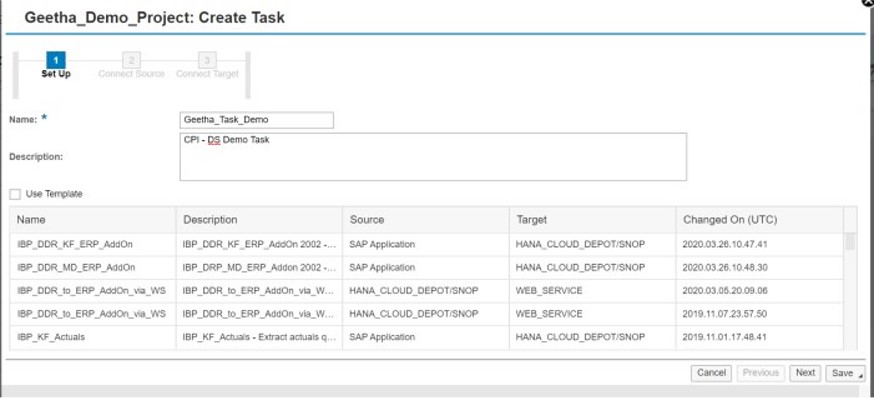
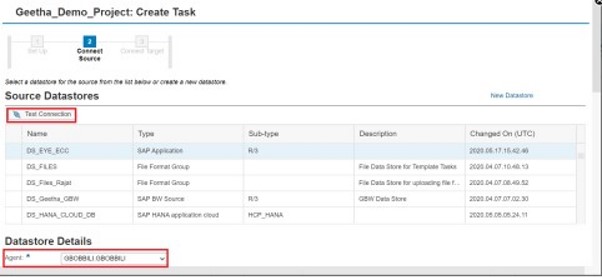
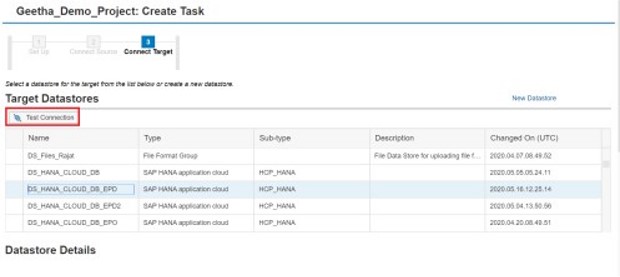
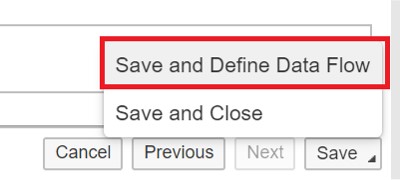
Select Source Datastore and Target Datastore. Click on “Test Connection” button. Click on “Save” and select “Save and Define Dataflow”.
Add a Data Flow to the Task:
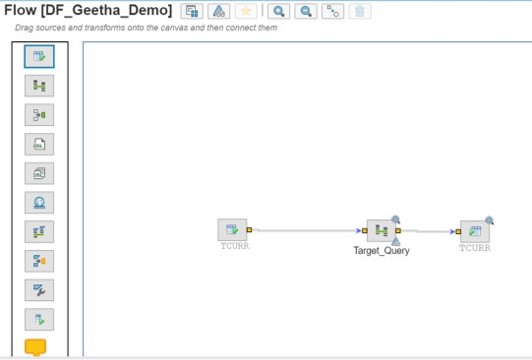
A data flow defines the movement and transformation of data from one or more sources to a single target. Within a data flow, transforms are used to define the changes to the data that are required by the target. When the task or process is executed, the data flow steps are executed in left-to-right order.
Although a data flow can have more than one data source, it can have only one target. This target must be an object in the target datastore that is associated with the data flow’s parent task.
Defines how many times each transform within a data flow replicates to process a parallel subset of data. Default value is 2.

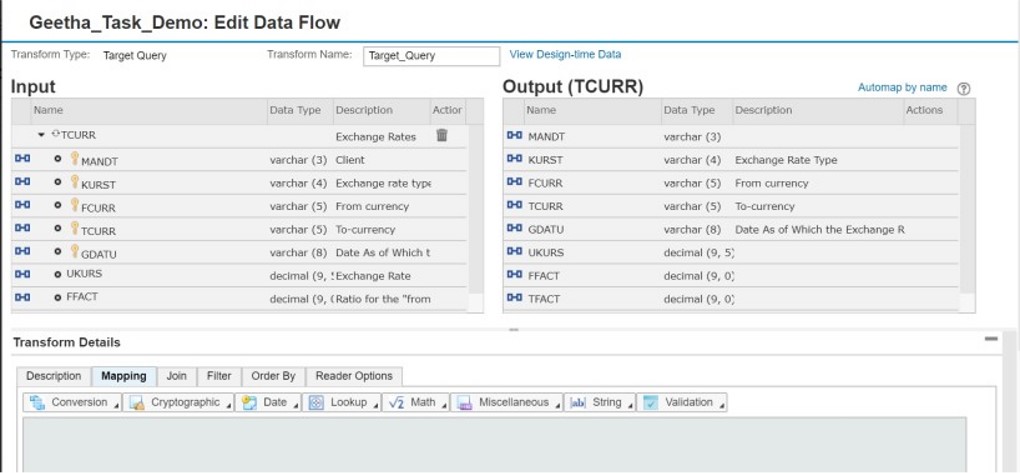
Source & Target Mapping:
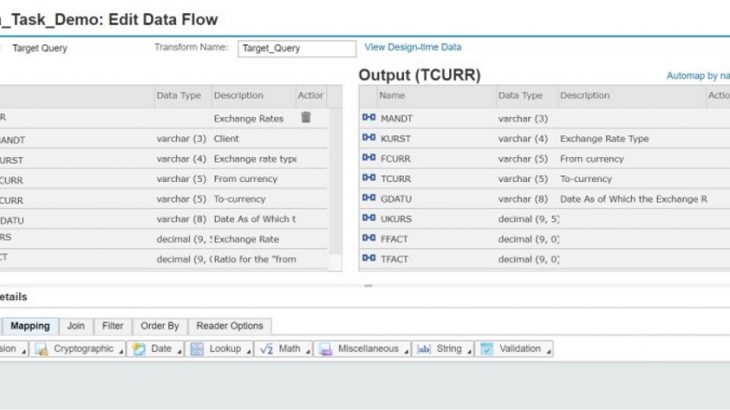
Maps all columns from the Input pane to columns with the same name in the Output pane (target).
Note: If the Input pane contains more than one source, Automap cannot be used.
Transform Operations:
A transform step applies a set of rules or operations to transform the data. You can specify or modify the operations that the software performs.
- Data transformation can include the following operations:
- Map columns from input to output
- Join data from multiple sources
- Choose (filter) the data to extract from sources
- Perform functions on the data
- Perform data nesting and unnesting
- Construct XML Map iteration rules
- Define a web service response

Join Tables:
You can use the Join tab to join two or more source tables. You specify join pairs and join conditions based on primary/foreign keys and column names.
To join two or more tables:
- In the Edit Data Flow view, select the transform in which you want to perform the join.
- If the tables you want to join are not already available in the Input pane, click New to add additional tables.
- In the Transform Details, in the Join tab, click the plus icon to add a new join.
- Select the tables you want to join and the join type.
- Type a join condition.
- Click Save.
- If needed, create additional join conditions. Subsequent join pairs take the results of the previous join as the left source.
Note: In an ABAP Query, mixed inner and left outer joins are not supported.
Sort Data:
You can sort the order of your data by using the Order By tab.
To sort your data:
- In the Edit Data Flow wizard, select the transform in which you want to sort your data. Sorting is supported in the Query, ABAP Query, and XML Map transforms.
- Click the Order By tab.
- From the Input pane, drag the column containing the data you want you use to sort and drop it into the Order By table.
- Specify whether you want to sort in ascending or descending order.
- Add additional columns to the Order By tab and arrange them as necessary.
- For example, you might choose to sort your data first by country in ascending order, and then by region in descending order.
Note: The data will be sorted in the order that the columns are listed in the Order By tab.
Filter Data:
You can filter or restrict your data using the Filter tab.
To filter your data:
- In the Edit Data Flow wizard, select the transform in which you want to add a filter.
- Click the Filter tab.
- From the Input pane, drag the column containing the data you want you filter and drop it in the Filter field.
- As needed, type filter conditions or use the built-in functions.
Examples of filter conditions are shown in the following table:

Open the Data Flow Editor:
- Open the data flow editor to design and debug data flows.
- Follow the steps below to open a data flow for editing.
- From the Projects tab, expand the project that contains the task and data flow you want to edit.
- Select the task that contains the data flow you want to edit and click Edit.
- From the Data Flows tab of the task, select a data flow and click Actions Edit.
- The data flow editor opens.
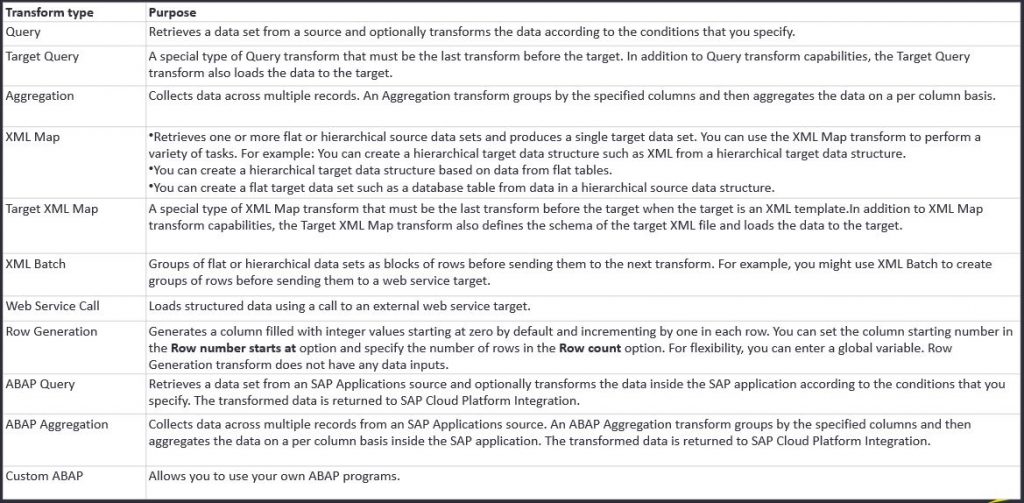
Transform Types in Dataflow:
Validate the Data Flow:
Select Validate.

Run the Task:
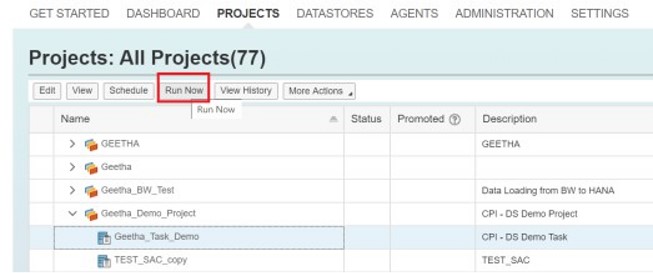
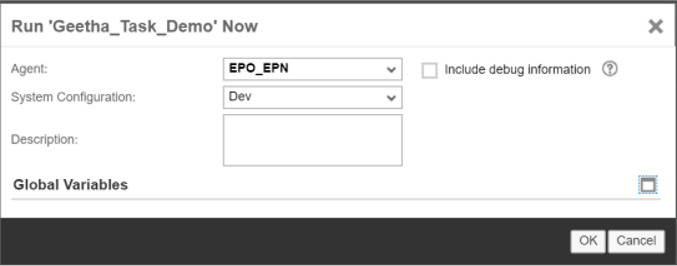
Select the Task and Click on “Run Now”.
Replicate a Task or Process:
You can replicate an existing task or process to the same or different project.
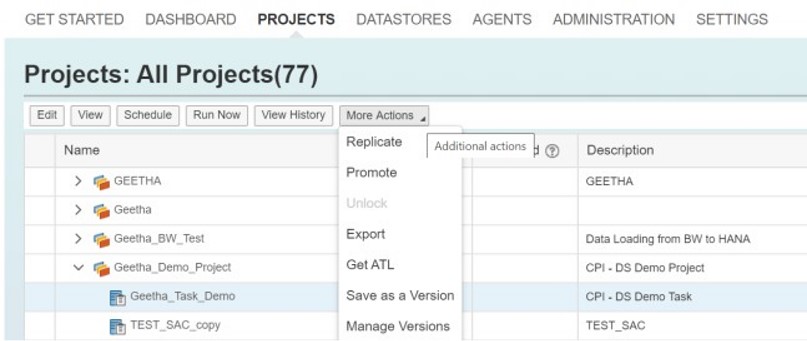
To replicate a task or process, select the task in the Projects tab and choose Replicate from the More Actions menu.
When you replicate a task, copies of the task and all data flows that it contains are created and added to the target project you select as the replication target.
When you replicate a process, copies of the process (including references to data flows), scripts and execution properties are created and added to the target you select as the replication target.
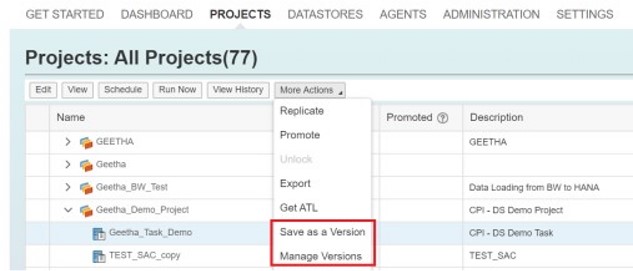
Versioning Tasks and Processes:
A new version is created each time you promote a task or process. You can also create a custom version if needed.
Versions allow you to keep track of major changes made to a task or process. You can consult the version history and return to a previously promoted or saved version to roll back unwanted or accidental changes.
It is recommended that you give each version a unique name and a meaningful description. They can remind you of the changes you made to the task or process, help you decide whether you want to roll back to a previous version, and decide which version you want to roll back to.
Caution: After you roll back to a previous version of a task, it is recommended that you check all processes that reference the task’s data flows to ensure that the references were maintained.
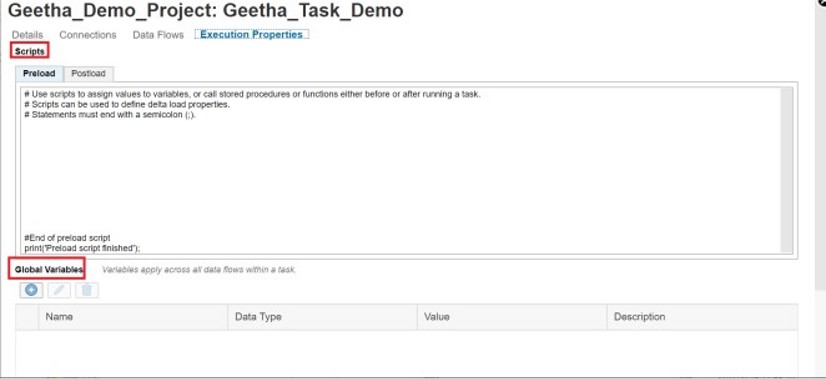
Scripts and Global Variables:
Scripts and global variables can be used in tasks and processes.
Scripts are used to call functions and assign values to variables in a task or process.
Global variables are symbolic placeholders. When a task or process runs, these placeholders are populated with values.
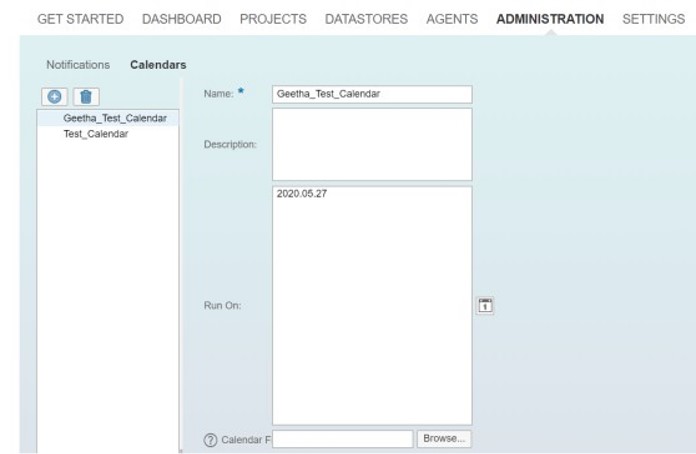
Create Custom Calendars:
Custom calendars allow you to specify a customized schedule for running tasks or processes.
In the Administration tab, click Calendars. Click the plus button + to create a new custom calendar. Enter a name and optionally a description for your calendar.
Add the dates you want a task or process to run by doing one of the following:
- Manually enter the dates,
- Select dates by using the calendar button,
- Upload a Calendar File,
- Click Save.
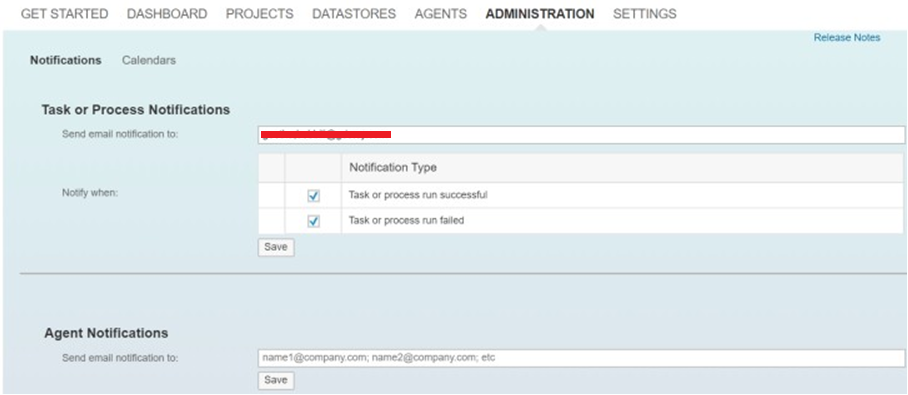
Configure Email Notification (Task, Process & Agent):
Tasks and processes must be set up to run on a scheduled basis.
Note:
- Email notifications for tasks or processes can be set for the Production environments. Notifications are not available for Sandbox. Enter email addresses to receive notification. Use a semicolon to separate multiple email addresses.
- Agent downtime notifications are sent for all environments including sandbox, production, and additional environments such as development or test. Downtime is a period of five minutes or longer. The server checks every 15 minutes.
Monitoring Production Status:
In the Dashboards, the production status displays whether your production tasks and processes succeeded or failed over a given period of time.
From the production status, you can: Set the time period for which you want to analyze results.
Click on an area of the pie chart to filter tasks and processes displayed in the table.
Click on a task or process in the table to view its history and log data.

