Introduction
This BlogPost is about PO Release Strategy. Here we have highlighted PO Release Strategy- Config & Pre-Requisites.
We need to define the parameters to initiate the release strategy. Here I have opted for Document type and Material Group, as an example/ combination for PO Release Strategy.
Most Imp – Structure CEKKO (Communication Release Strategy Determination Purch. Document) displays all fields, using which release strategy can be configured.
We will discuss:
Characteristics, class & config.
1. Characteristics
Characteristics need to be created for the attributes, on which release strategy is dependent.
As an example, we have CEKKO- BSART (Doc Type) & CEKKO- MATKL (Material Group).
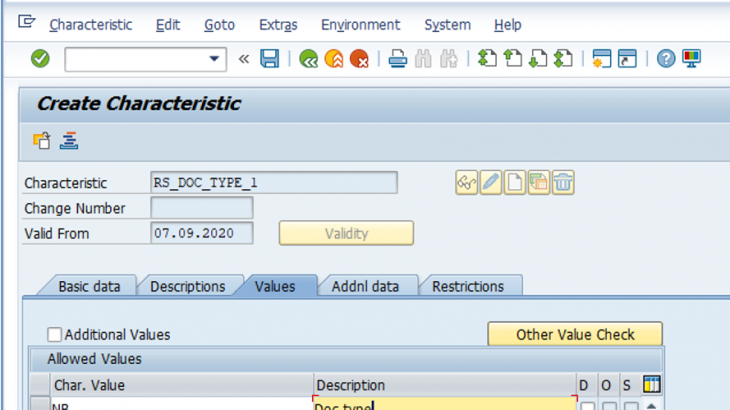
- Run transaction CT04, below screen will appear
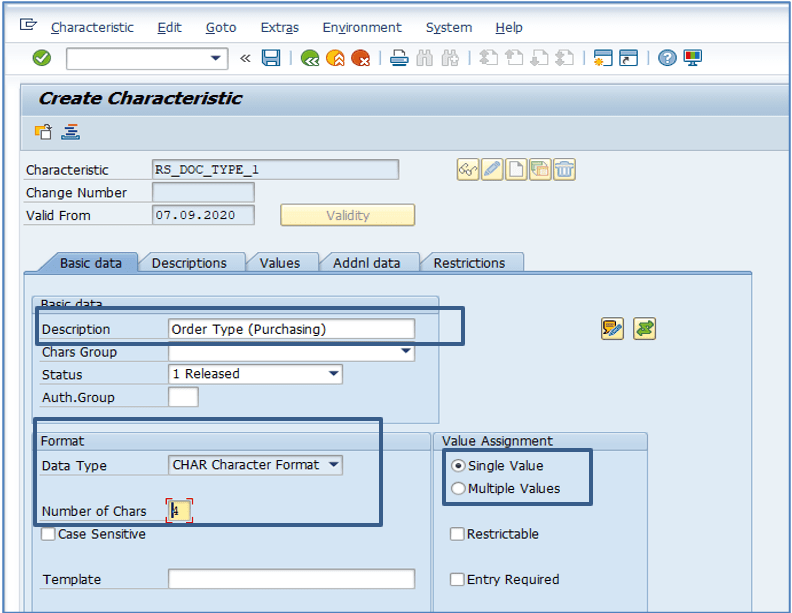
- Enter a characteristic name and click on the Create button
- Select data type
- In my case, I wanted to configure the release strategy for 1 document type
- Selected Single Values in the Value Assignment block
- Multiple values can be selected for Many document type
- As displayed below, in the Addnl tab, for Reference to a table field, mention the field name as displayed below. Same as mentioned in the CEKKO structure.
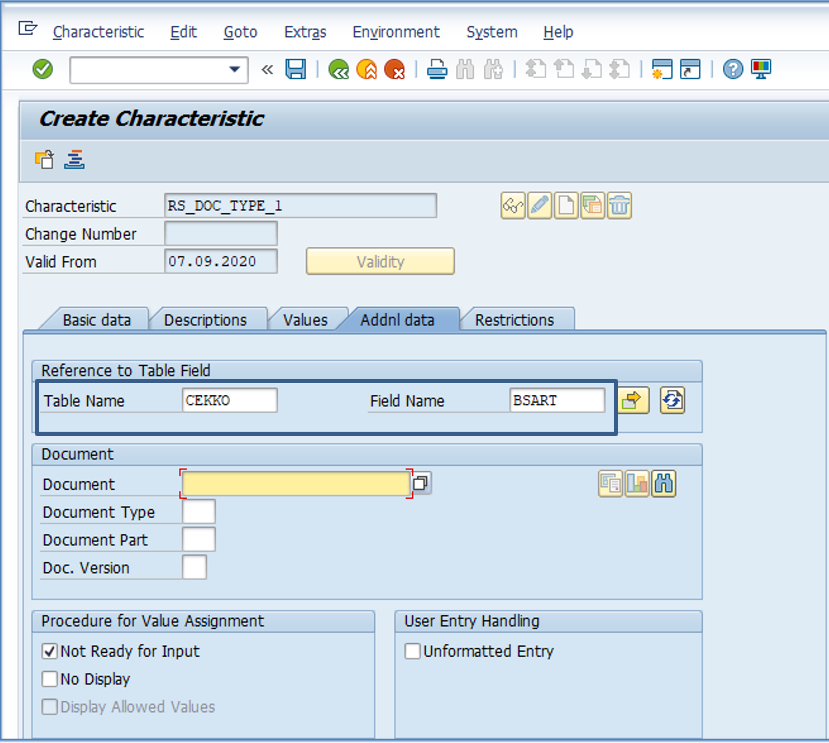
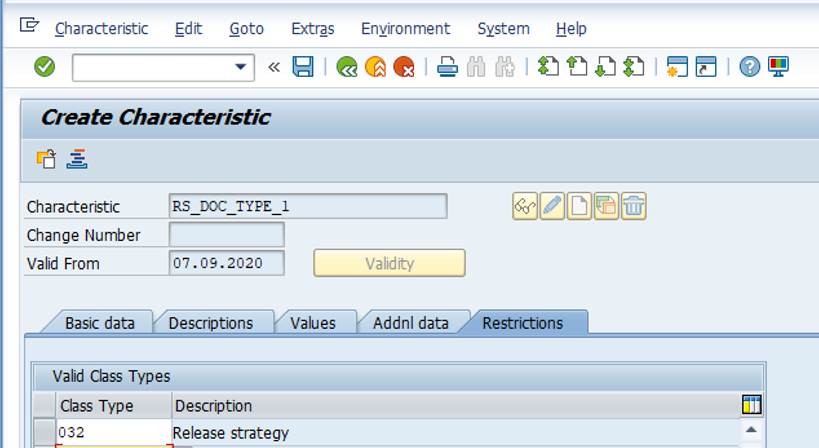
- As displayed below, in the Restriction tab, mention Class type as “032”
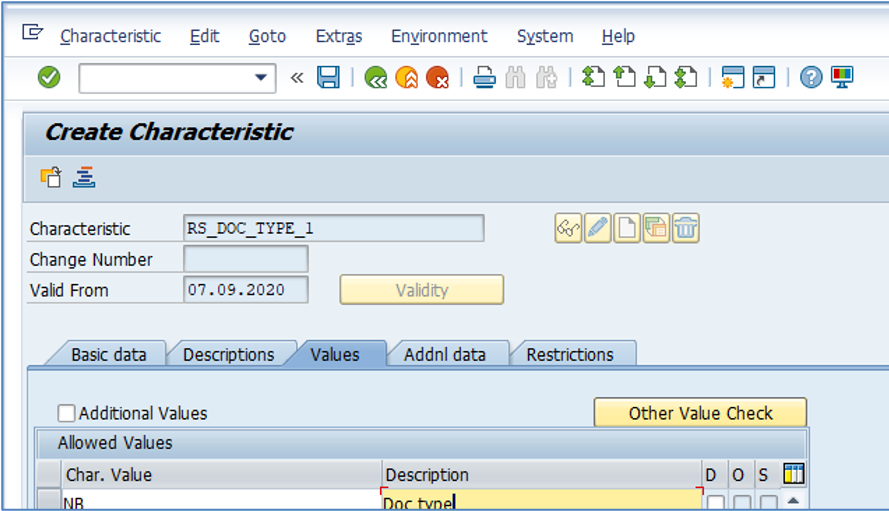
- Click on the Value tab, mention value for PO Doc type, I have taken standard as NB
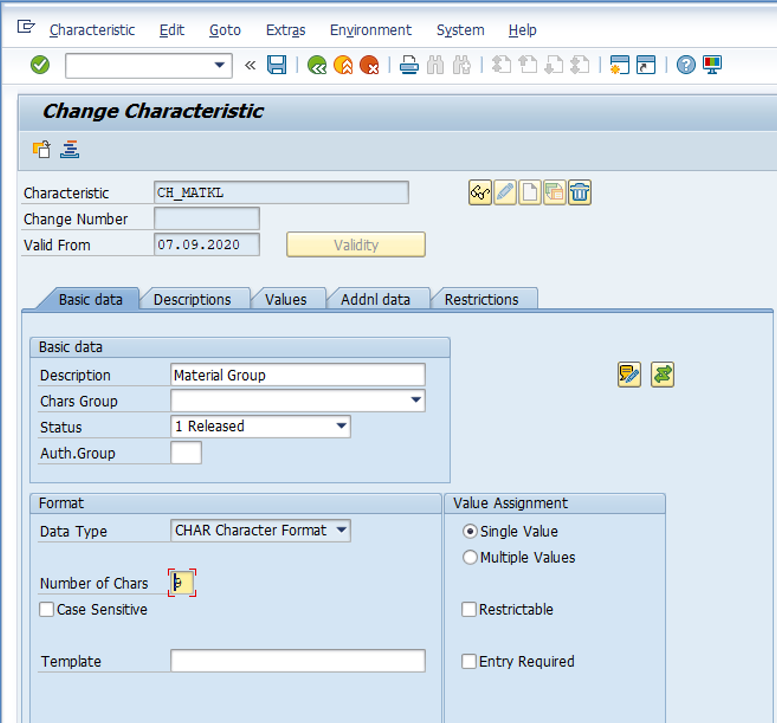
- As below, similarly, create a characteristic for the Material group
- All screenshots as mentioned below
2. Class
Class needs to be created to club all characteristics as created above for the PO release Strategy.
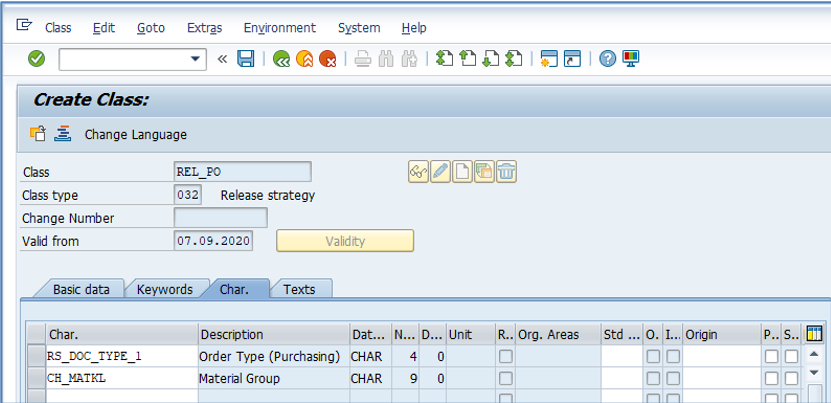
- Run transaction CL02 with class-type 032
- Provide Class description
- Enter characteristics name as mentioned below for Doc/Order Type & Material Group.
3. Config steps for Release strategy as below –
Path – SPRO: Materials Management -> Purchasing -> Purchase Order -> Release Procedure for Purchase Orders -> Define Release Procedure for Purchase Orders.
- Release Groups
- Release Codes
- Release Indicator
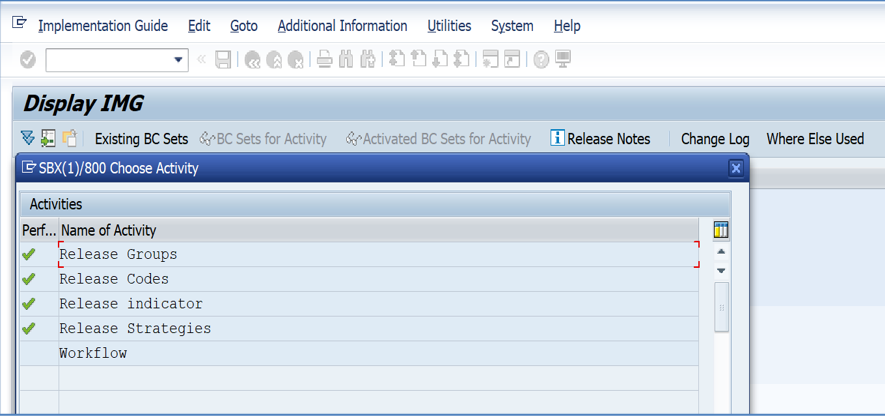
- Release Strategies
- Workflow
- First, select Release Group, choose Release Group, below screen will appear
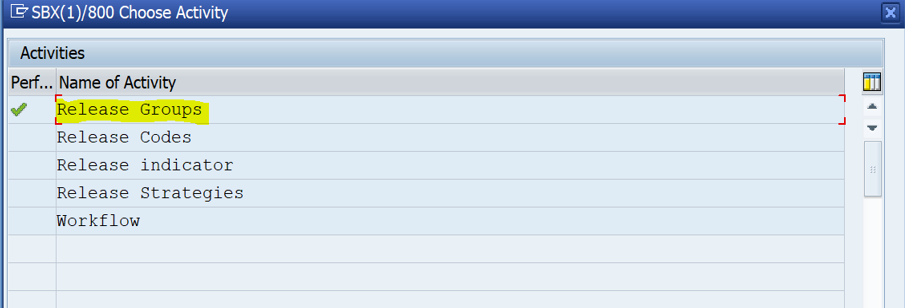
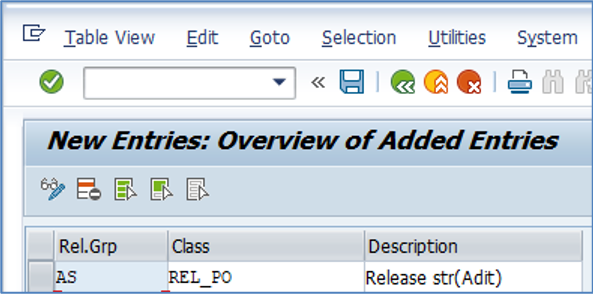
- Opt new entries & provide description/Name of the Release Group, in my case as “AS”
- Choose class & provide a description as below.
- Second, select Release Codes, choose Release Codes, below screen will appear
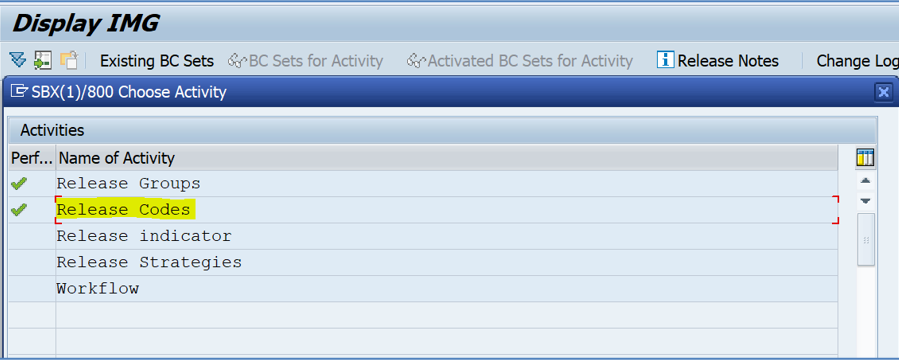
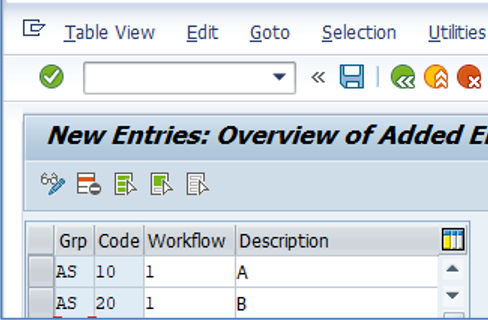
- Enter release code against the Release group.
- Here we have entered 10 & 20 with “10 = A & 20 = B”, as below
- Opted workflow = 1 (Role resolution with the group, code, and plant).
- Save it
- Third, select Release Indicators, choose Release Indicators, below screen will appear
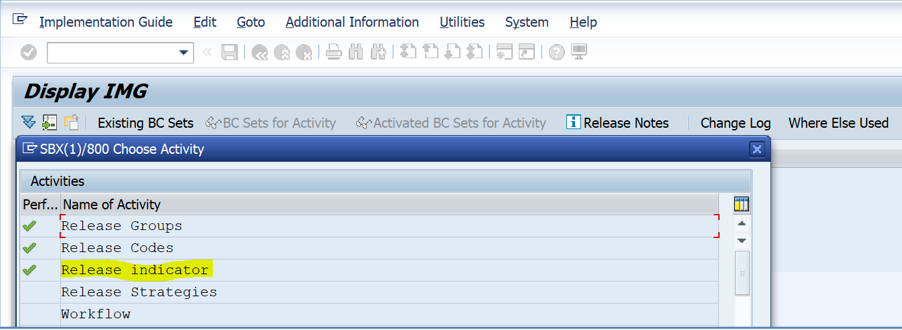
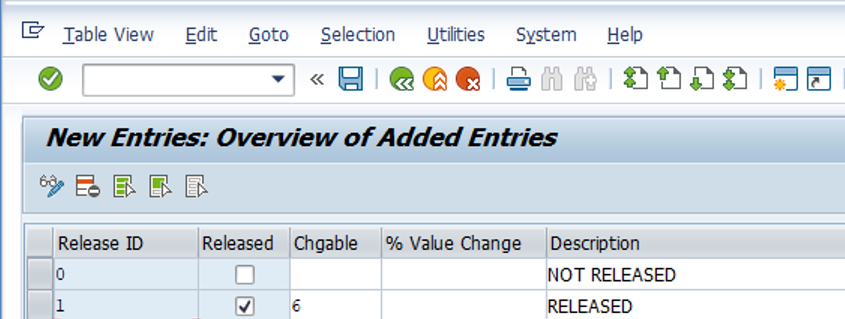
- Enter Release ID, here I have entered 0 & 1
- Check the released checkbox for the Release ID where PO shall be released.
- Changeable value as 6 for PO
- Value change: After the release of PR, it cannot be changed significantly until the value mentioned.
- Enter description
- Fourth, select Release Strategies, choose Release strategies, below screen will appear
- Click, New Entries button
- Opt Release group.
- Now, provide Release strategy and description.
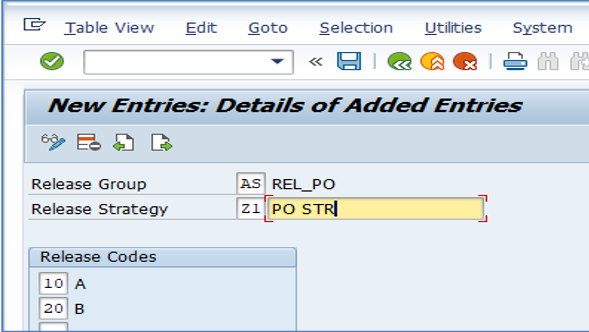
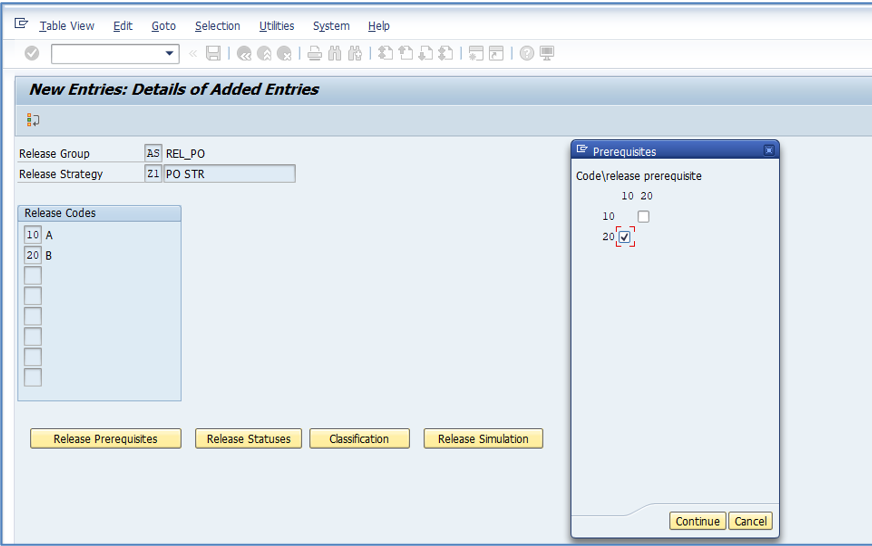
- As below, Now click on Release prerequisites
- In the prerequisites screen, select prerequisites for each release code.
- Here in the screenshot, there is no prerequisite for release code 10, and for release code 20, there is a pre-requisite that release id 10 has to be there.
- Click, Continue, as below.
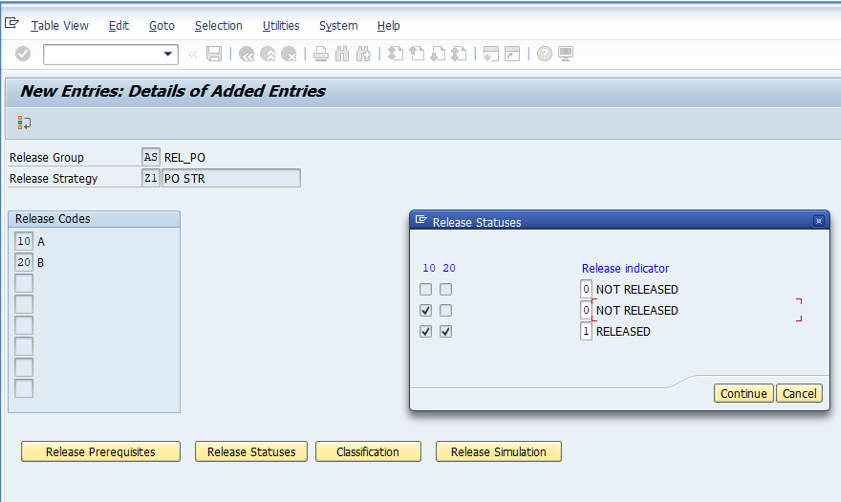
- As below, Now click on Release Statuses
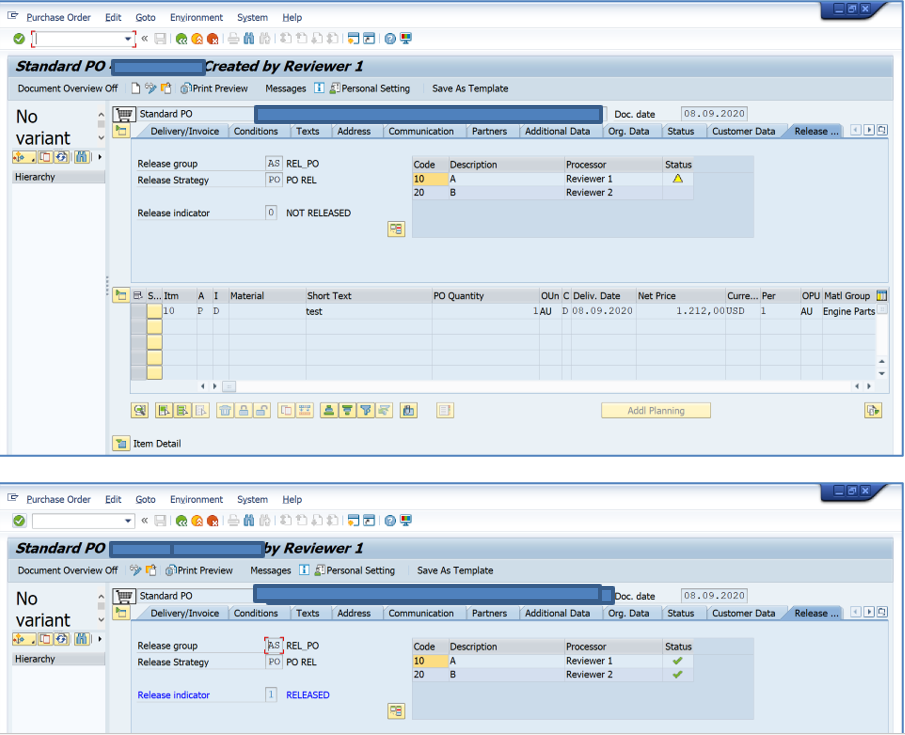
- No level released, “release indicator” not Released
- When the first level is released, “release indicator” not Released
- When both levels are released, PO overall status will be Released.
- Click, Continue button.
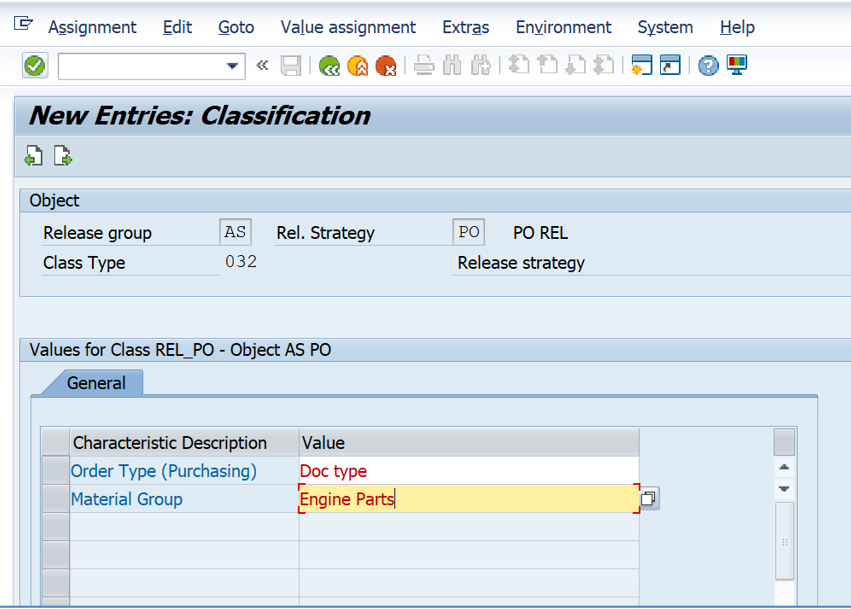
- As below, Now click on Classification.
- Select characteristic values, as below.
- These values are involved in the release strategy.
- Press the back button & save.
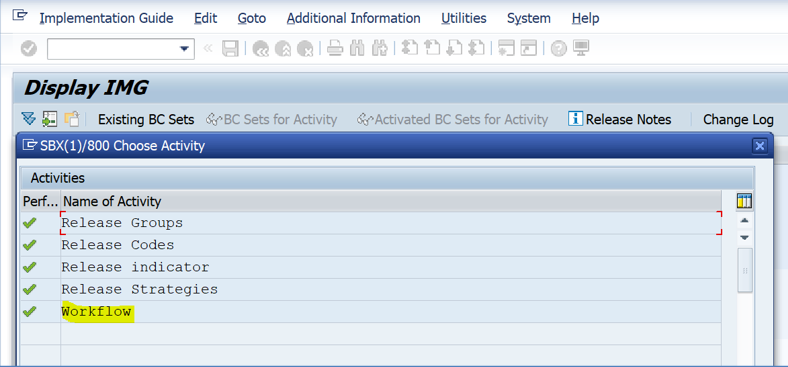
- Click on workflow
- The below screen will appear
- Opt Release group, release code, object type & ID.
- Displayed as below.
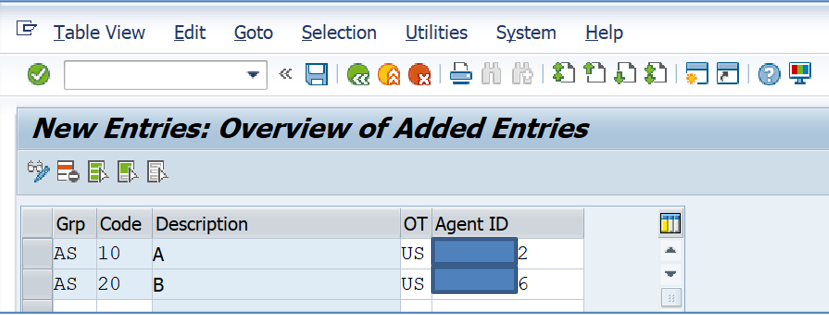
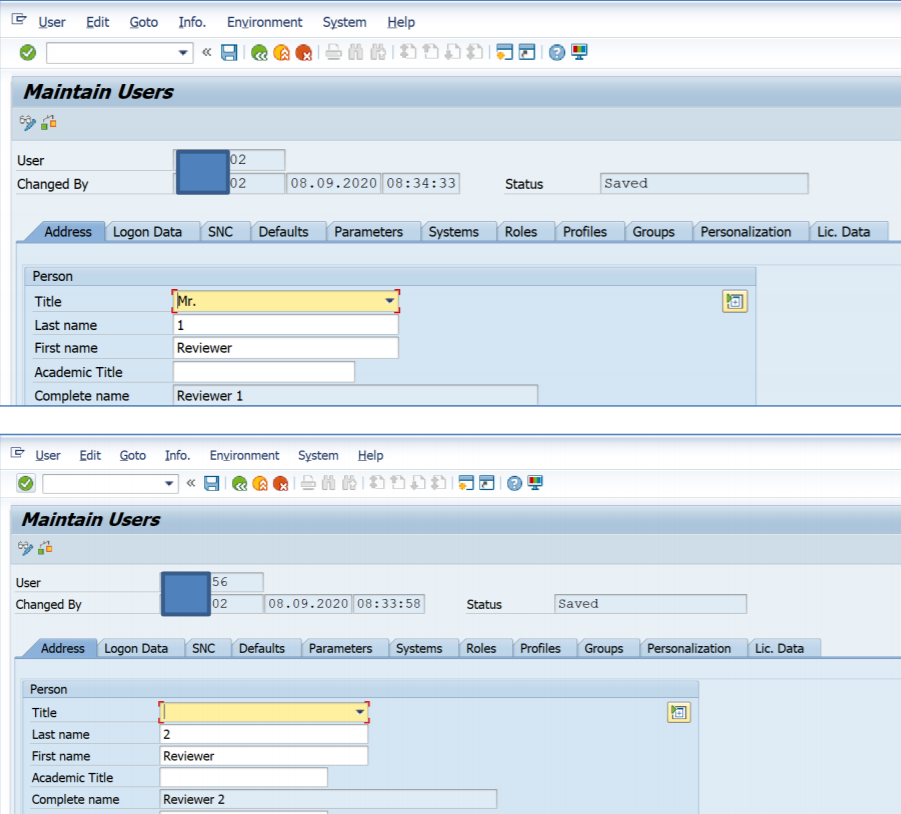
- SU01 ID displayed as below “Reviewer 1 & Reviewer 2”
- PO created with Doctype “NB” & Material grp as in release str…
- Release str triggered, as below
