Introduction
Looping Process Call refers to a way of repeating processes in an SAP program using loops, calling one or more processes within a specific cycle. This can be useful, especially when working with large data sets or when automating a series of tasks. we are working with large datasets, fetching them all at once increases RAM consumption.
With this method, we retrieve our data in fragments based on a certain condition, and after the loop ends, our data is merged as a whole. From a performance perspective, we alleviate the strain on memory. It reduces processing time and enhances performance. It simplifies our overall data analysis.
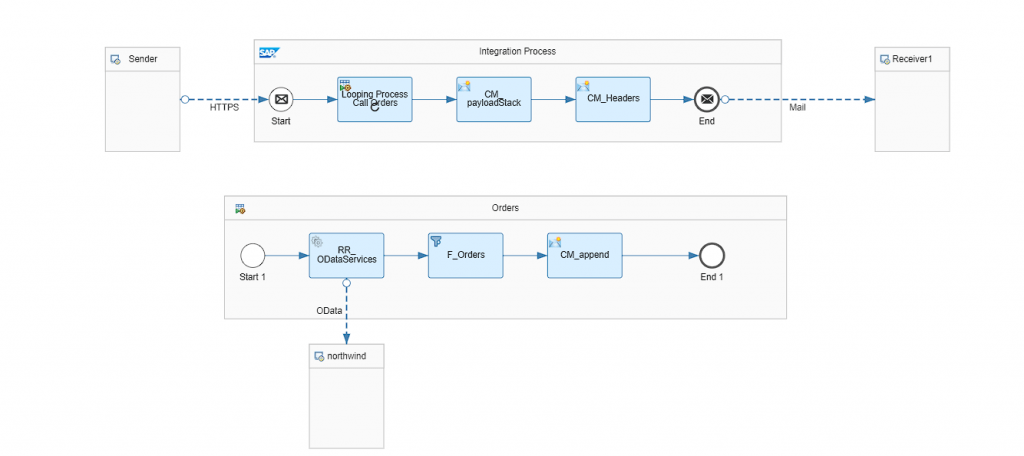
Now, we will design a scenario in cloud integration. We will fetch large data from OData and loop it through a specific condition (looping process call). Then, we will observe the results together.
Prerequisite: BTP Cockpit access and Integration Suite
Step 1. First, we will create a CPI link to be able to make calls to the service.
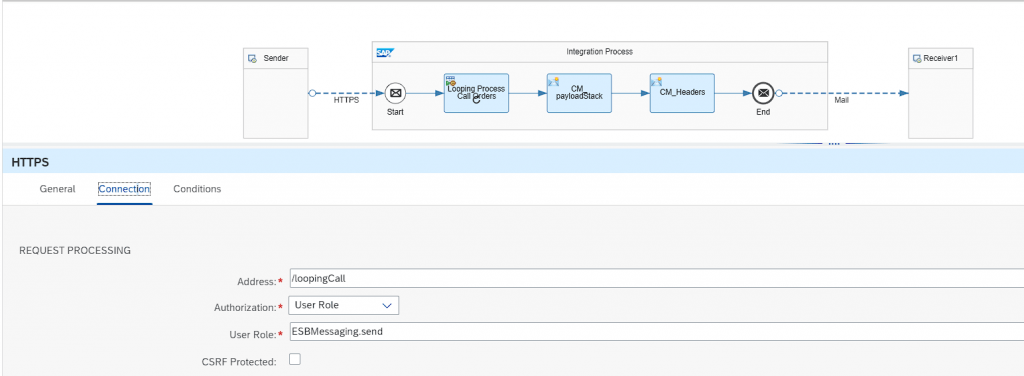
Adapter Type: HTTPS
Address: Specific
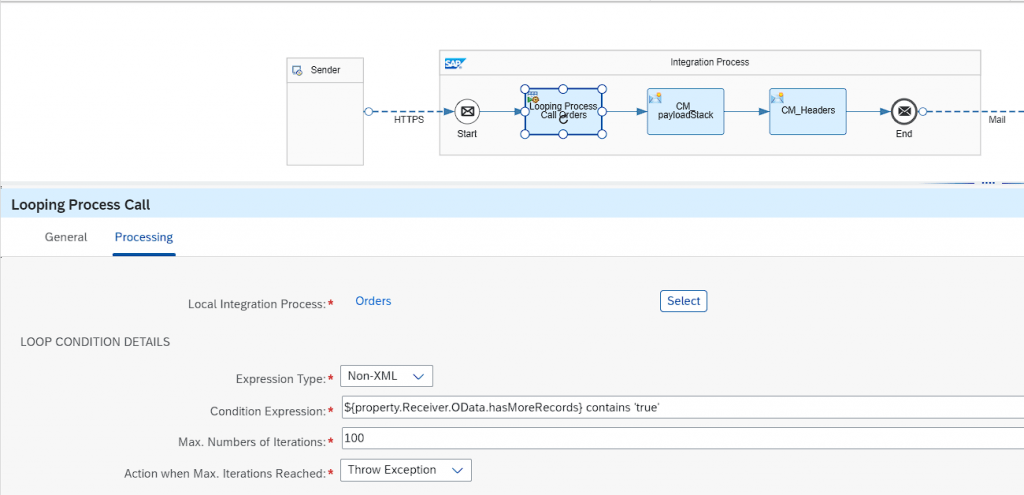
Step 2. We specify that the looping process call will work according to the condition expression specified in the “condition expression” field. By stating “.hasMoreRecords contains ‘true’, we indicate that the loop will continue to run as long as there are multiple records.
When this condition returns false, the loop will end.
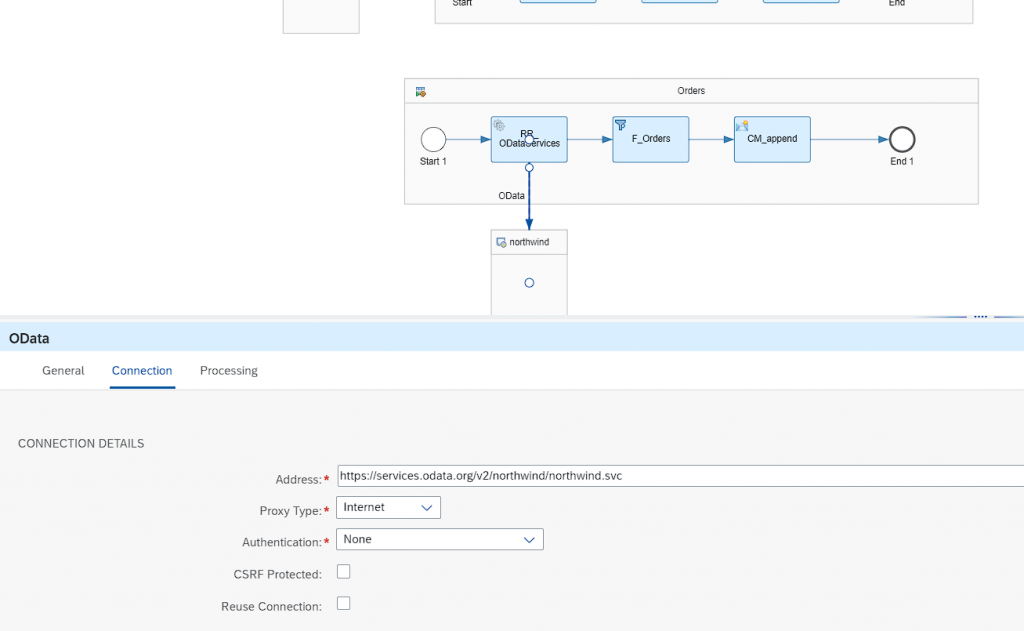
Step 3. OData informations.
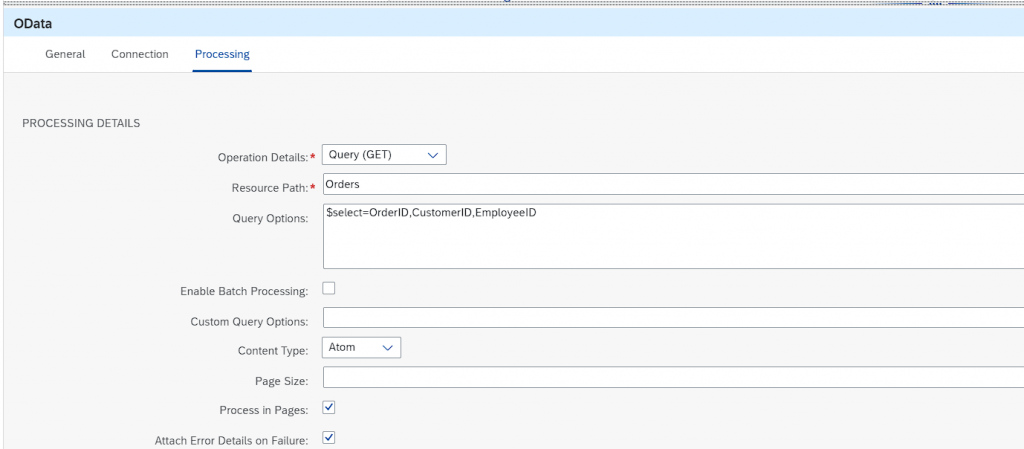
Step 4. We use the “select” clause to choose which fields we want to retrieve from the Orders entity.
Our method is GET.
We need to mark “Process in Pages”. If we don’t mark it, the system will send all the data at once after entering the loop once.
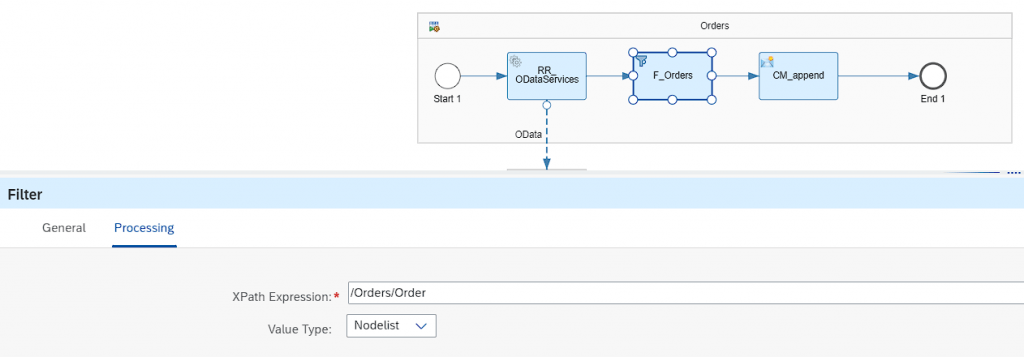
Step 5. After passing through the filter, the data will no longer include “Orders” but will start with “Order.” This is because we need the information of “Orders/Order” due to sending the data in fragments. After completing the process of sending fragmented data, we will merge it in the “Message Body” of the Content Modifier.
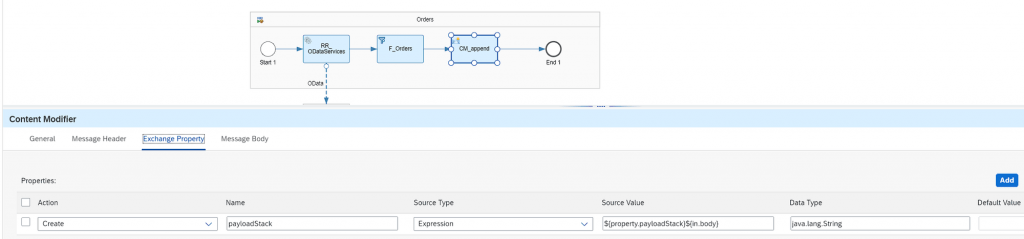
Step 6. ${property.payloadStack}${in.body} : We use it to continue adding each incoming fragmented data to the body. You can take a look at it.
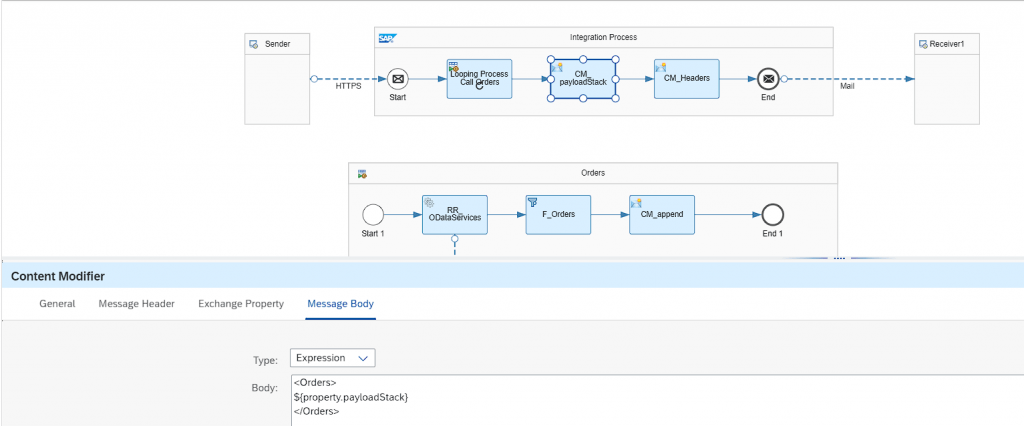
Step 7. We add the “Orders” tag, which we ignored with the filter, to this content modifier. Once the loop is completely finished, we add the merged data as a property.
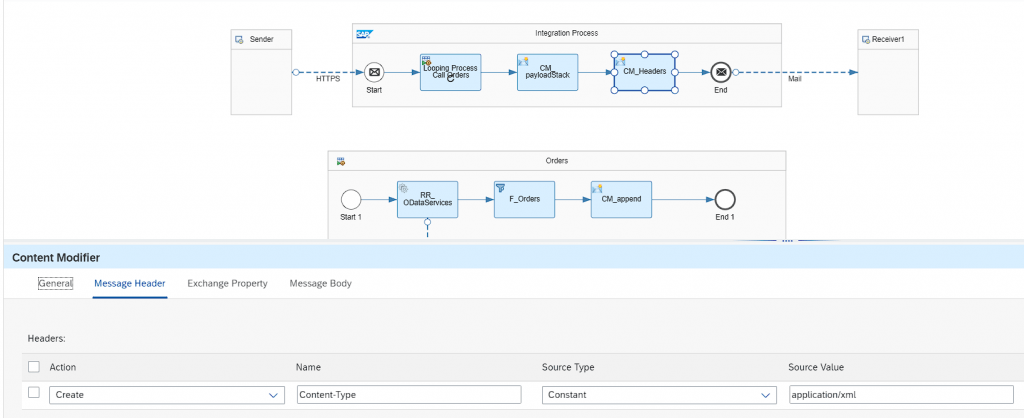
Step 8. To indicate that the last data will come in XML format, we add the “Content-Type” header.
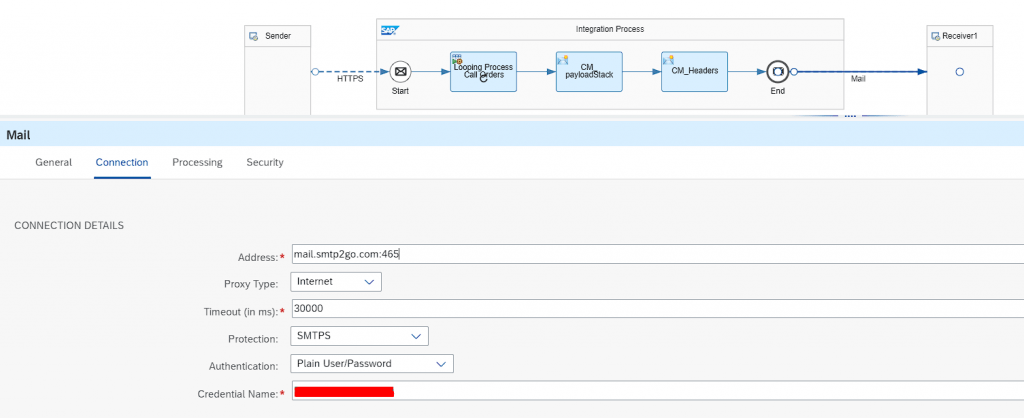
Step 9. We fill in the necessary information for the email adapter.
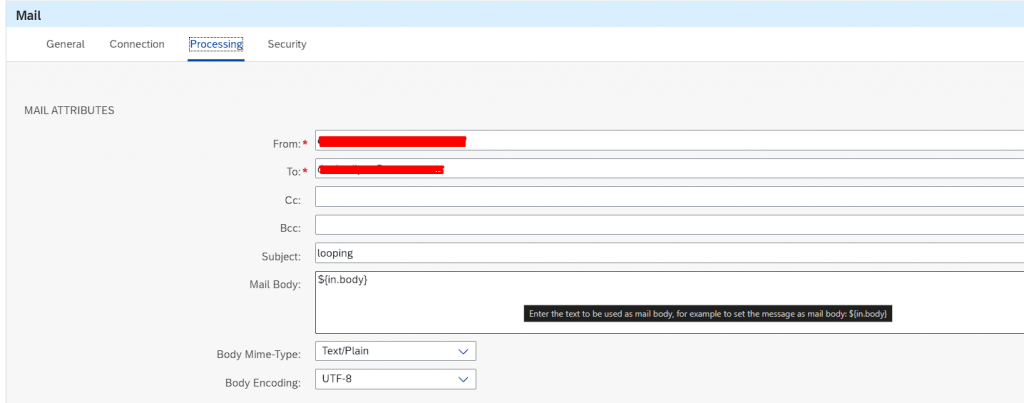
Step 10. We determine who the email will come from and who it will go to.
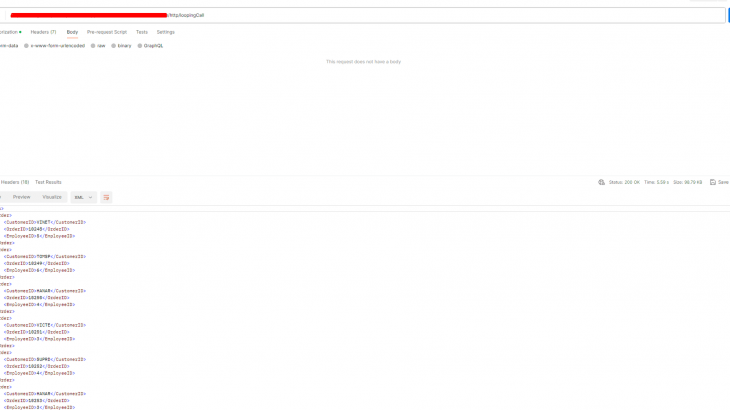
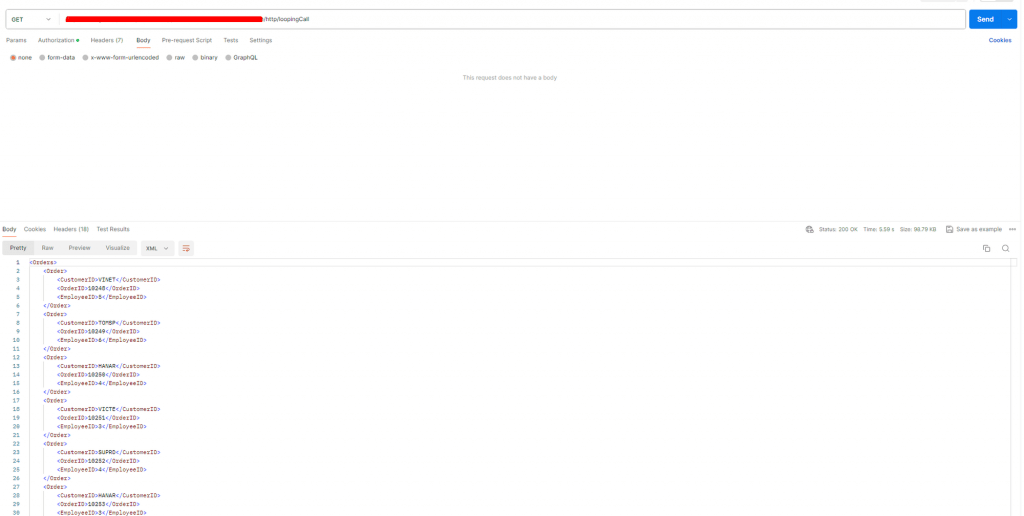
Step 11. Save and Deploy. Then once we have created a CPI link, we need to call it using the GET method in Postman after the deployment.
Step 12. We are making a call to the CPI service using the CPI username and password.
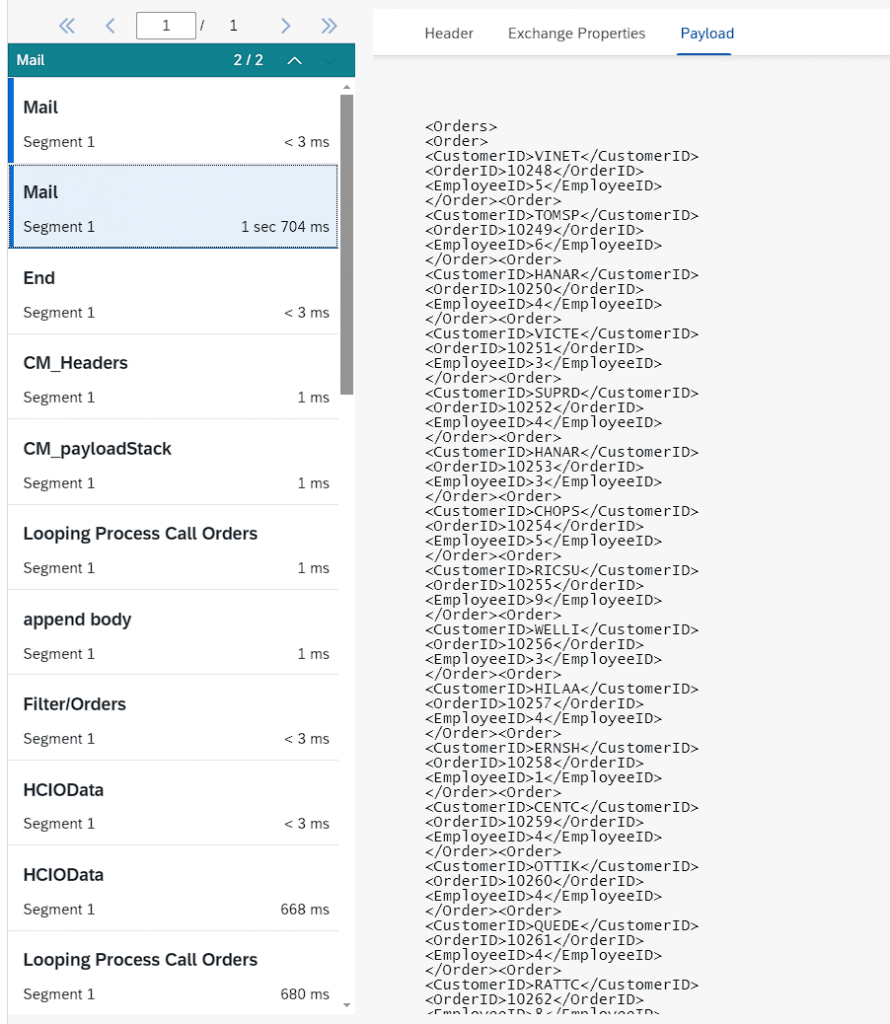
Step 13. It entered the loop a total of 6 times, but on the 6th request, since there was no data left inside, it combined the data sent in fragments, exited the loop, and continued to ‘End’.
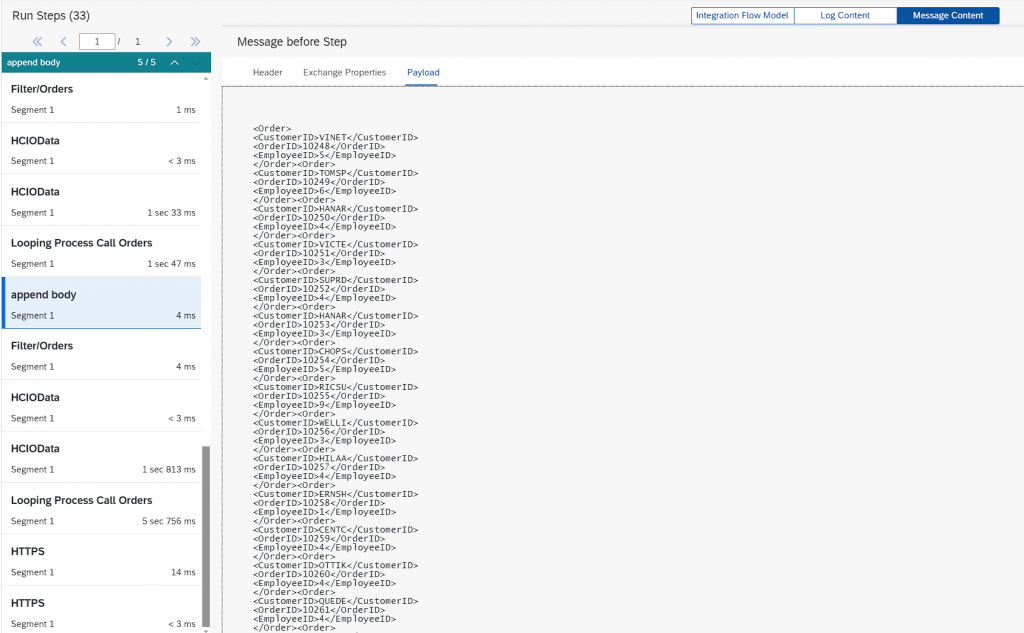
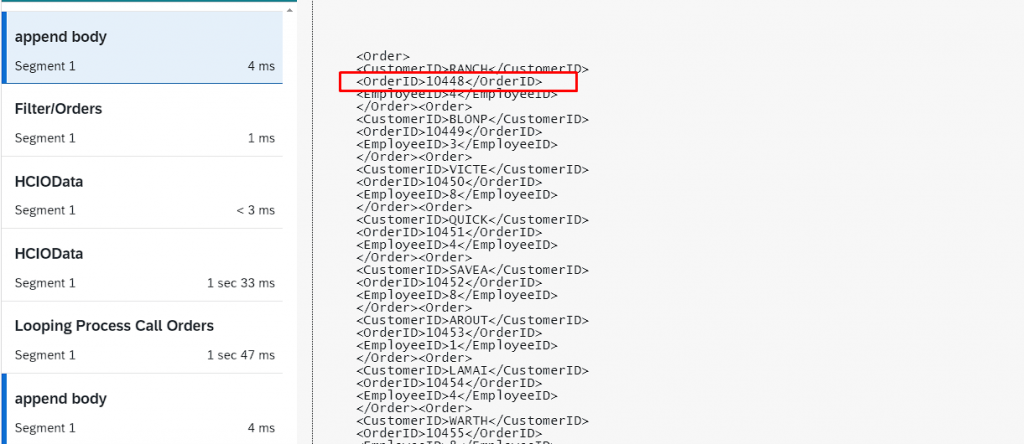
When we look at our first loop, it indicates that in the first request, it fetched the first 200 records from the entire data set and provided the information that the next loop would start with OrderID 10448 using the expression “$skiptoken=10447”.

In each loop, as it adds data, it indicates that there were 400 records in the 2nd request, and when it enters the 3rd loop, it won’t fetch the same initial 400 records again. Similarly, it shows that in the next loop, the data will start with OrderID 10648.

The important point to note is that it continues to loop as long as the condition we set is met, meaning it enters the loop as long as it evaluates to true.

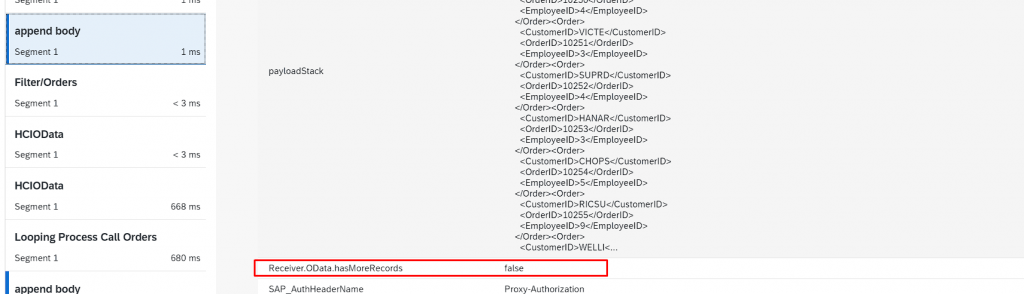
When we check the final step, we understand that this condition returns false, indicating that it has fetched all the data inside.
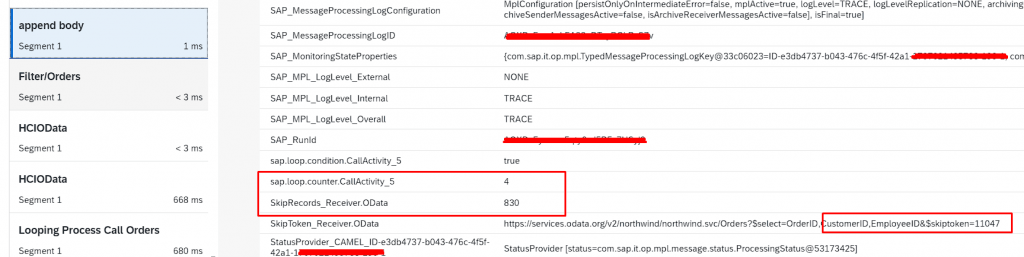
Due to the condition, since the Loop process has ended, we receive information that the last data has the OrderID number 11047.
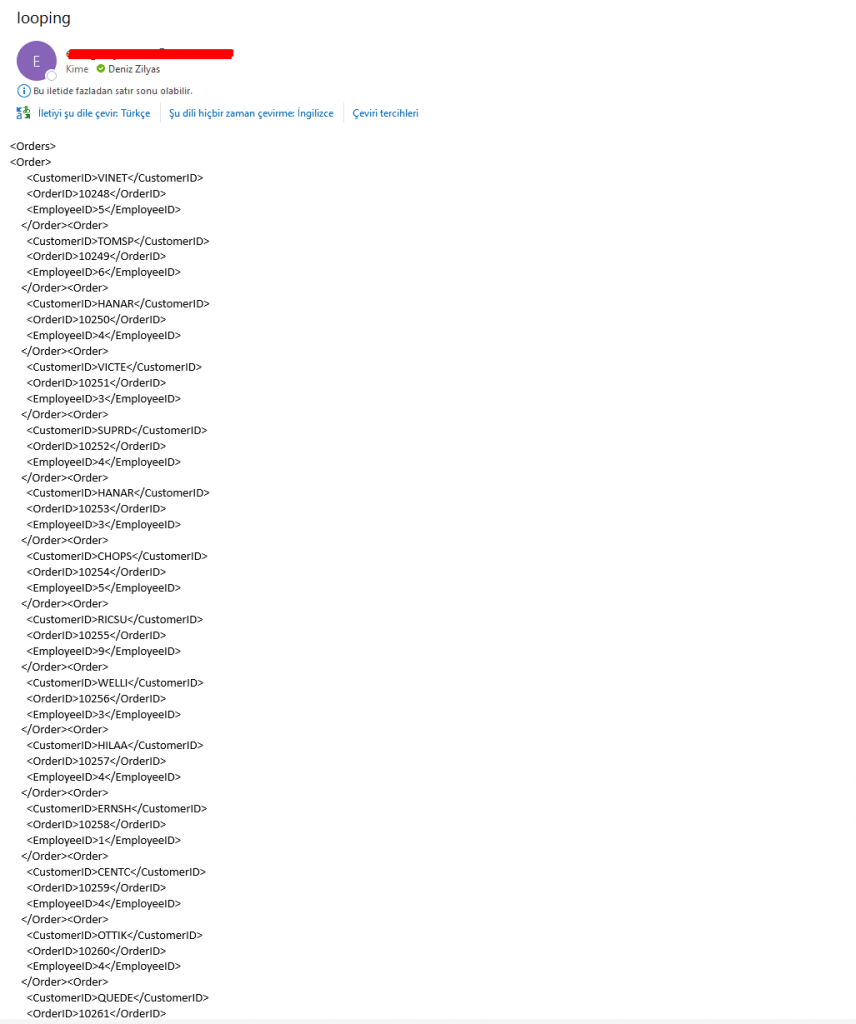
Finally, I wanted to add an email adapter. It notifies all the information via email.