Introduction
SAP Cloud Platform Integration October 2020 release (3.30.x/6.6.x) provides an extended feature to support simulation of an integration flow with the various types of body files. You can simulate Zip and Tar splitters which require an incoming payload in Zip and Tar format.
This blog’s primary focus is to explain how you can simulate an integration flow with zip and tar splitter which essentially requires input body file in the format of zip and tar.
In addition to this, we will also explain how other types of body files such as *.pdf, *.xlsx, *.txt, *.docx , *.xml, *.json etc. can be simulated to describe SFTP scenario.
Let us understand the enhanced capability of simulation input dialog in detail before we hands-on few scenarios.
Simulation Input Dialog capability
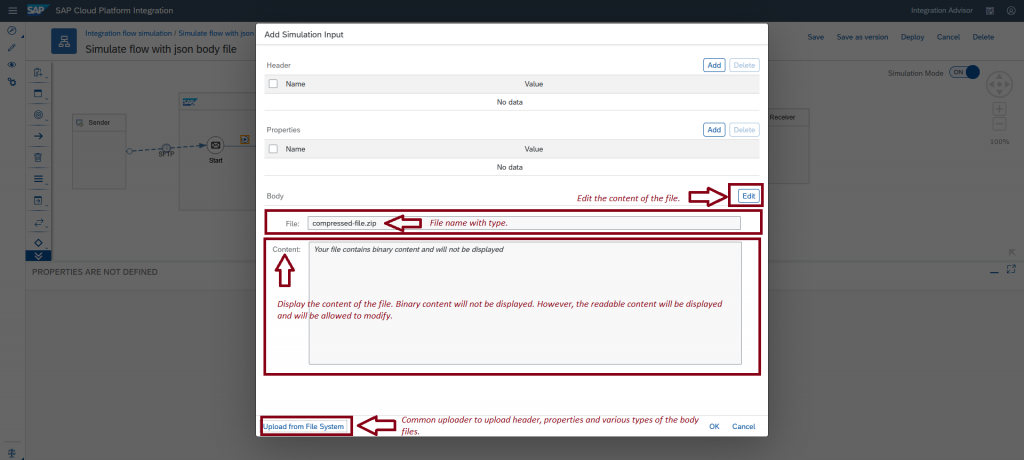
- Body section of the simulation input dialog has been enhanced to support upload of various types of body files like *.zip, *.tar, *.txt, *.pdf, *. *.xlsx, *.docx. *. json, *.xml etc.
- Body section has the following attributes:
- File: Display the file name and type.
- Content: Display content of the file.
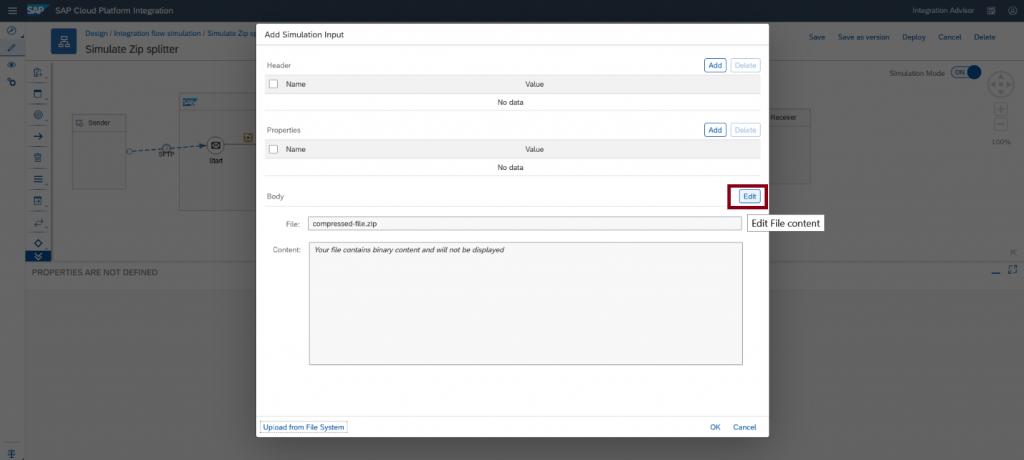
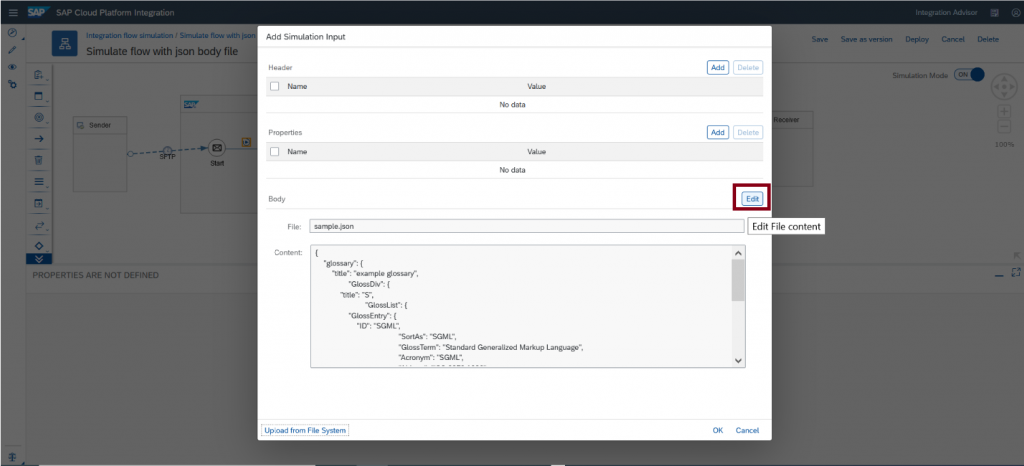
- Edit: Action to edit the content of the file.
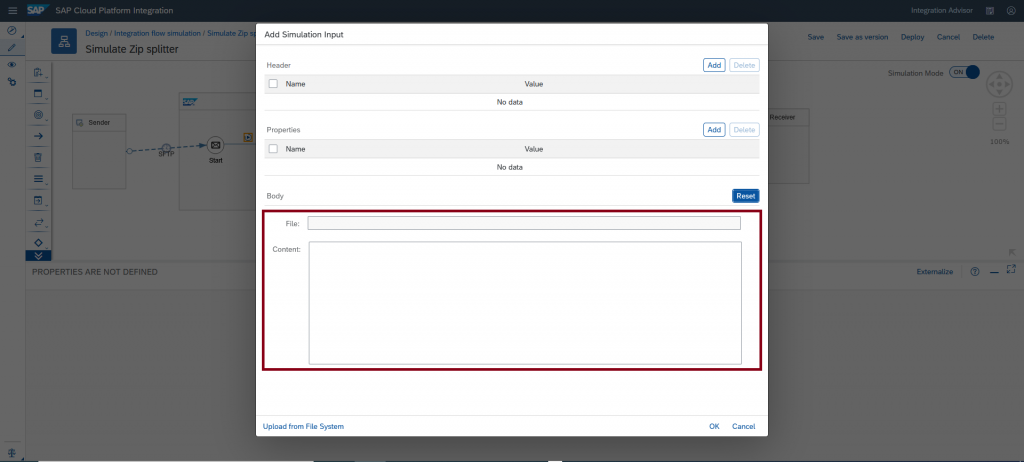
- Reset: Revert to the original content of the file.
- File: Display the file name and type.
- Upload of the trace message content file which comprises of *. header, *. properties and *. body will be supported and individually you can upload *. header, *. properties and *. body as well. This is the existing feature and it will be maintained.
- Any distortion in the trace message content file will be treated as a body file on upload.
- File types like *.tar, *.zip, *.pdf, *docx, *.xlsx which are essentially binary content file will not be displayed in the content section.
File types like *.txt, *.xml and *. json which has a readable content will be displayed in the content section of the dialog. - When the file is edited, it will invalidate the file and file name will be removed.
- Readable file content is maintained, and modification is allowed.
- Binary file content is cleared and not allowed for any modification.
- Readable file content is maintained, and modification is allowed.
- Revocation to the original file is possible by using Reset functionality.
I hope you understood the enhanced capability of simulation input dialog, now let’s apply this capability in few of the below scenarios.
Scenario # 1 – Unzipping input ZIP file from SFTP that have multiple files and send it to receiver with same source file name.
Let simulate this scenario through simulation feature of an integration flow.
Step # 1 – Model the scenario as shown below.
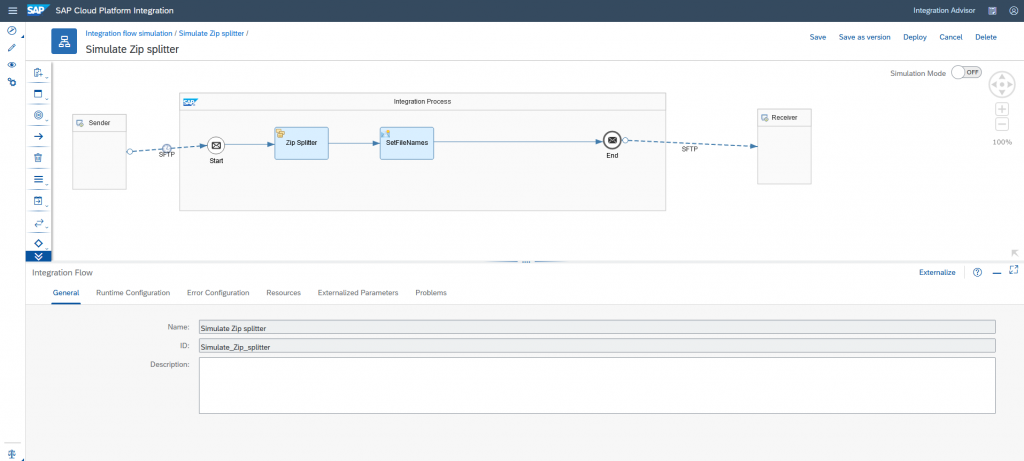
Step # 2- Configure ZIP Splitter to unzip incoming compressed zip file.

Step # 3 – Configure content modifier to parse the incoming file name to keep same file name at the target side. We will be getting file name in camel header CamelFileNameOnly with value ZIPNAME/Filename in order to get only file name, we can use below expression in the value.

${header.CamelFileNameOnly.replaceAll("[0-9A-Za-z]+\/","")}Step # 4 – Define the start and stop point to simulate the subset of flow.
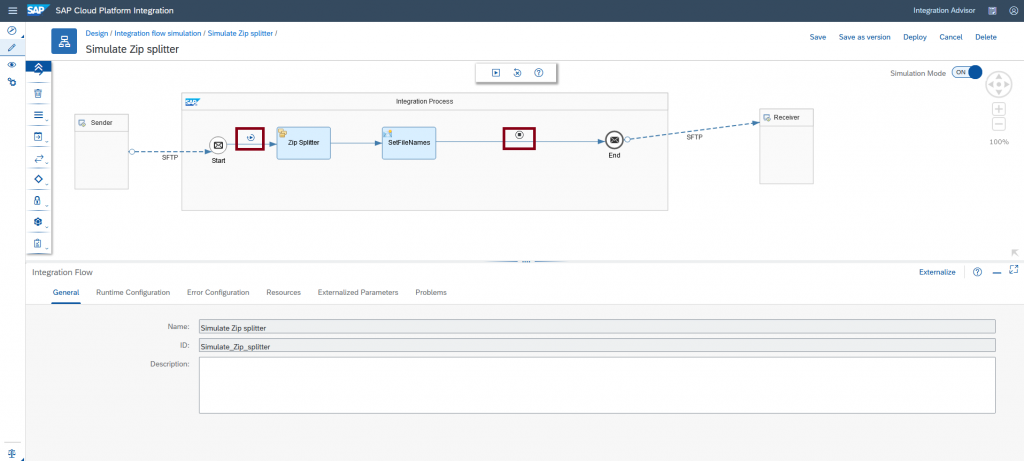
Step # 5 – In the simulation input dialog, upload the compressed zip file as a body input file which contains the text files.
- compressed-file.zip
- file1.txt
- file2.txt
- file3.txt
- file1.txt
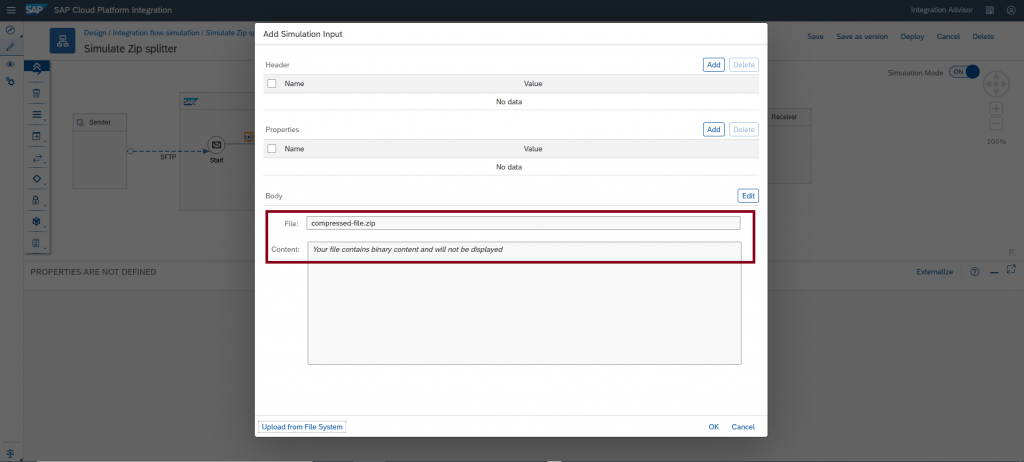
Note: Binary file content will not be displayed in the content section of the dialog.
Step # 6 – Run the simulation and validate the outgoing message from the content modifier.
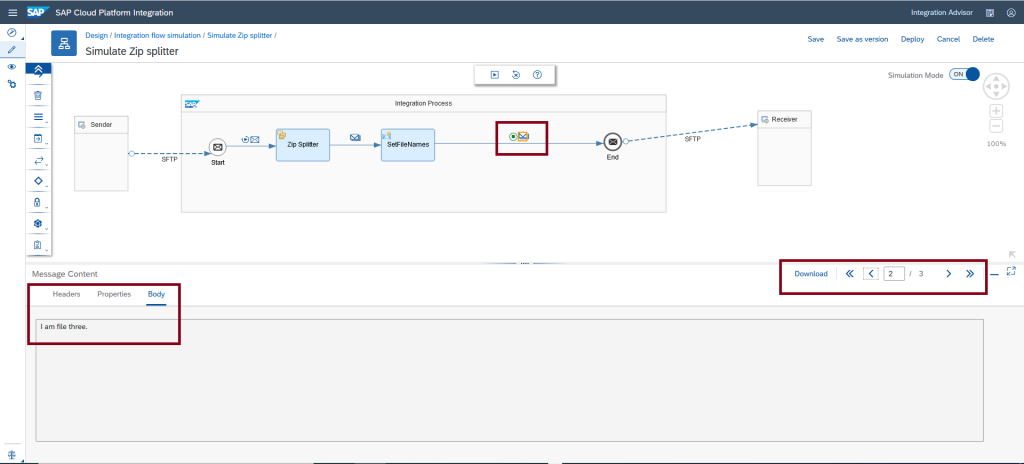
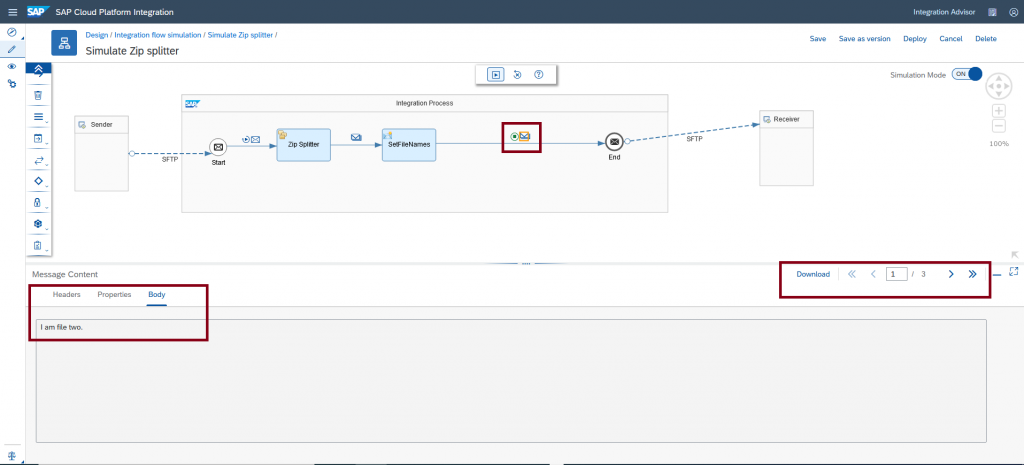
Zip file is split and the content of each text file will be shown.
Content of the file1.txt is displayed.

Content of the file3.txt is displayed.
Content of the file2.txt is displayed.
Note: When the binary file is edited, it will invalidate the file and file name and content will be removed. Lets experience this behavior.
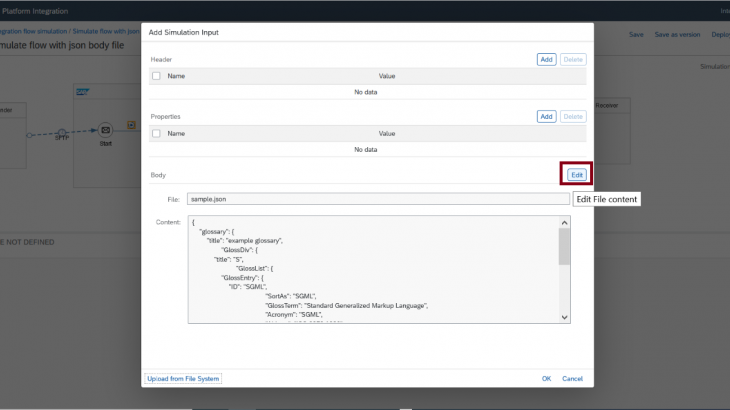
Click Edit button.
Content section of the Body is available for an input.
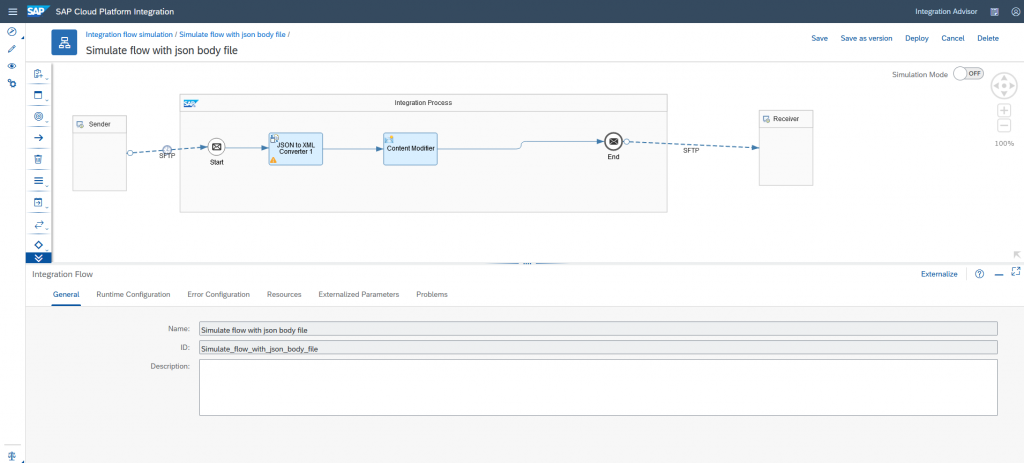
Scenario # 2 – JSON file from SFTP is converted into XML and sent to the receiver.
Let simulate this scenario through simulation feature of an integration flow.
Step # 1 – Model the scenario as shown below.
Step # 2 – Define the start and stop point to simulate the subset of flow.
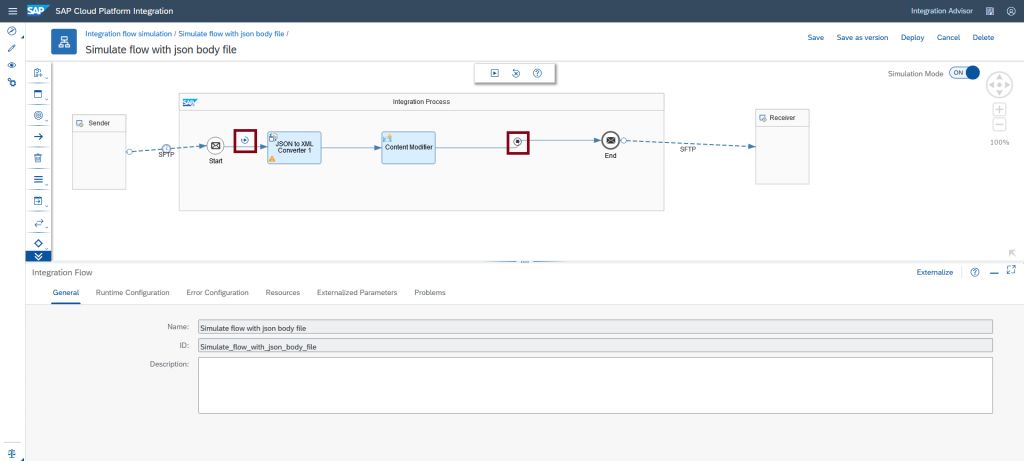
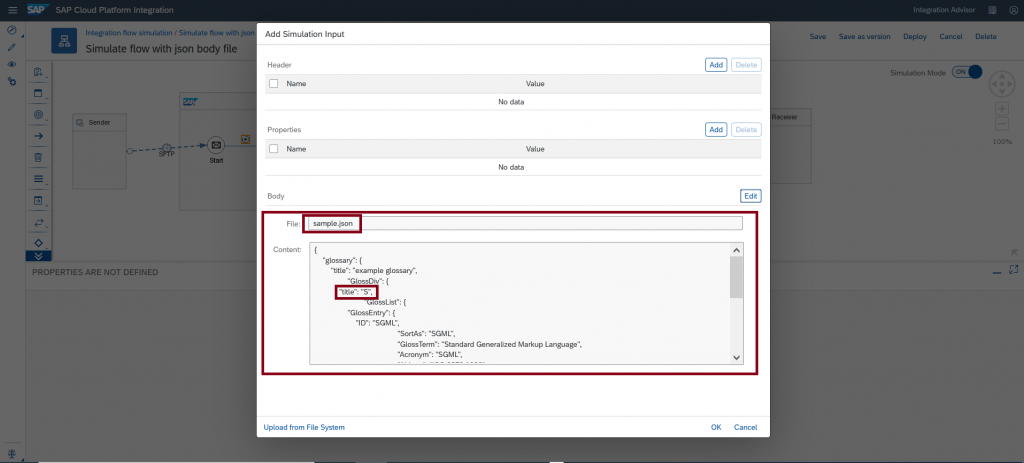
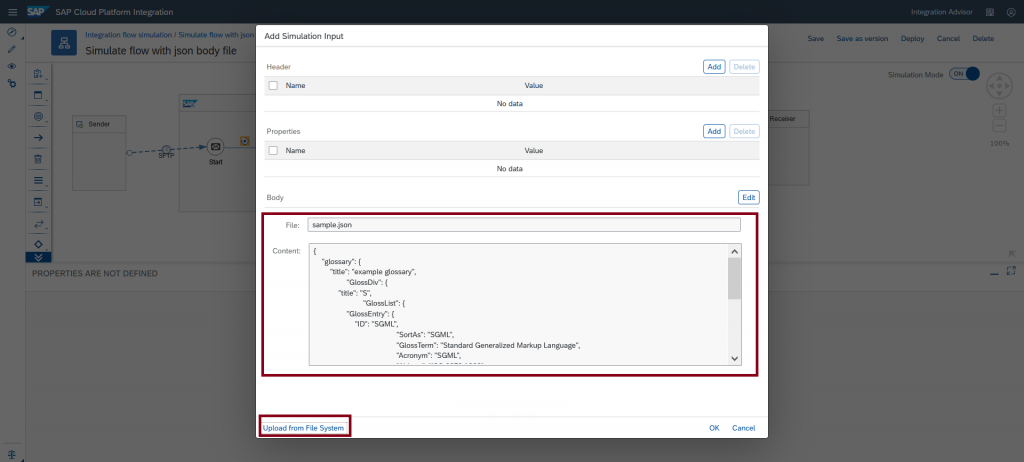
Step # 3 – In the simulation input dialog, upload sample json file as a body input file.
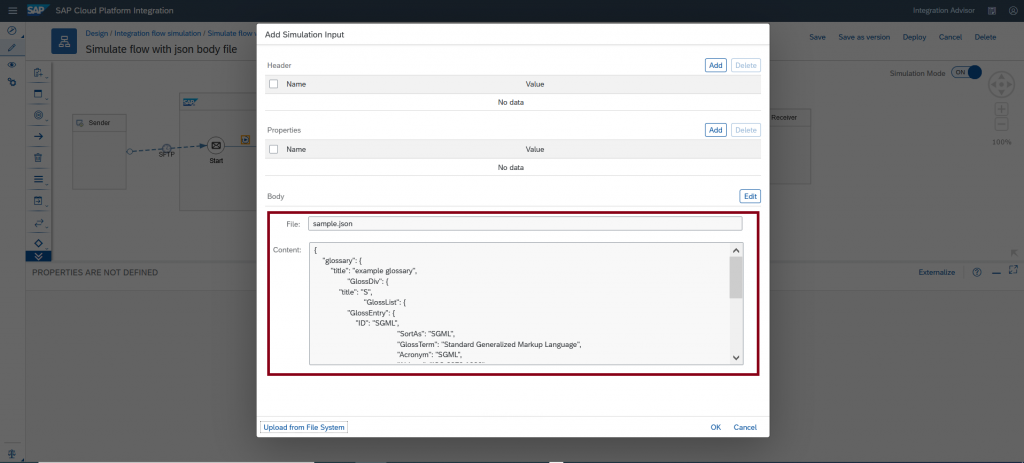
Note: Readable (Non-binary) file content will be displayed in the content section of the dialog.
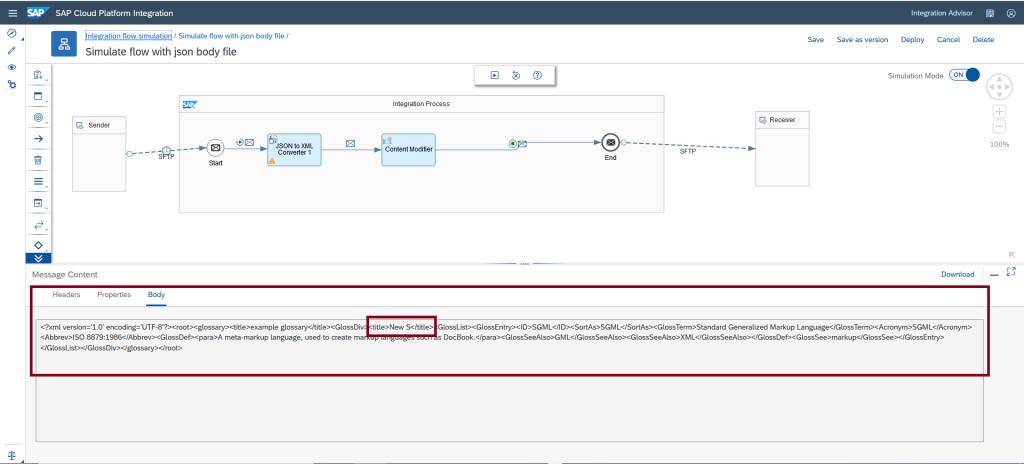
Step # 4 – Run the simulation, validate the outgoing message from the JSON to xml convertor and content modifier step, the json is converted in the XML format.
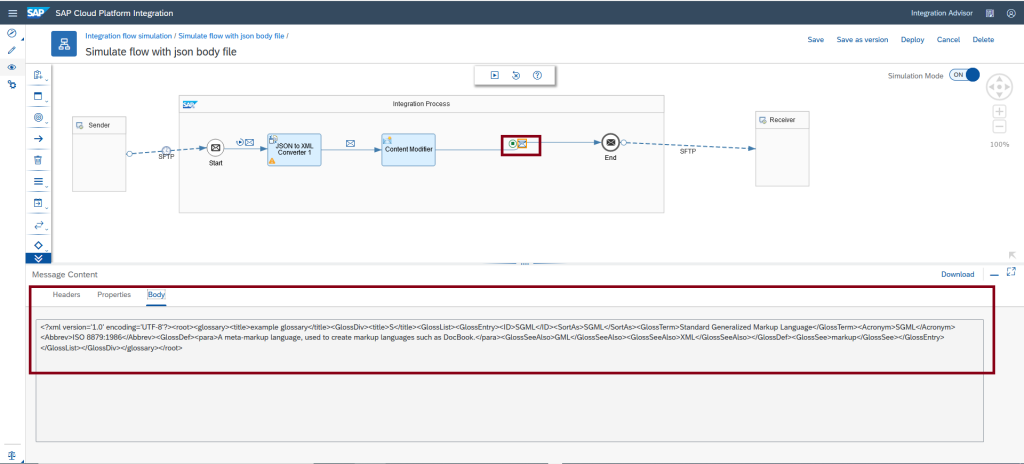
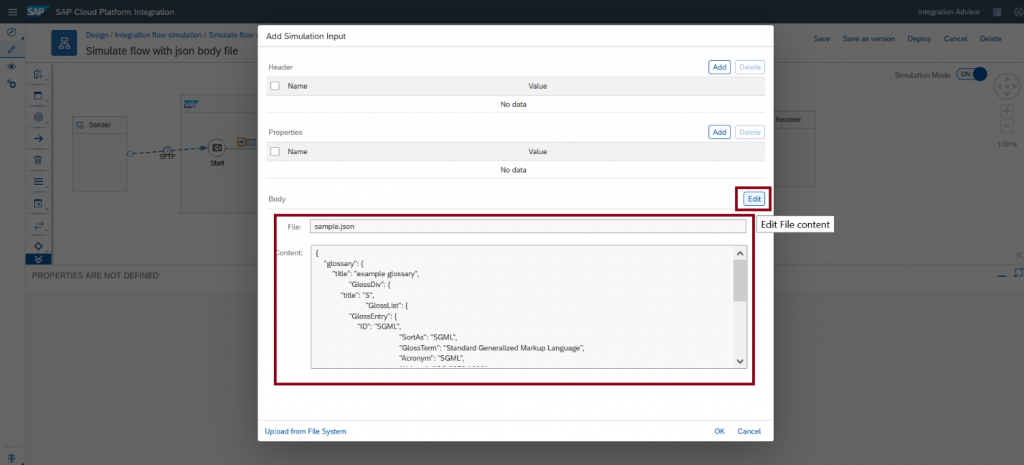
Note: When the readable (Non-binary) file is edited, it will invalidate the file and file name is removed. However, content of the file is available for modification. Let’s experience this behavior.
Click Edit to modify the content of the body file.
Content of the file is modified.
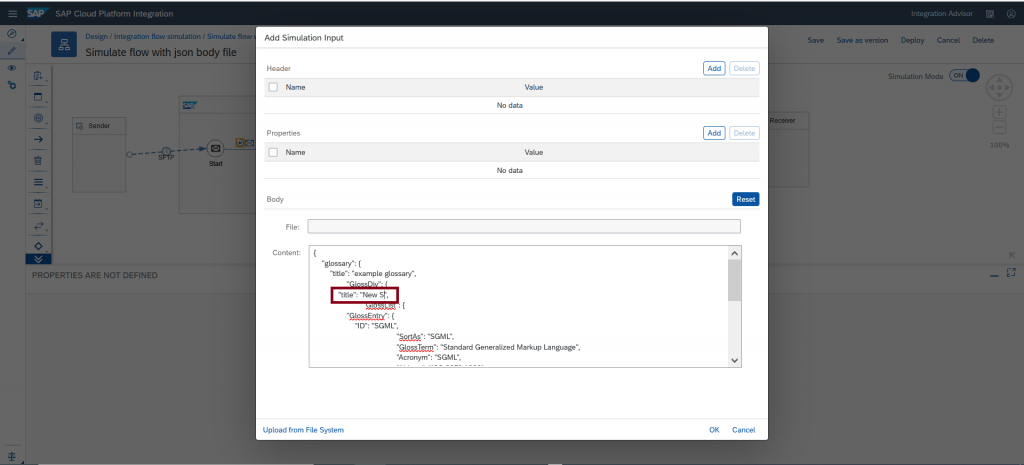
Run the simulation and expected output will be noticed.
Scenario # 3 – How to revoke the modified content to the original content of the file.
Step # 1 – Upload the body input file.
Step # 2 – Click Edit to modify the content of the file. File content is available for change.
Step # 3 – Modify the content of the file.
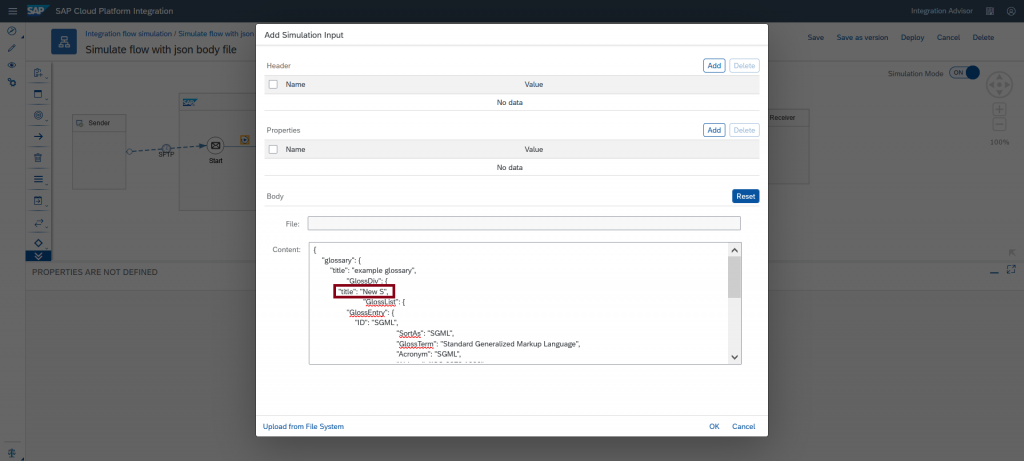
Step # 4 – Click Reset button to revoke the change to the original content of the file.
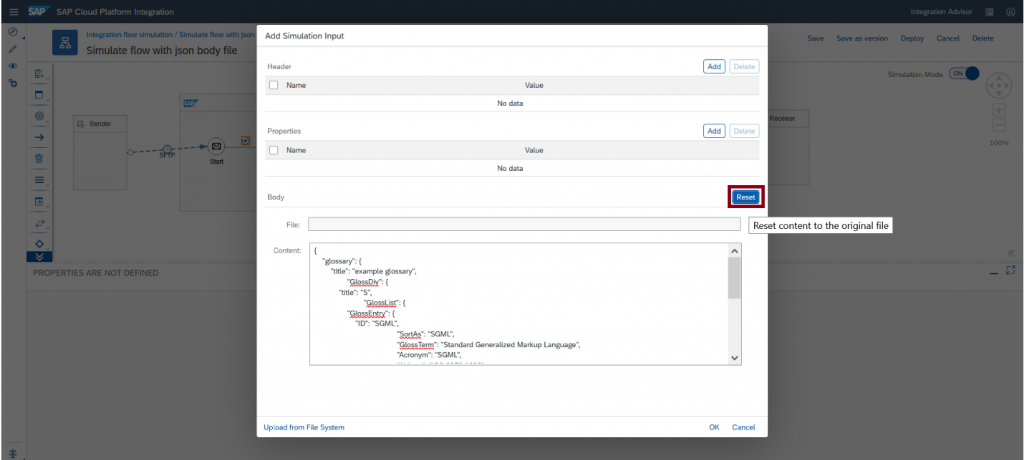
Content is reset to the original file you uploaded.
