With SP20 we enlarge the test strategy supported by PIT Tool. Until now it was only possible to do positive tests. Positive testing is based on the assumption that a message, which was successful in the source system, is expected to be successful in the target system as well. A positive test checks, that the content of a message – payload, headers and attachments are equivalent in source and target system.
But there are also situations, where you want to test that errors are handled correctly by the system. That means, for example, when a message fails in the source system, you expect to see the (same) error in the target system as well. This approach is known as negative testing. A negative test does not compare the content of two messages with each other, it checks only that they fail with same error message. That means, a negative test is successful, when a message fails, and the error expectation is fulfilled. Message content is not validated for negative tests.
Negative Tests
To create a negative test run configuration – first it needed a data set with unsuccessful messages in.
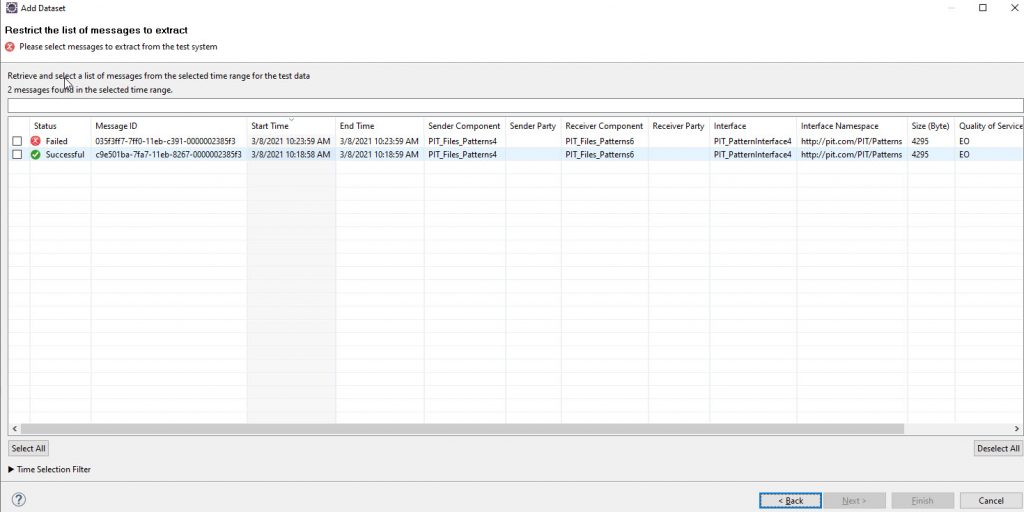
For this you are now able to also select such messages in the extraction of a Data Set. But please have in mind – that only message in a final status can be extracted. So be aware of the fact that for asynchronous messages a final error status can only be assigned manually – for example by cancelling the message in the message monitor.
If you like to do negative tests, you have to select at least one Failed Message to your data set.
In the test dataset editor you are able to take a look at the failed message as well as to the error itself.
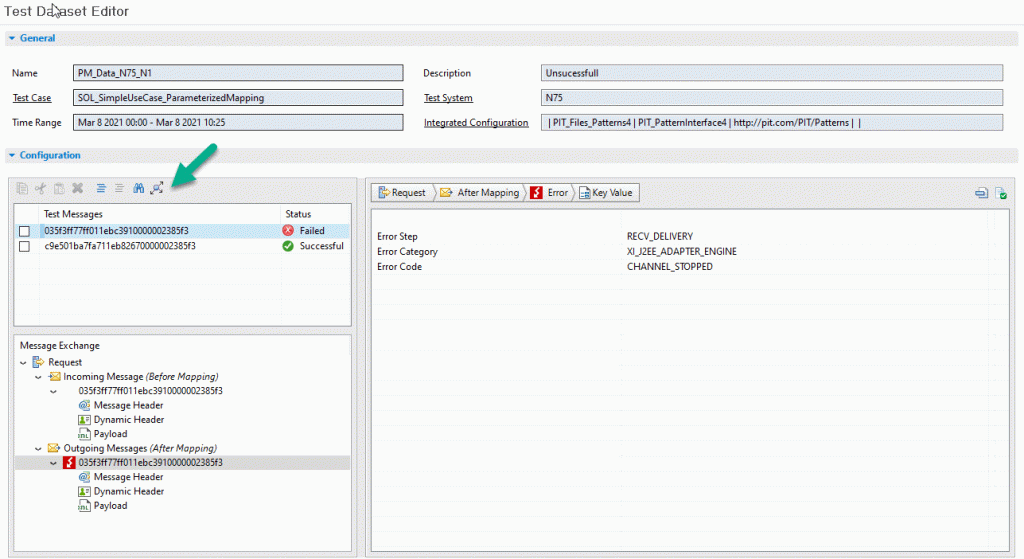
And in the graphical overview you can see the pipeline step where the error happened in the Source system. You can open this view over the button Show message structure.

For the Test itself you must create a Run Configuration.
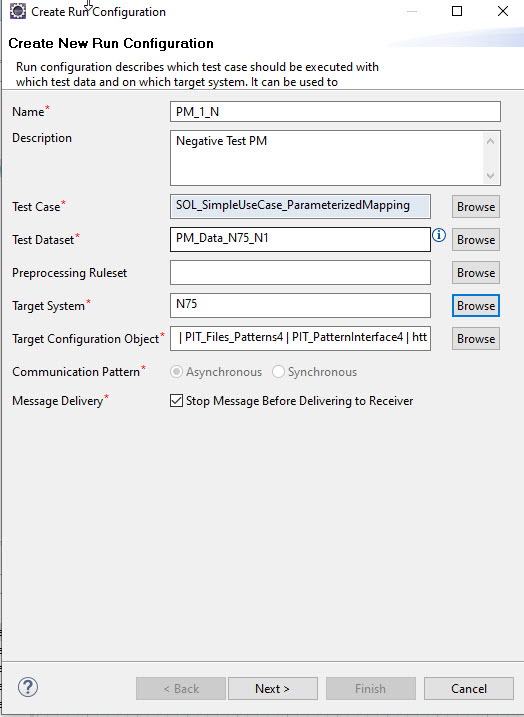
On the next screen, you see the part of the configuration for the negative tests. In this you can decide if you like to ignore all successful process messages for this data set or send them also to the target system. You can set also your expectations of the error behavior.
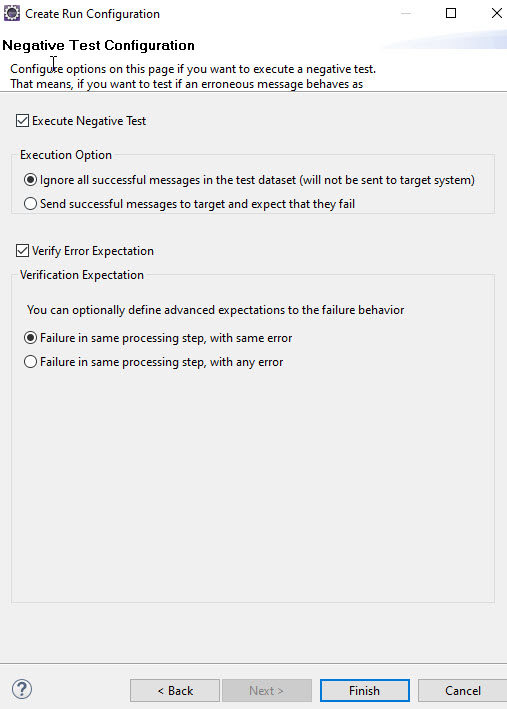
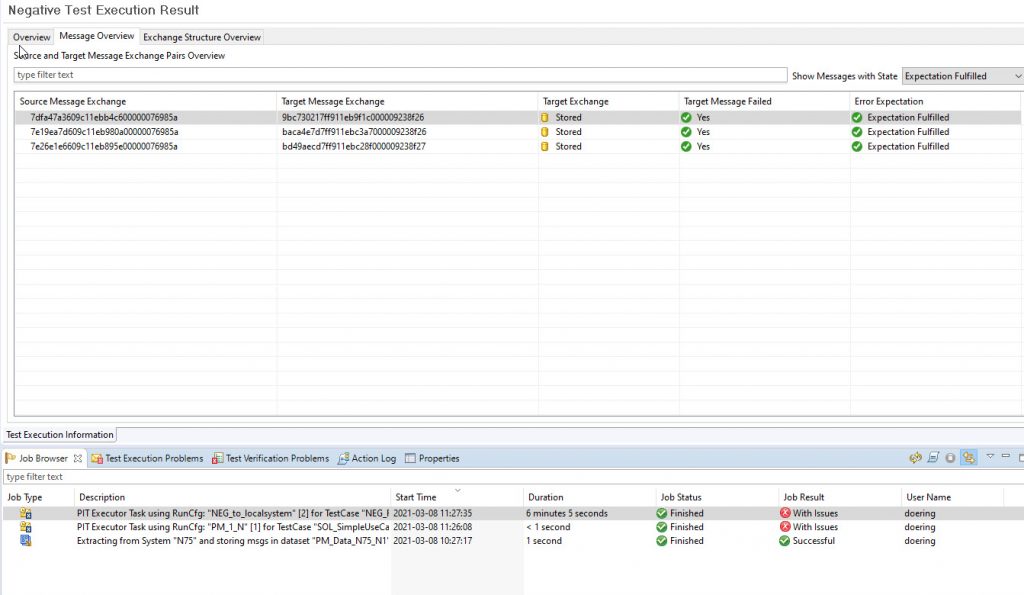
With this Run Configuration you now can start the negative tests. You will get an Execution Result page with the status information on.
The first example we have a mixed result.
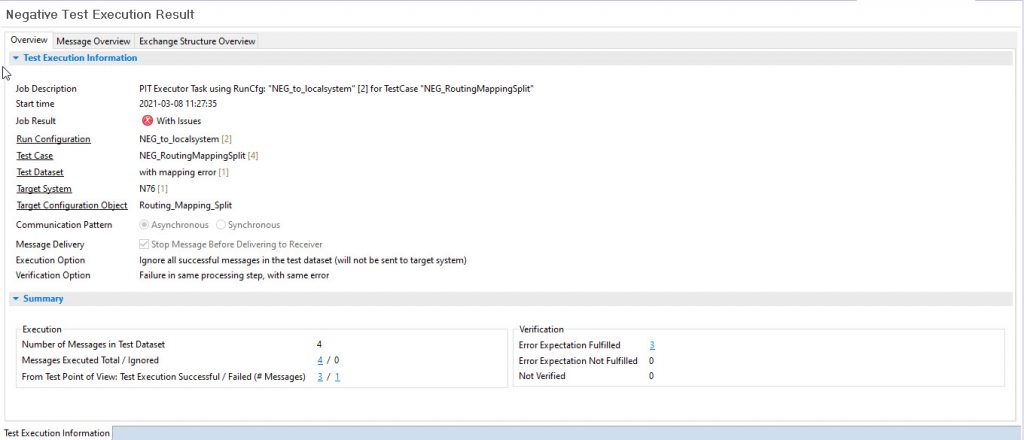
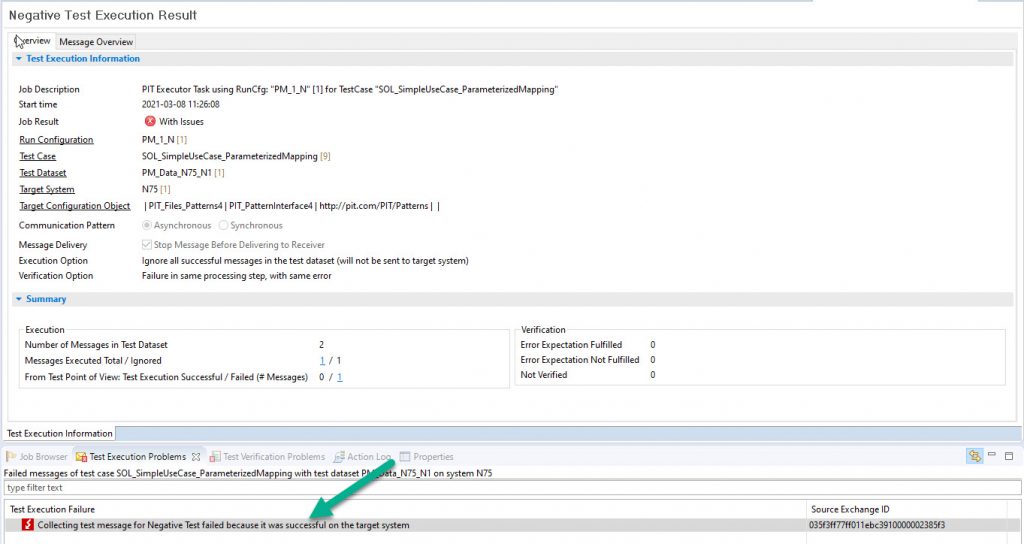
One of them not meet the expectation – and you can see the detailed message on the Test Execution Problem window.
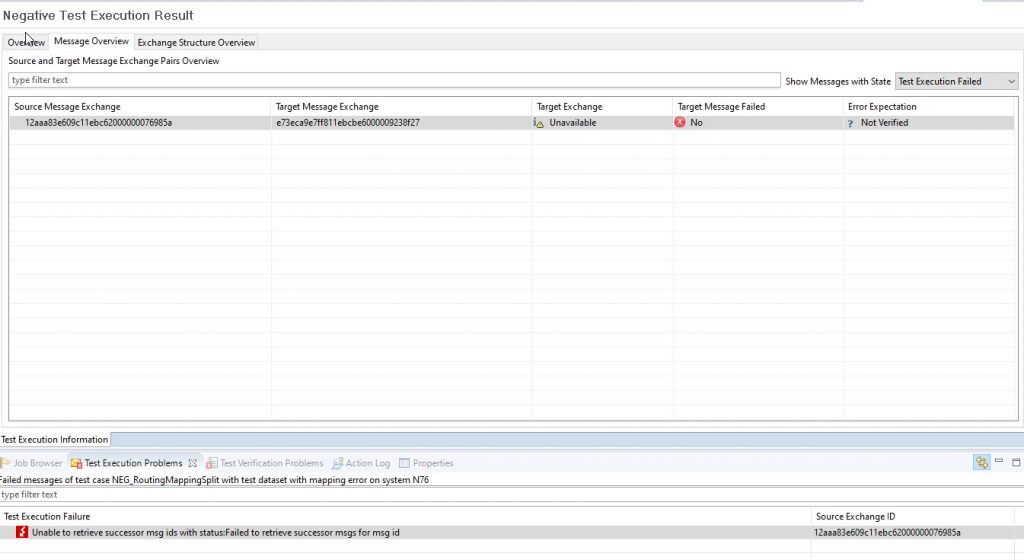
The other messages are successful from the Test Execution point of view. They have the same error in the sources and the target system and with this meet the expectation.
The next one fails –because the expectation was not meet – this message went thru the target System successful.
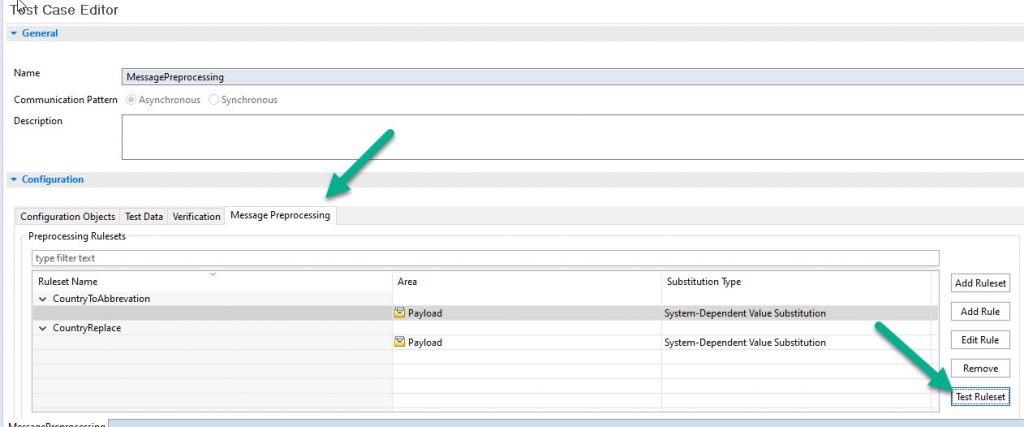
Message Preprocessing Test
In SP20, the preprocessing has been enhanced. Now you can test the Preprocessing before you send a message. On the Preprocessing tab – you now see the Test Ruleset Button. If you push this, you will see the new screen
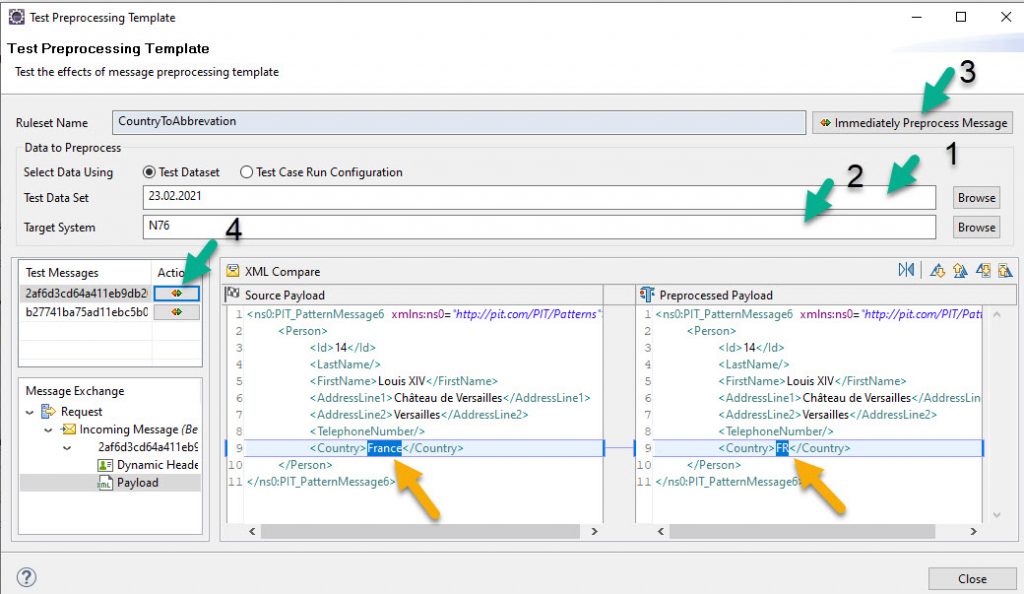
You can now use a Data Set (1) or the Test Case Run Config as Source and you have to fill in a target system (2). Then you can active the Immediately Preprocessing Message (3) and select one test message for the processing (4). With this you get the test result in the Preprocessed Payload window.
For a better understanding I add the Rule Set for this example.
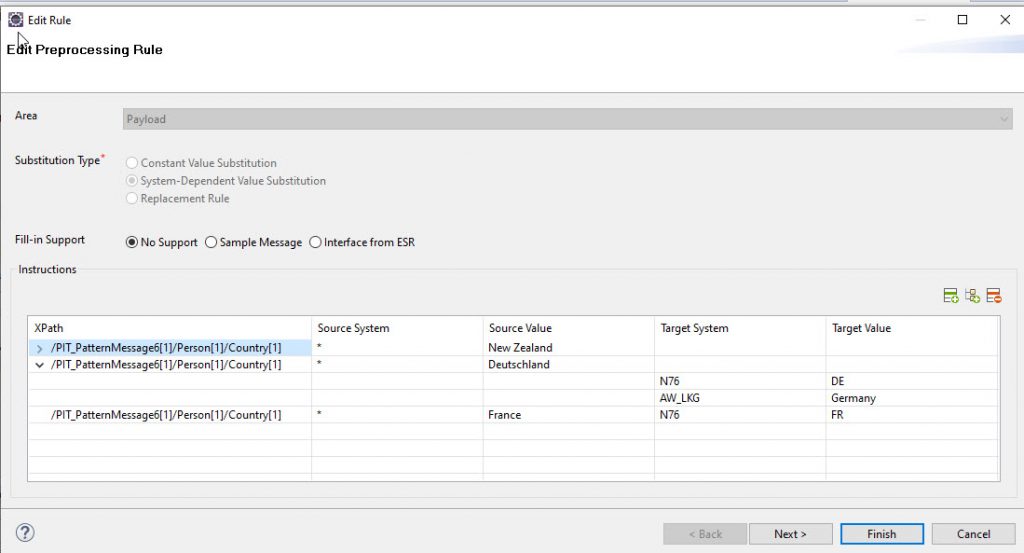
Preprocessing Rules out of the Data Set Editor
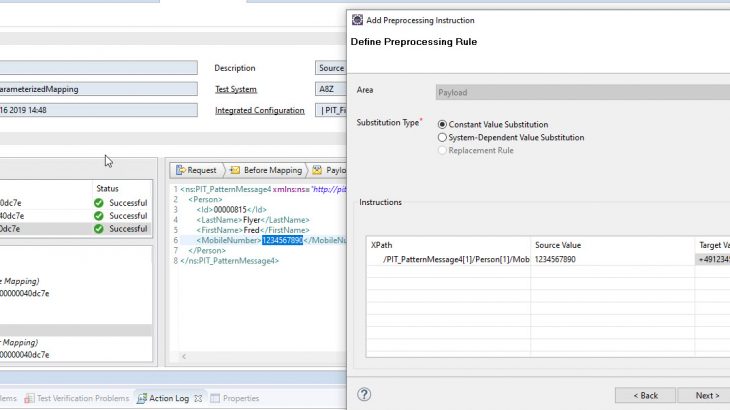
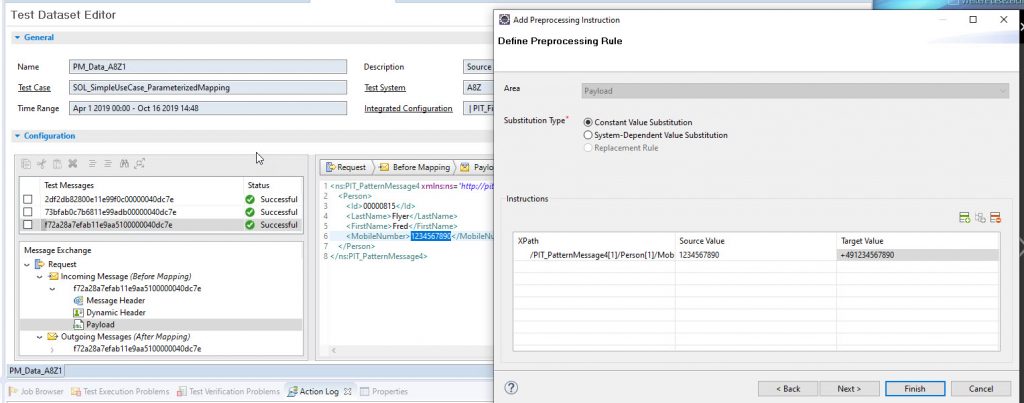
You can configure message preprocessing rules out of the test dataset editor, using the content of an XML-based payload or a dynamic header from a selected incoming message.
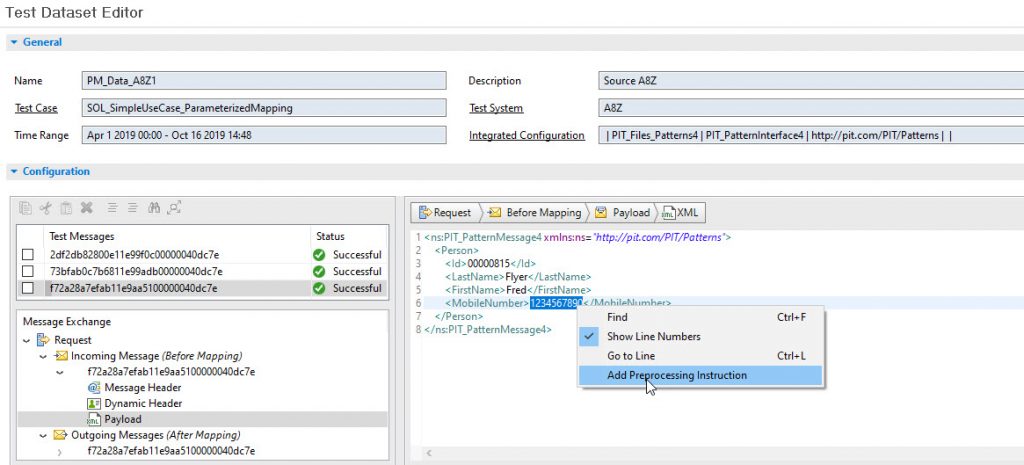
Now the Preprocessing definition will open and you can create a new Rule Set or add a rule to an existing Set.
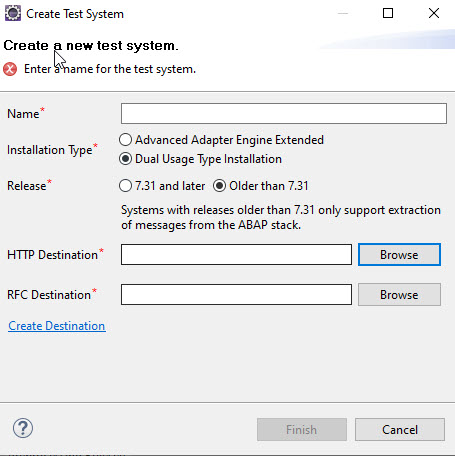
Older than 7.31 ABAP Stacks as Source Systems
With SP20 it is now possible to use the ABAP part of a Dual Stack System older than 7.31 as a source system for classical Scenarios only.
For this a new Test system type must be created.
