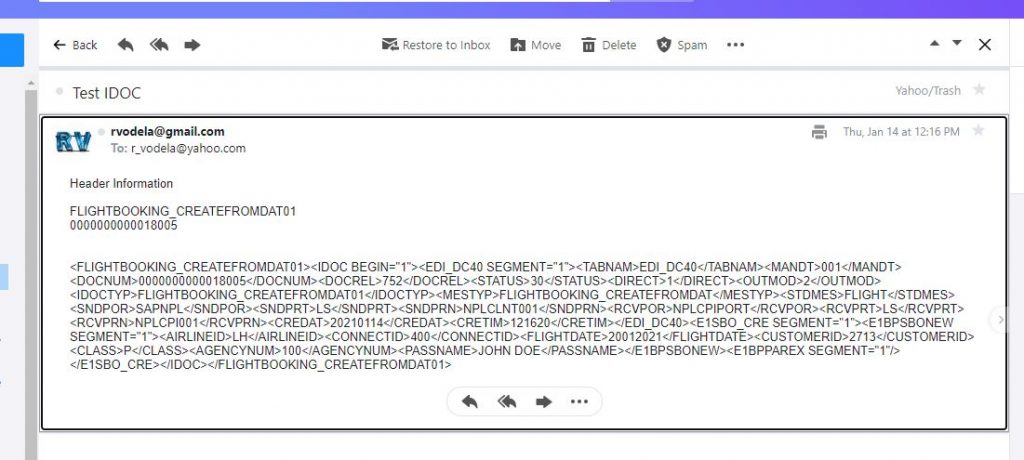
In this Blog I will describe the different Steps on an outbound IDOC Process that sends an IDOC of basic type FLIGHTBOOKING_CREATEFROMDAT01 and Message Type FLIGHTBOOKING_CREATEFROMDAT to SAP cloud Platform Integration iflow that sends the IDOC XML to an email account. It is assumed that you have familiarity with CPI.
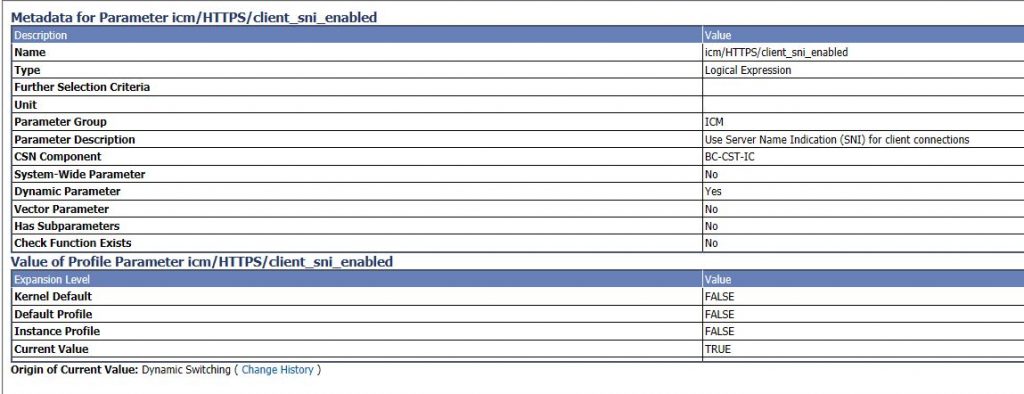
1. Use Transaction RZ11 to set the value of the profile parameter icm/HTTPS/client_sni_enabled to true.
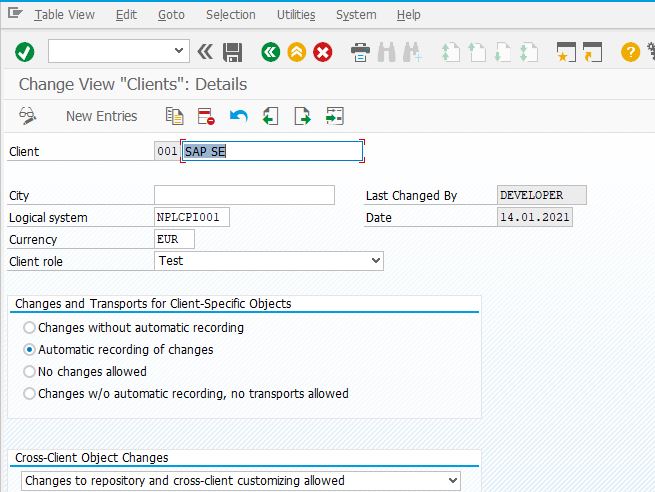
2. Use Transaction SALE to Create Logical System and then assign the Logical System to the client.
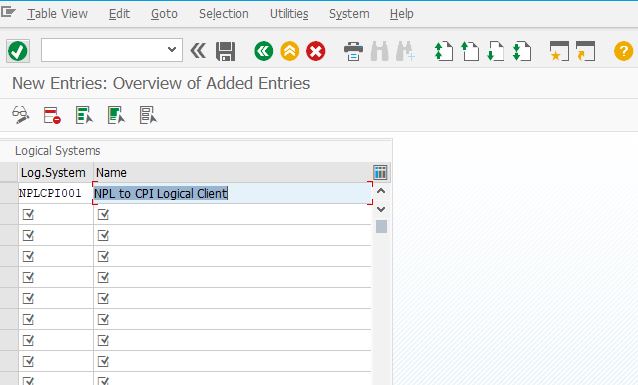
Create Logical System
3. Assign the logical System to Client
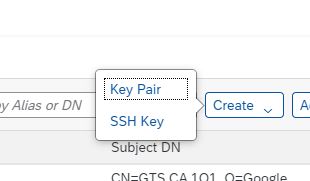
4. In the Cloud Platform Trial Account – Go the integration Suite and Choose Operations View Choose leystore and create a new Key pair for CPI
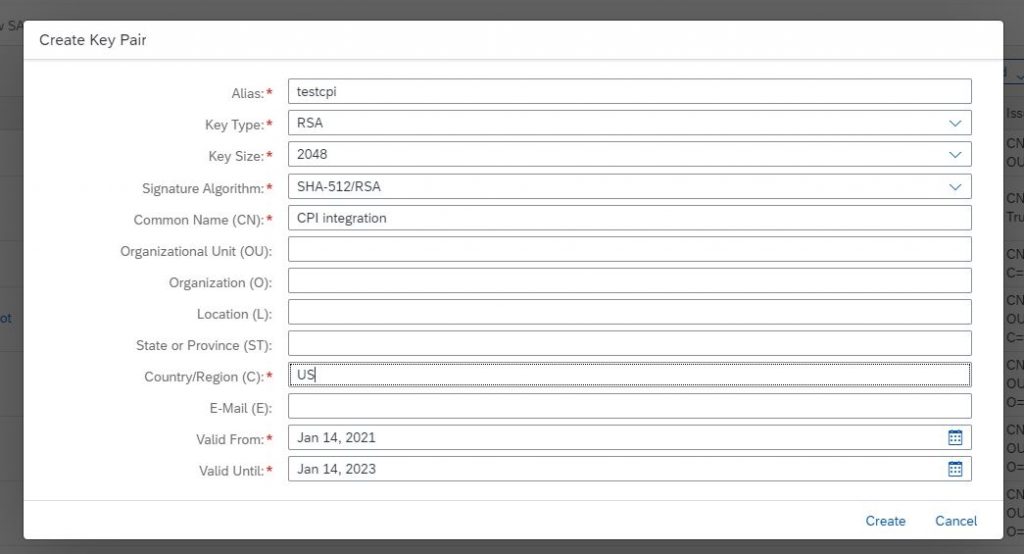
5. Enter the required value and choose Create and down the Certificate file
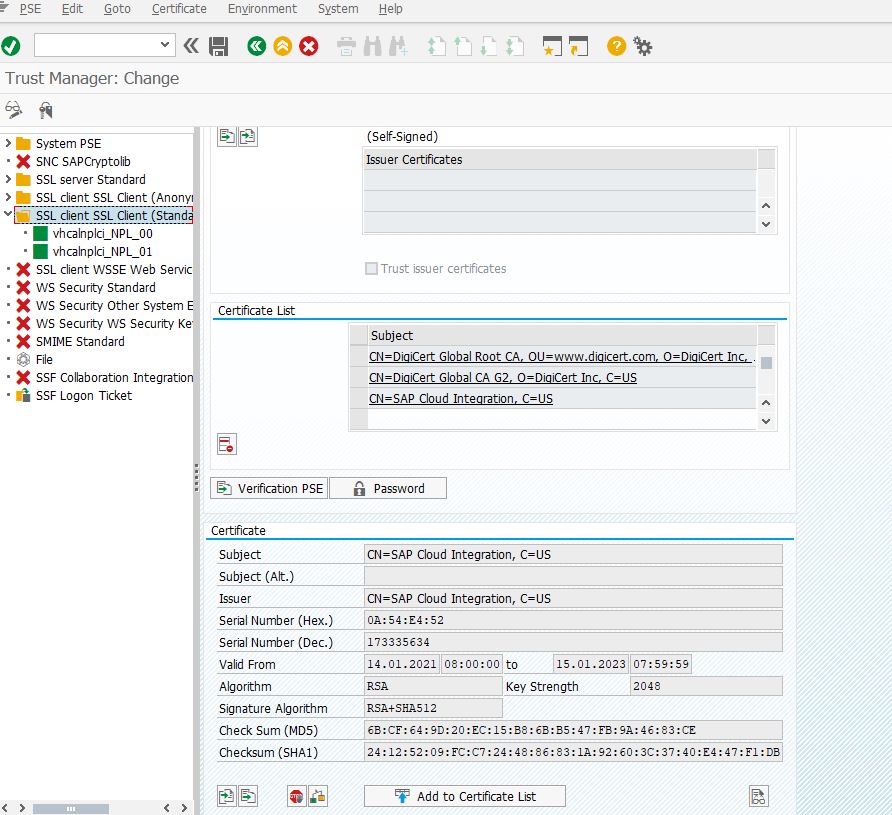
6. Back in ECC NPL ABAP System – Start the transaction STRUST and choose SSL Client Standard and import the file that was downloaded in the previous step – Choose Add Certificates and Save these changes
7. Create and RFC Destination type G in transaction SM59

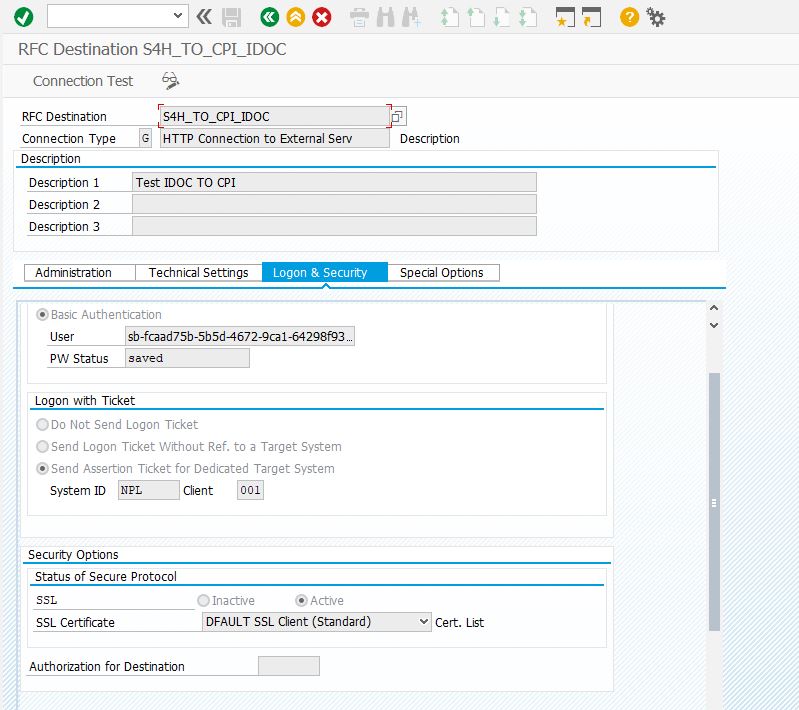
the path prefix is the IFLOW we will create in subsequent Steps with the the user name and password is the clientid and client secret that you can get the CPI Service instance config file.. For SSL Certificates choose the Default SSL that you had imported the client Corticates in STRUST.
8. Check the RFC Connection you can 500 or Not Found is the IFLOW is not yet created.
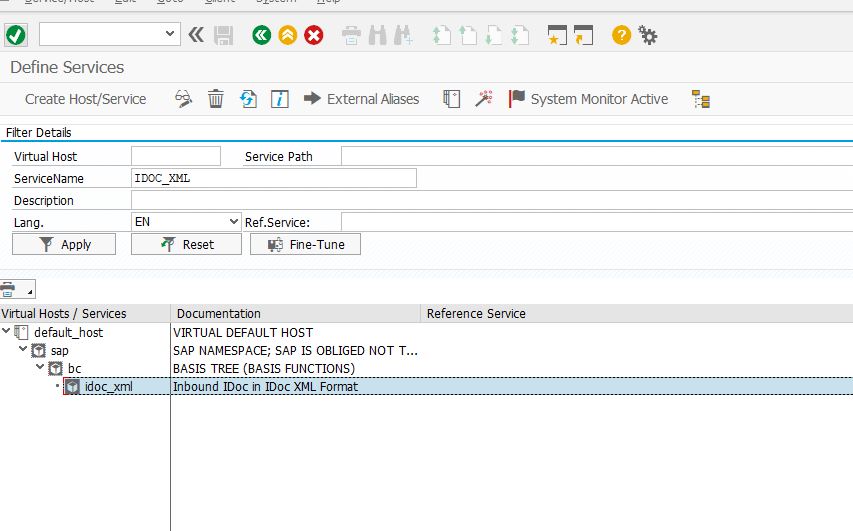
9. As we plan to send IDOC we need to activate the Service /sap/bc/idoc_xml show below
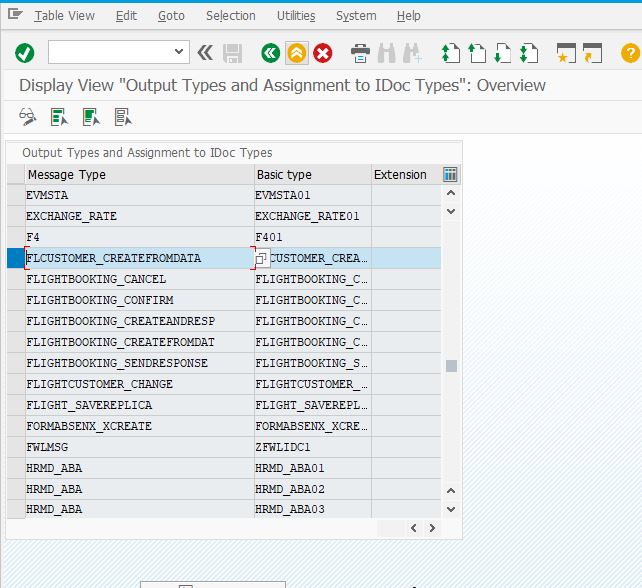
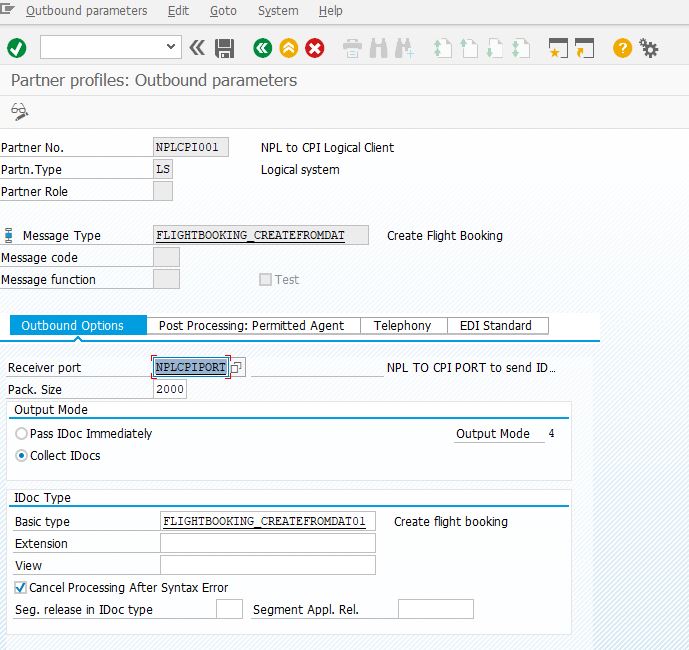
10) To Select the IDOC message type and Basic type go transaction and note FLIGHTBOOKING_CREATEFROMDAT and Basic type FLIGHTBOOKING_CREATEFROMDAT01
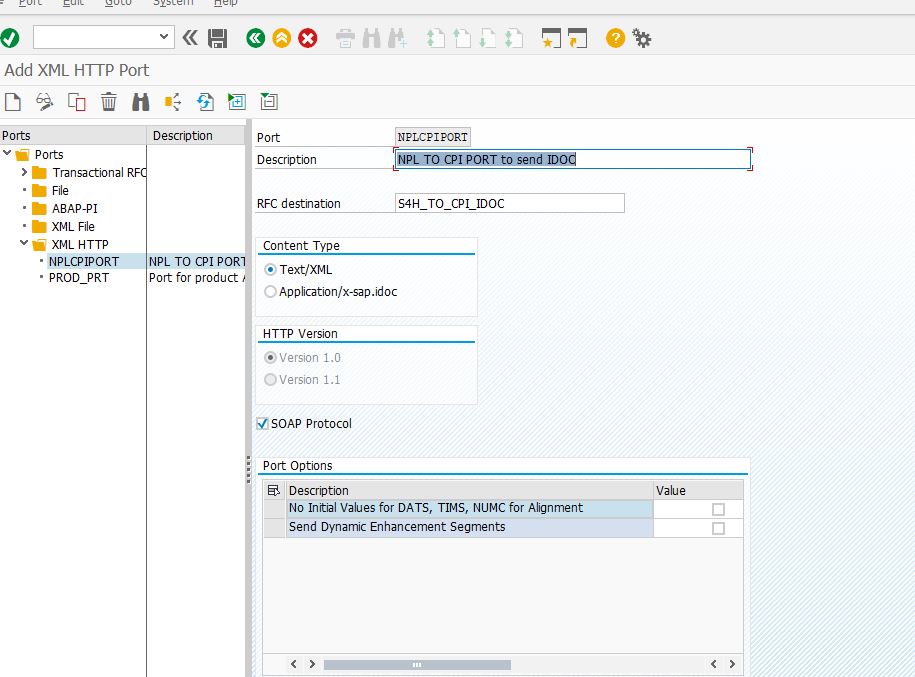
10. Go to transaction WE21 and Create XML-HTTP port that is used to send IDOC XML
11. Create a Partner Profile for NPLCPI001 for partner type LS using the transaction WE20
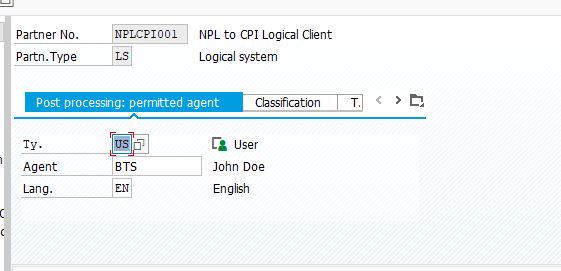
12. Configure the output bound Parameters in the same transaction WE20
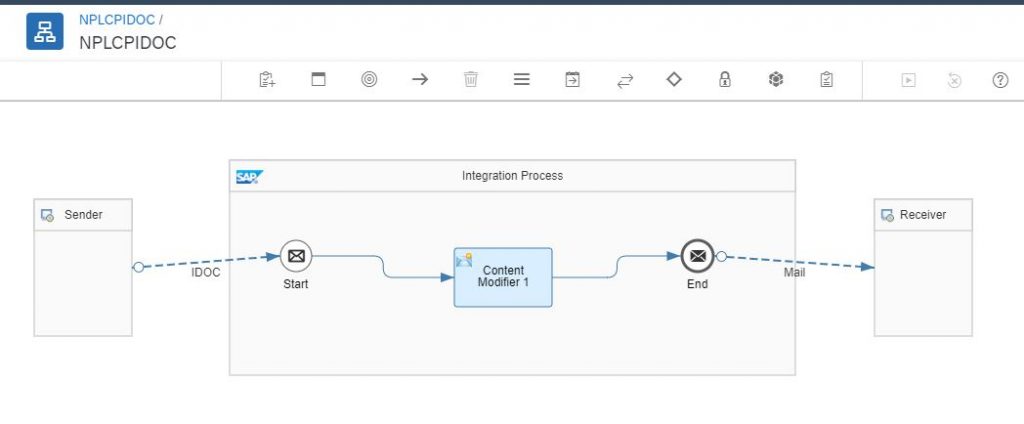
13. Now We Create the IFLOW in cloud Platform Integration Suite as shown below
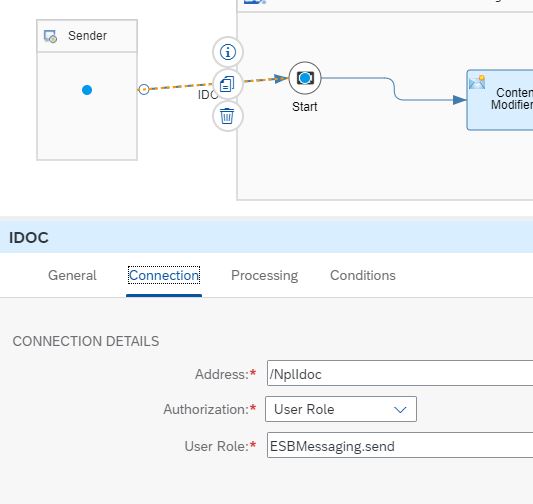
14. Choose the IDOC and enter the parameters as follows. Please note that /cxf is omitted from the address field as this automatically added by CPI on deployment
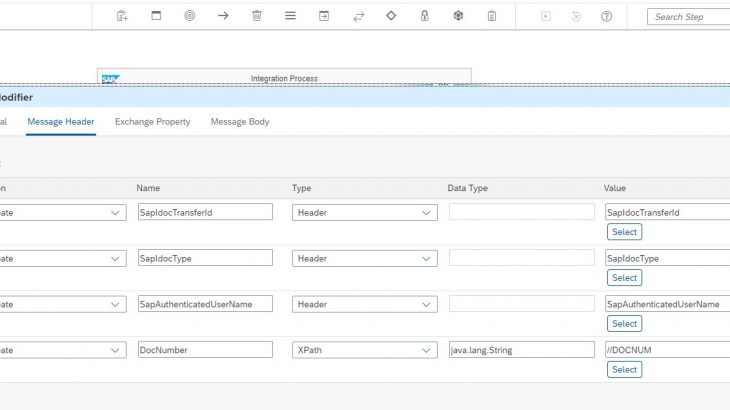
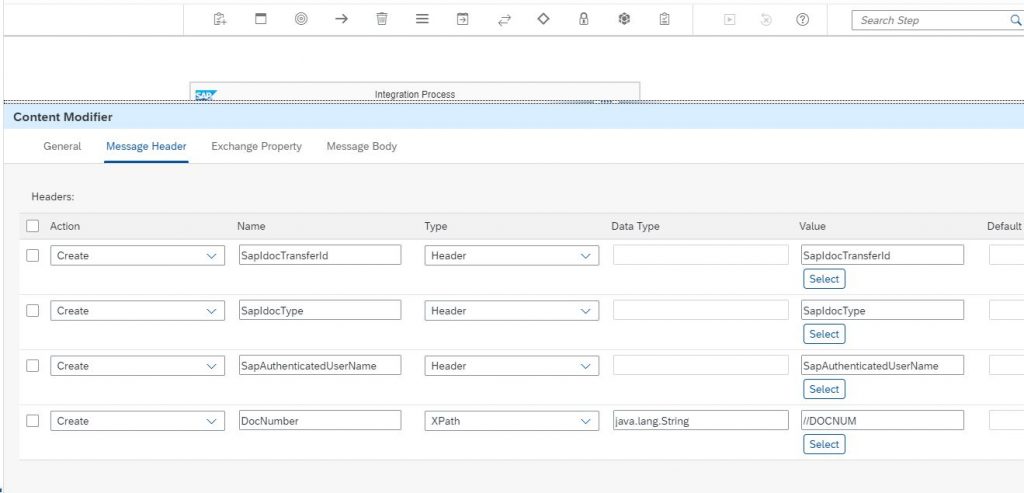
15. In the Content Modifier we will add three header variables that we will send in the email body. The content Modifier is as shown below
16. To configure email we need to create email credentials in the security material in the operations view.
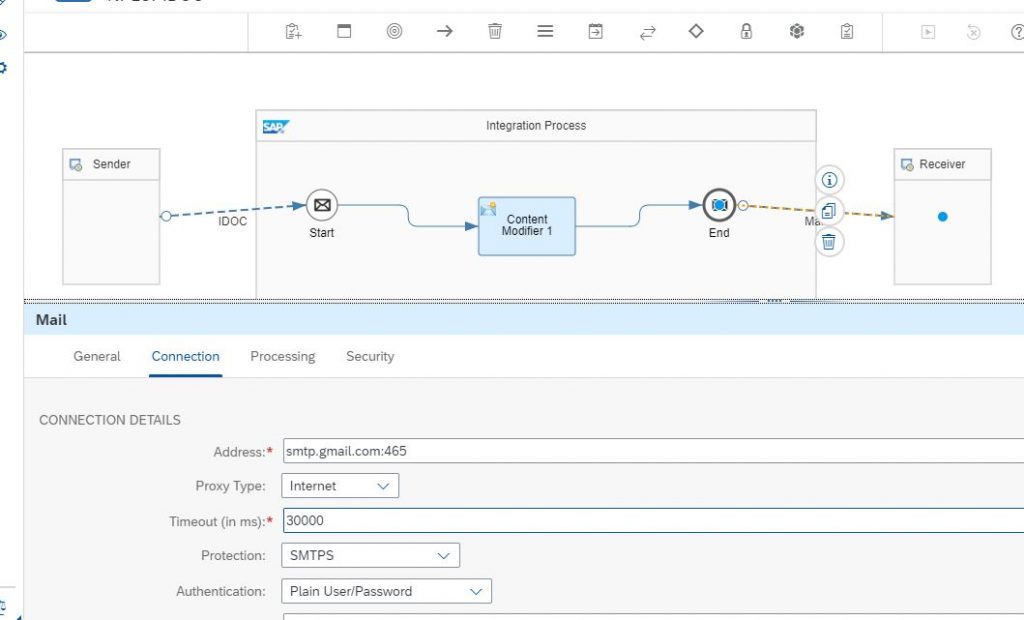
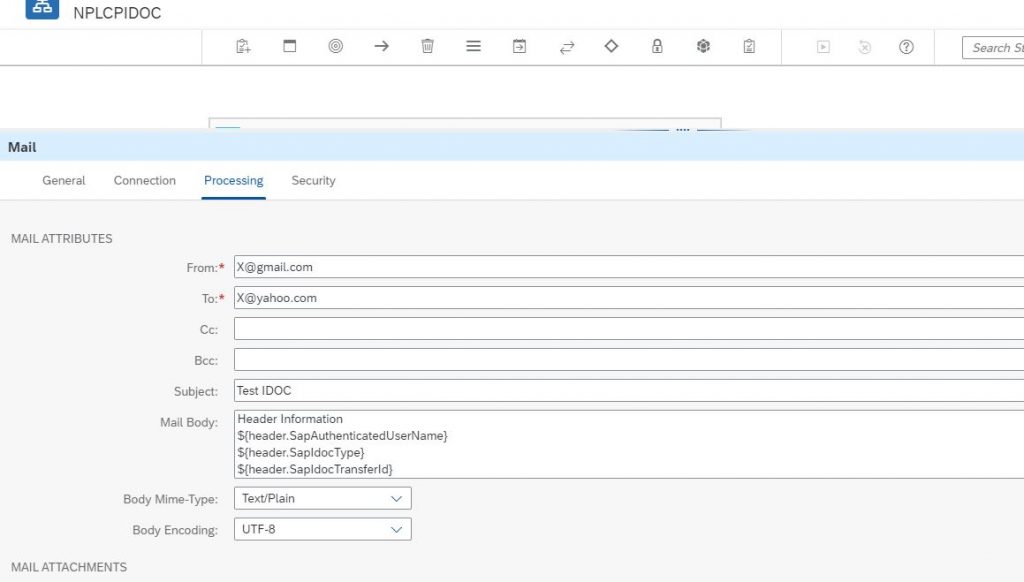
17. Configure the Email Adapter properties as show below
18. Save and Deploy the Integration and make sure that it has started by checking in the operations view
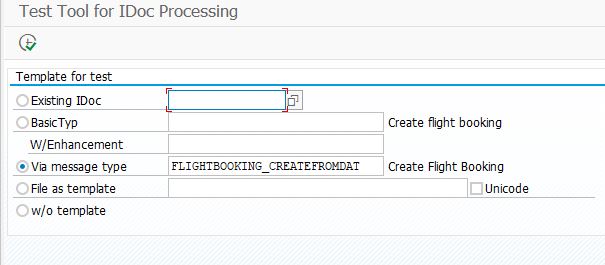
19. To Test this we will Trigger IDOC from WE19 and choose the the option via message type and enter FLIGHTBOOKING_CREATEFROMDAT
20. Click the Root EDIC and enter the following information
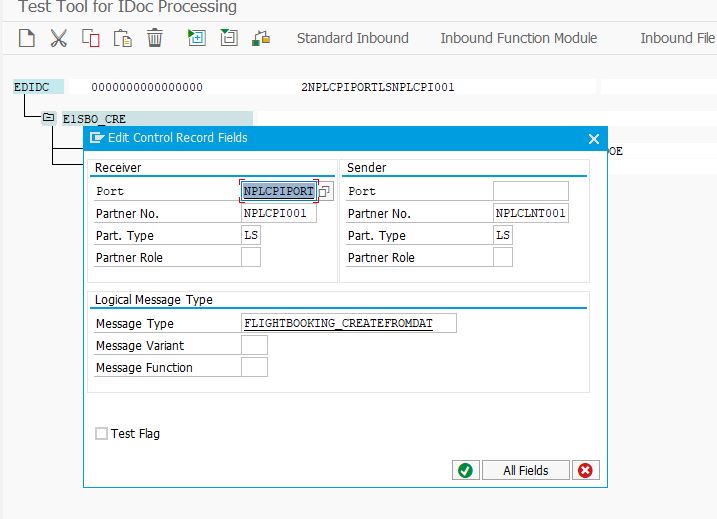
21. Click the node E1BPSBONEW and enter some valid information for Flight Booking
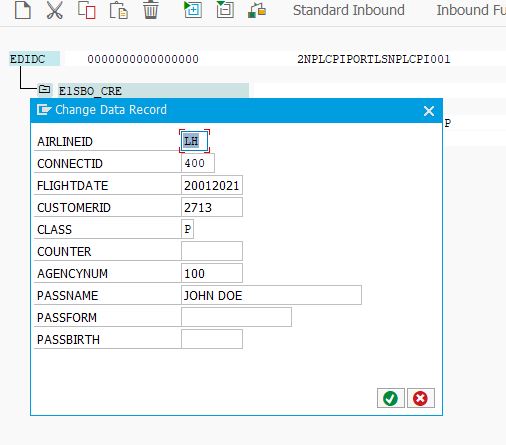
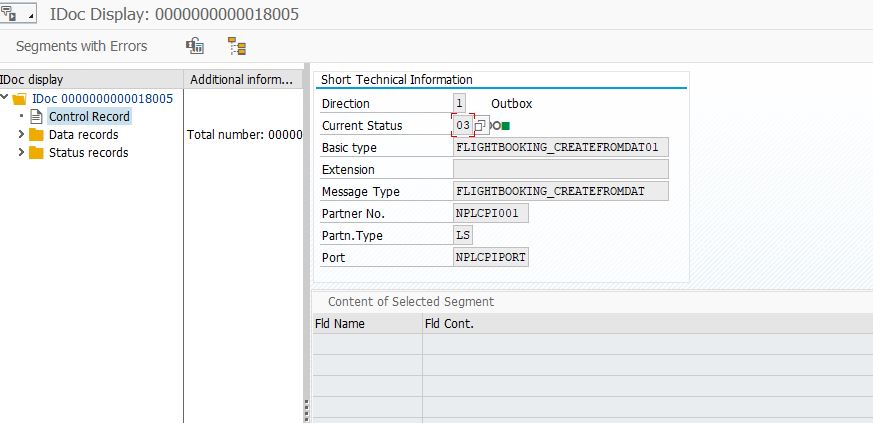
22. We have all the information for the IDOC – Click Standard outbound processing on the top right and make sure any errors are resolved. You can also check in Tcode WE02 that an IDOC with Status 3 has been created due the previous steps.
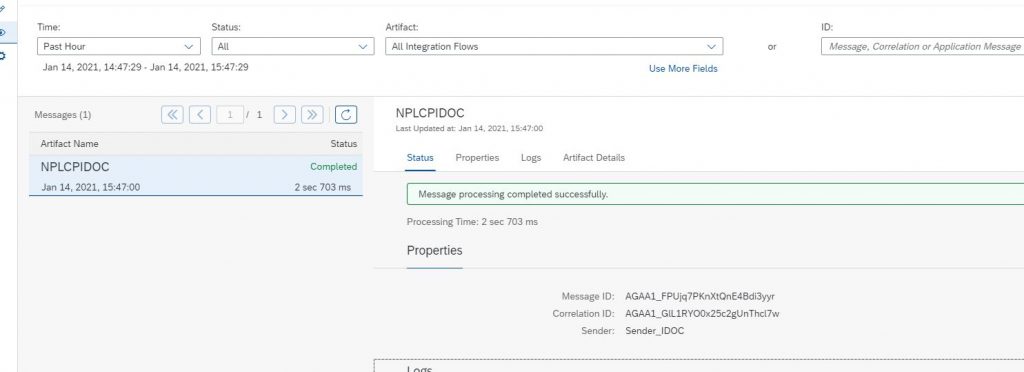
23. Now we go the SAP Cloud Platform integration and choose operations View – Select the Deployment and choose View Message Monitoring and make that success message is displayed for this or look at any error message by change the info to trace and resend the idoc to resolve any error
24. Check you email account to verify the email has been received as configured in the email adapter settings the IDOC content
