Purpose
This blog describes how to replicate model data between two SAP Analytics Cloud systems using Data Export Service within an OData connection. This workflow is very suitable for the movement of data from production to development environments or vice versa, and for models that contain large volumes of data. Note that a pre-existing model must exist on the target system.
Steps
The steps to replicate data from one tenant to another can be broken down into 6 easy to follow steps:
- Configure OAuth Client.
- Locate the source tenant URL.
- Locate the source model ID.
- Create a remote connection.
- Set up import data.
- Map and import data.
Let’s take a closer look at each individual step.
1. Configure OAuth Client.
In order to send requests to the Data Export Service, you must first set up an OAuth client on the SAP Analytics Cloud source system. This requires administrator access.
- Go to System > Administration in your SAP Analytics Cloud source system and select the App Integration tab.
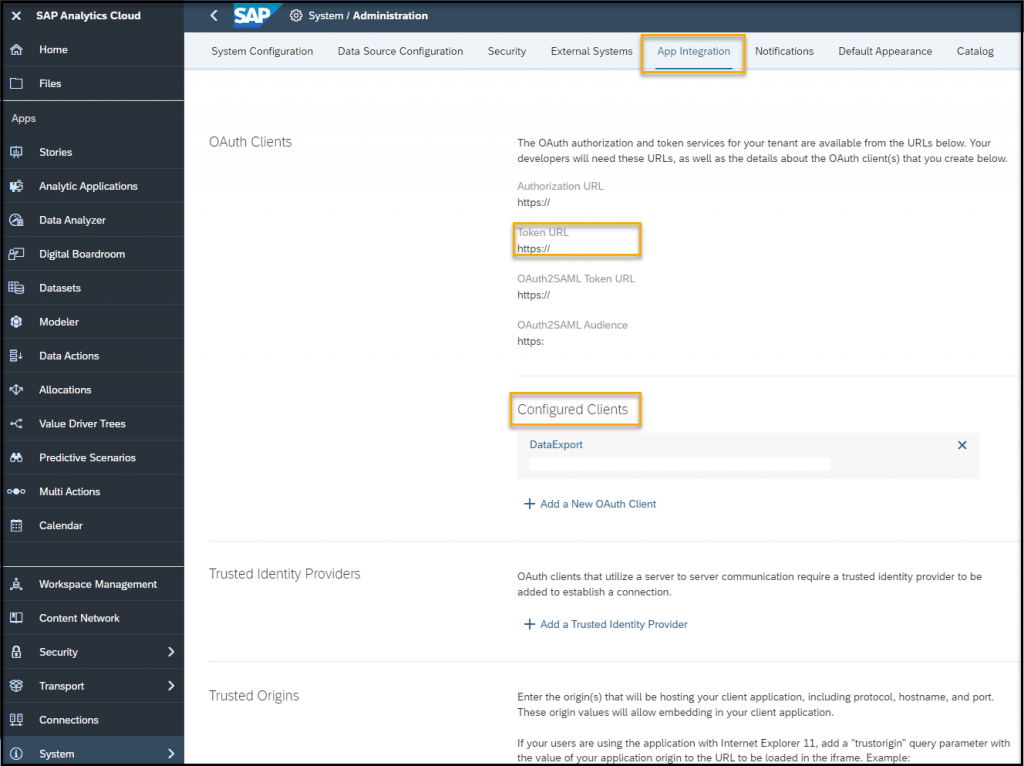
- Observe the list of URLs in the OAuth Clients section and make a copy of the access token URL under Token URL, as this will be needed in a future step.
- Select Configured Clients within the OAuth Clients section.
- Click Add New OAuth Client.
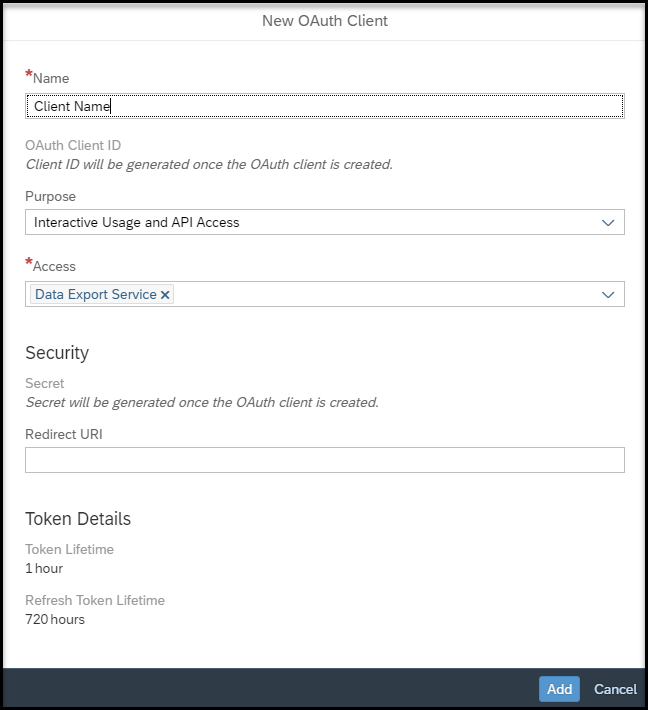
- Complete the required fields by first entering a client name.
- Under Purpose, select Interactive Usage and API Access.
- Under Access, select Data Export Service.
- Once the OAuth client has been created, note down the OAuth Client ID and the Client Secret. These values will be used to send requests to the Data Export Service.
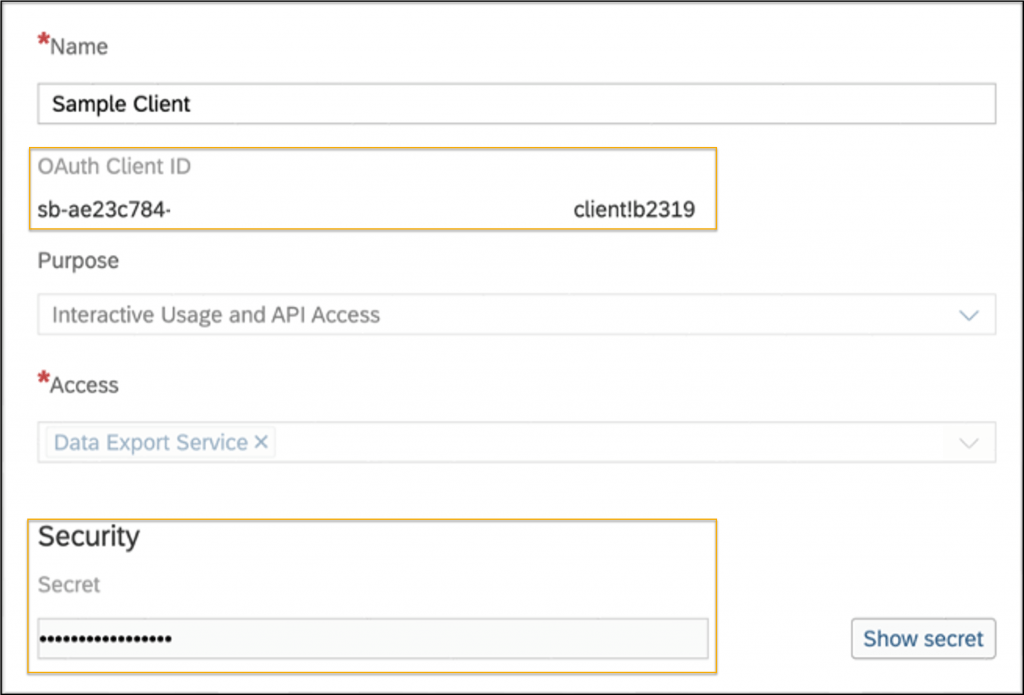
- After configuring the OAuth client, you should have access to the following values, to allow you to send a sample request in Postman, custom applications or any other system that supports OAuth flow.
- Access token URL
- OAuth Client ID
- (Client) Secret
- Access token URL
2. Locate the source tenant URL.
- Go to System > Administration in your SAP Analytics Cloud source system and select the System Configuration
- Scroll down to Link My Tenants and make a note of the SAP Analytics Cloud URL, as this information will also be required later.
3. Locate the source model ID.
Each model has a unique identifier (ID). This can be obtained directly from the SAP Analytics Cloud URL on the source system. When you access a model, the model ID is referenced at the end of the URL after the last backslash “/”.

Make a note of this model ID as this is required in future steps.
4. Create a remote connection.
Create a remote connection on the target system, to connect the source and target SAP Analytics Cloud systems.
Note that a new connection is required for each model as every connection is specific to a model on the source system.
- On the target SAP Analytics Cloud system, go to Connections and click on the +
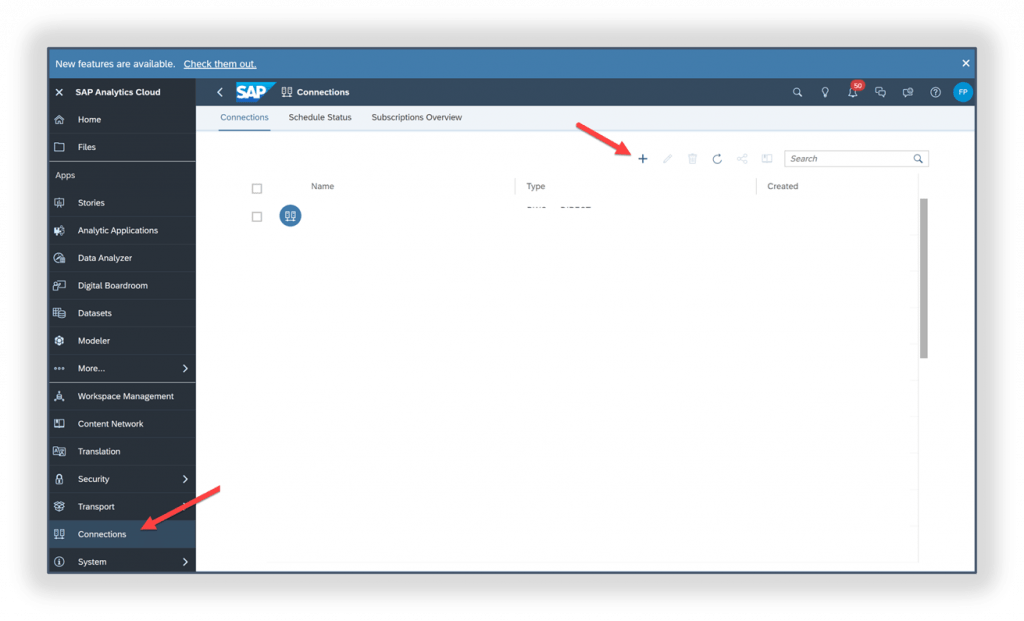
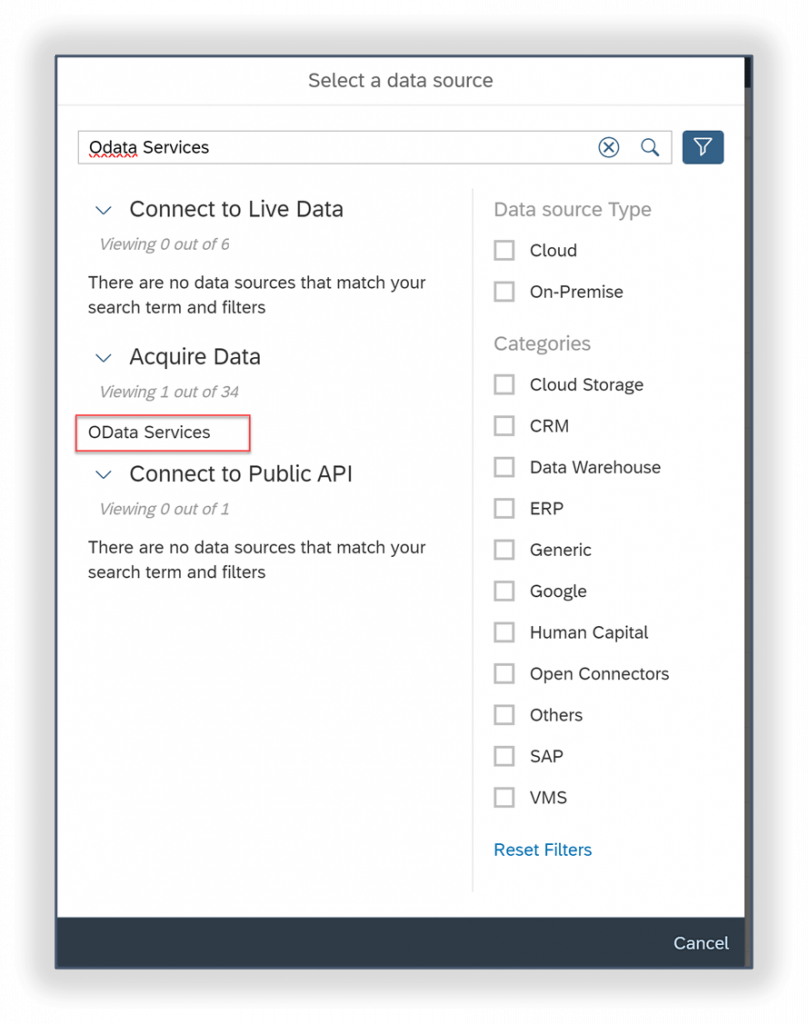
- In the Select a Data Source dialog, select OData Services, under Acquire Data.
In the New OData Services Connection dialog, specify:
- Connection name
- Description (optional)
- Use the source tenant URL, along with the Model ID, obtained in the previous sections, as part of the Data Service URL using the following format: https://<<TenantURL>>/api/v1/dataexport/providers/sac/<<modelID>>
- Ensure that there is no backslash “/” at the end of the Data Service URL
- Set Authentication Type to OAuth 2.0 Client Credentials.
- The OAuth Client ID from Section A OAuth Client Setup
- The Secret from Section A OAuth Client Setup
- The Token URL from Section A OAuth Client Setup
- Click Create.
- For errors, check that all required fields are correct and ensure that the URL follows the format mentioned above.
5. Set up import data
- On the target system, open a pre-existing model and select Data Management.

- Click Import Data > Data source.
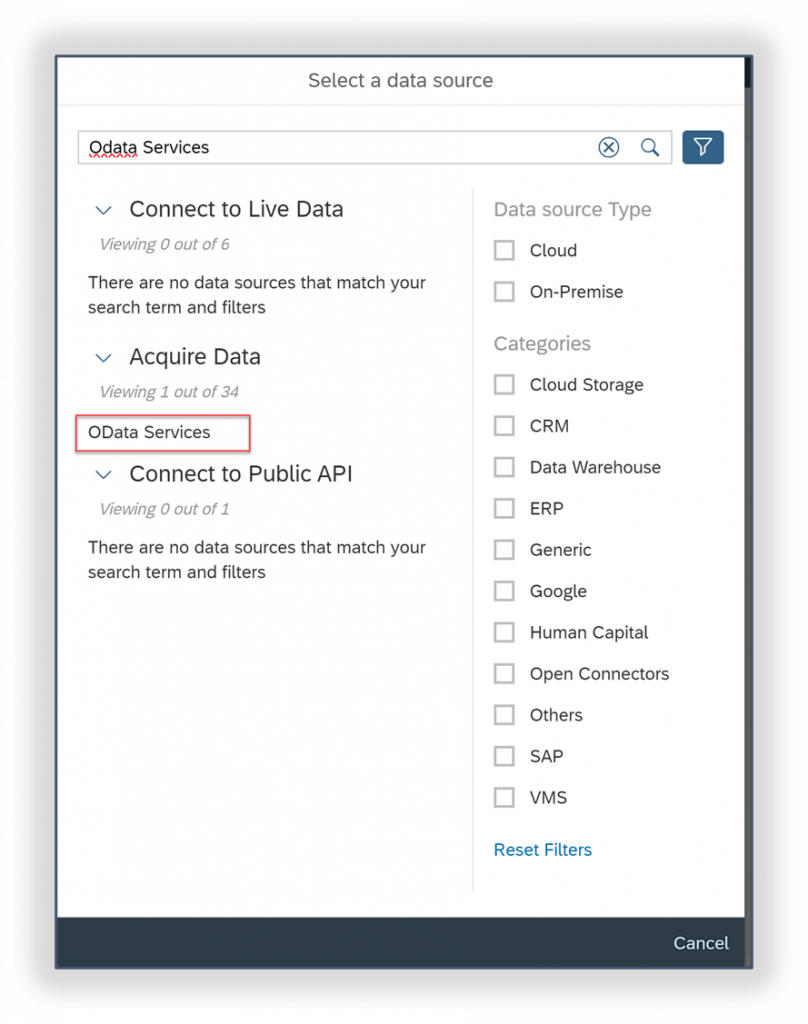
- Select OData Services.
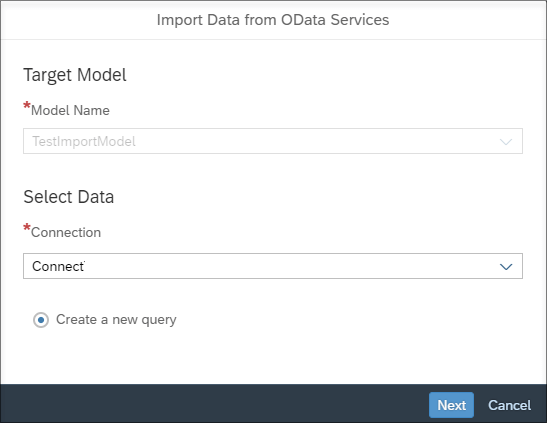
- The Connection name that was created in Section 4 should be seen in the drop down.
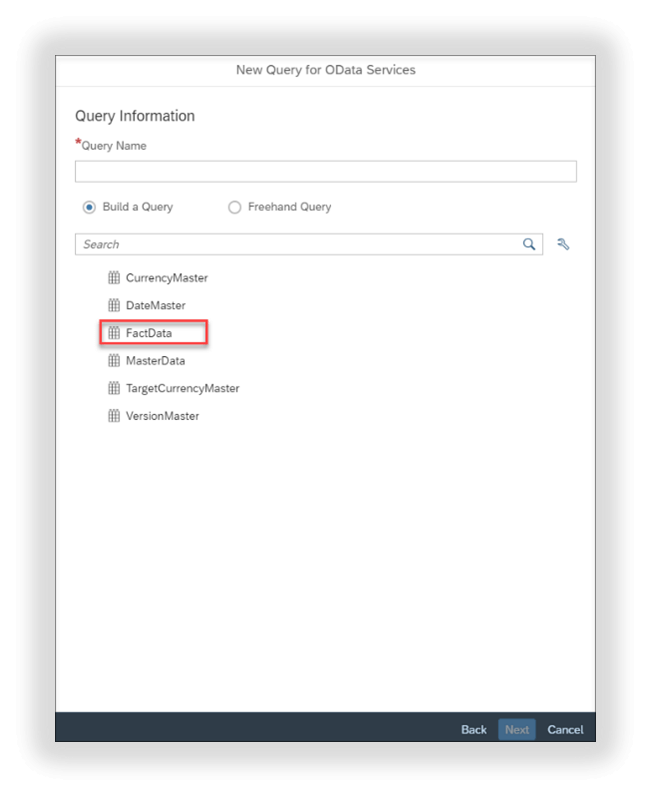
- Add a name to the query and select the data you wish to import. For example, Fact Data.
- Drag and drop required fields within the Build OData Services Query Dialog.
- Apply filters to restrict the data that is imported. Note that filters must contain a value and should not include quotes.
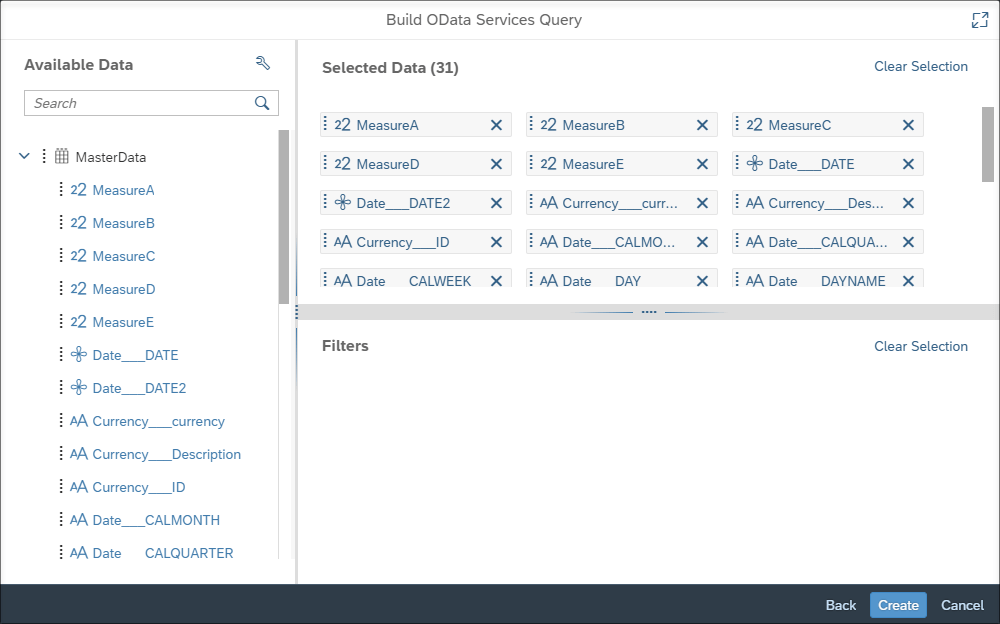
- In case filters have been configured incorrectly or results are empty, you will receive a warning message similar to the following:

- A toast message confirms the successful job creation

- Select Set Up Import and see the fact data preparation screen.
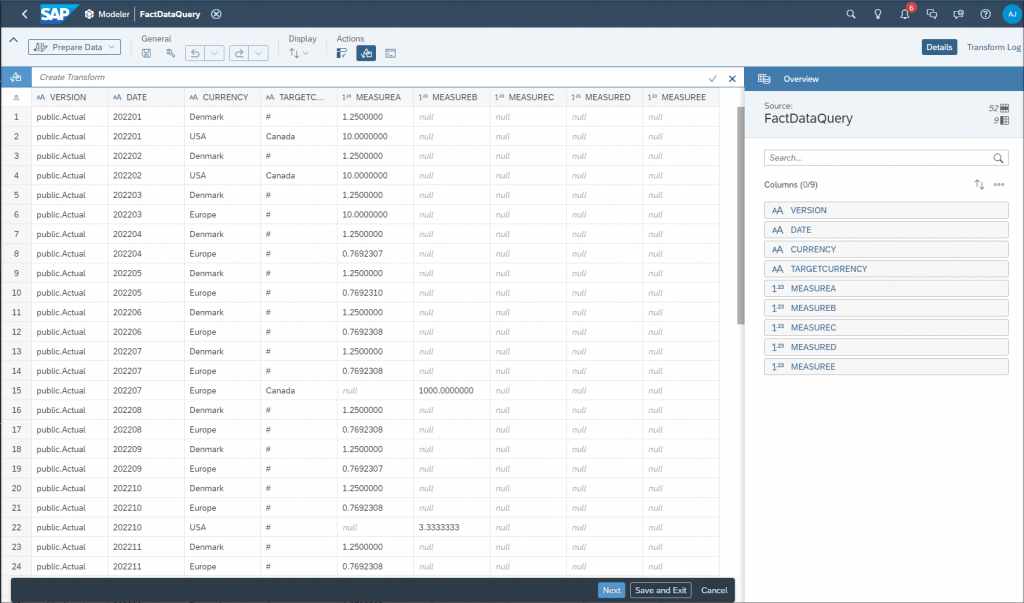
6. Map and Import Data
- Within the Fact Data Preparation screen, choose Next to open the Map to Facts.
- Mapping of source and target data is automatically applied.
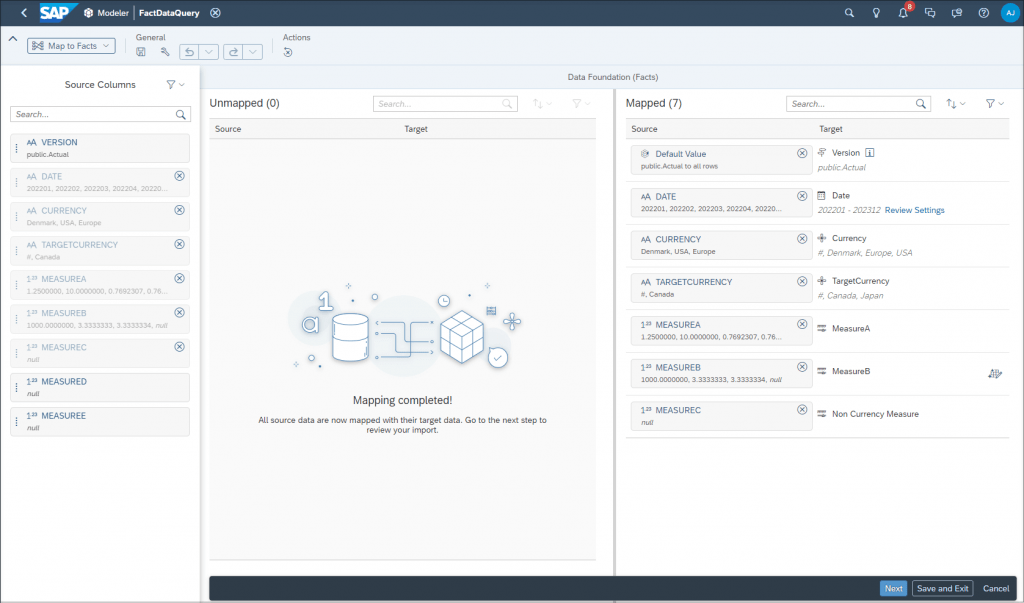
- Click Next and Run Import once mapping has been applied.
- The import settings can be changed, if required, from Update to Append, Clean and replace selected version data, Clean and replace subset of data.
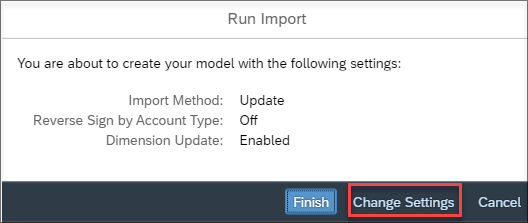
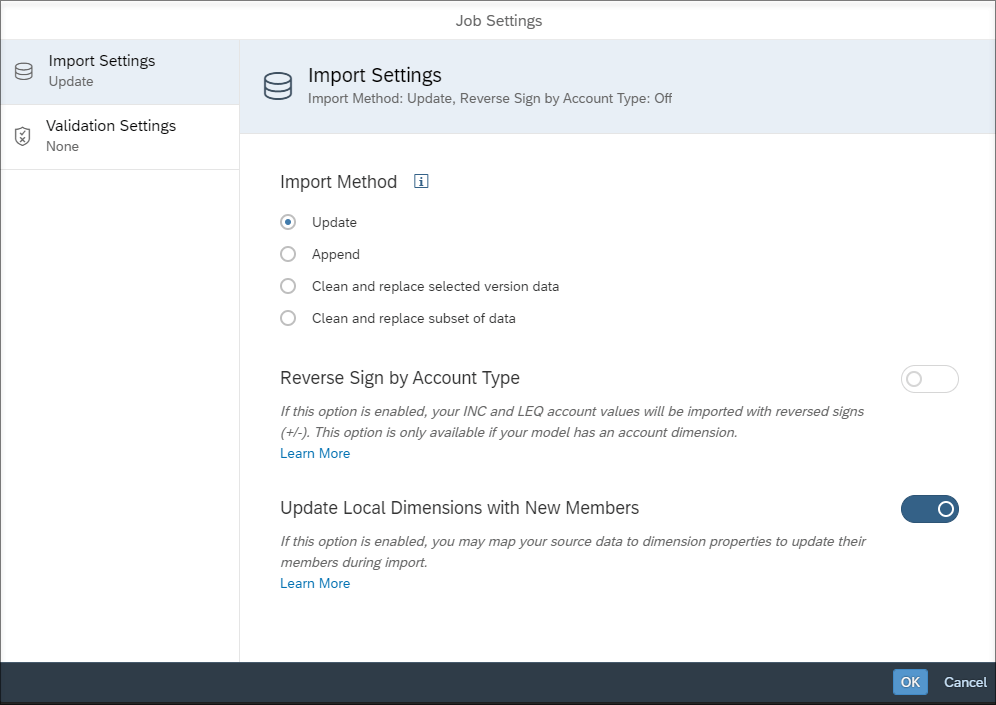
- Click Finish to import the data.
- A success toast appears, confirming data has been imported successfully.

- A Rejection Summary can be exported as csv to allow for further analysis.

This concludes the steps required to export fact data using the Data Export Service from a source SAP Analytics Cloud system to a target SAP Analytics Cloud system.


