This blog will guide with an example to work with Formula based / Calculated MIC. This process can be implemented where one parameters value to be calculated based on the values recorded for other parameters.
In this example, Area of Triangle is calculated. The formula for Area of Triangle is:
Area of Triangle = 1/2 ( Base * Height )
This blog is written on the assumption that one is well aware of MIC & it’s control indicators, sampling procedures & inspections plan.
Pre-requisites
Following are the Pre-requisites:
- Sampling procedure( if sampling procedure is selected at MIC level) T-Code : QDV1
- QM should be active for the material
Master Data
In this process Master Inspection Characteristic & Inspection plan are the key master data. Here we will be needing 3 MIC’s one for each Length, Height, Area and an inspection plan to formulate the MIC.
- Master Inspection Characteristic:
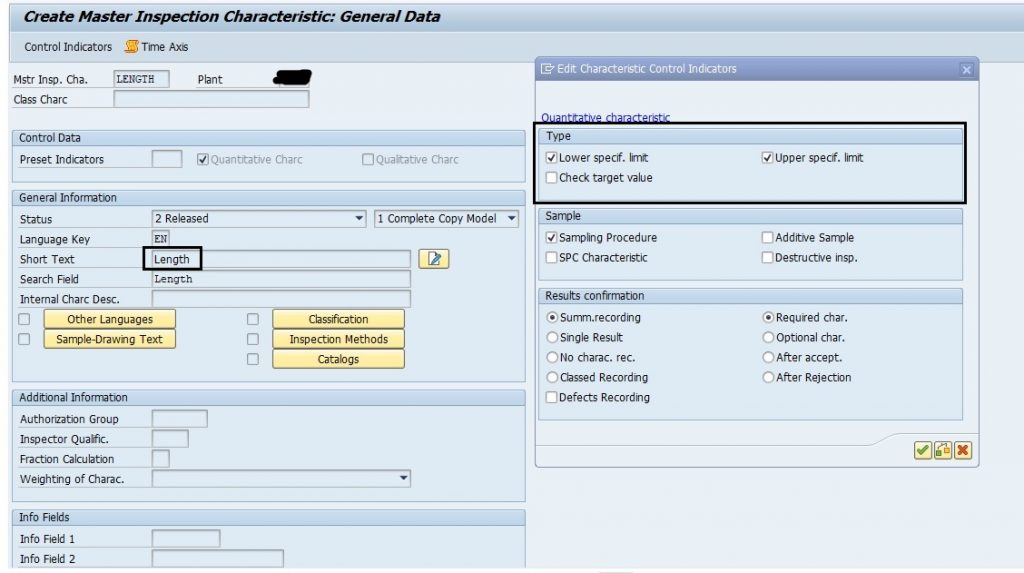
a. Length:
Create an MIC with following control indicators. The control indicator for Type i.e. tolerance limit are optional and can be kept blank if required.
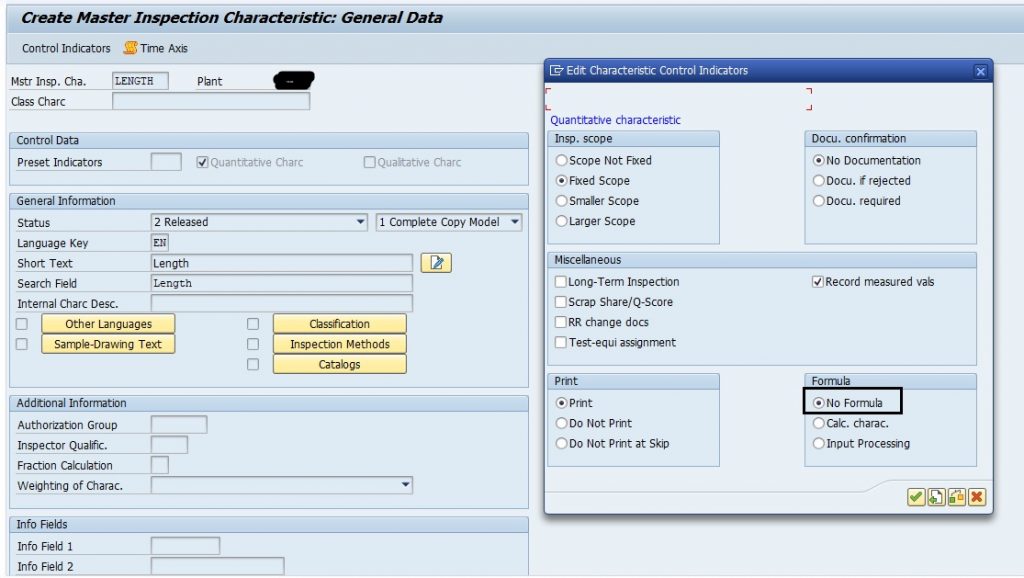
It is mandatory to keep the Formula radio button at “No Formula” as this is a regular MIC.
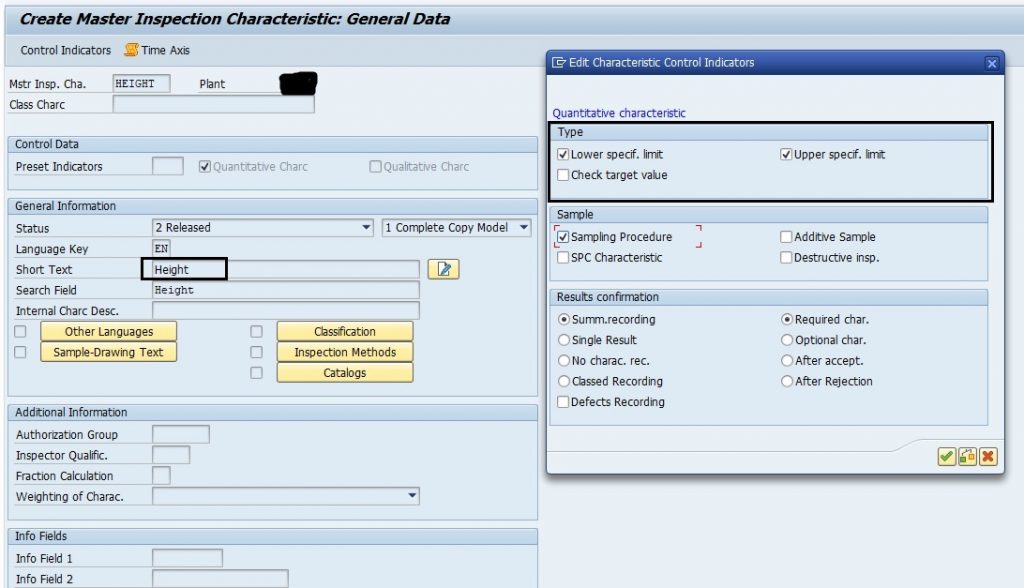
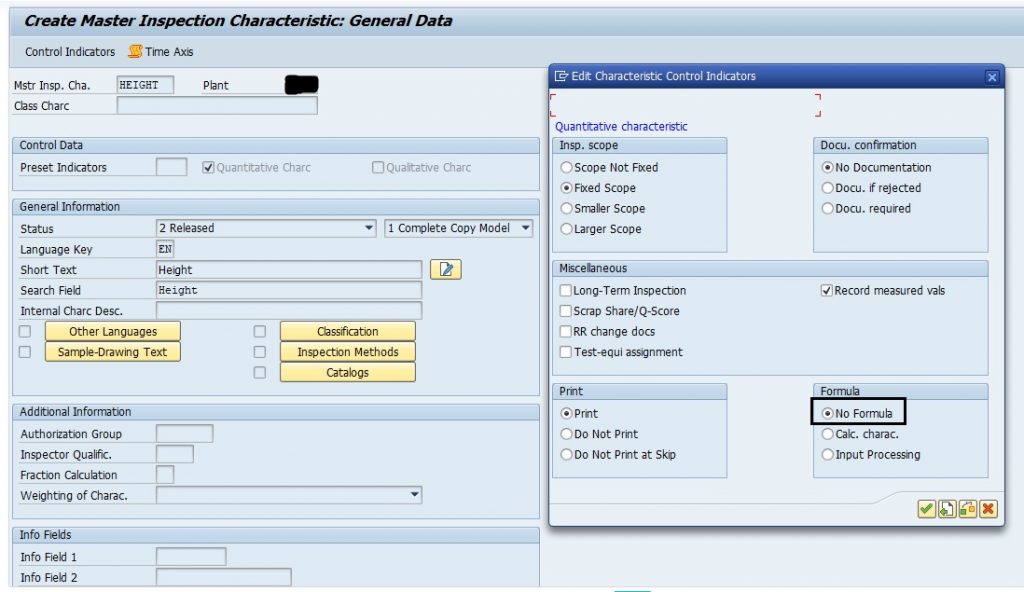
b. Height
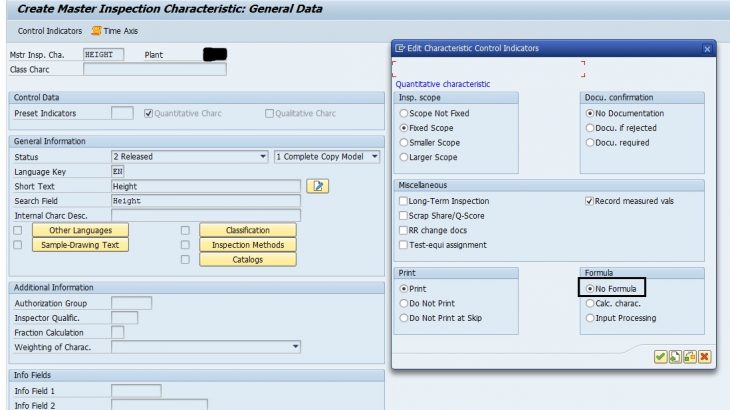
Second MIC we need to create is Height. This MIC is also like previous MIC & Formula indicator should be “No Formula” only.
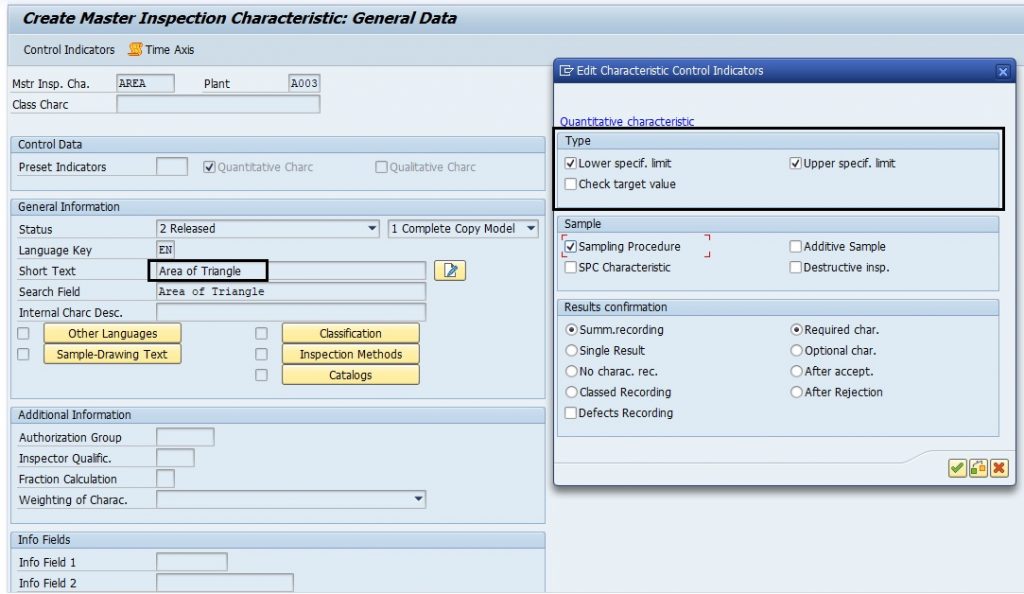
c. Area
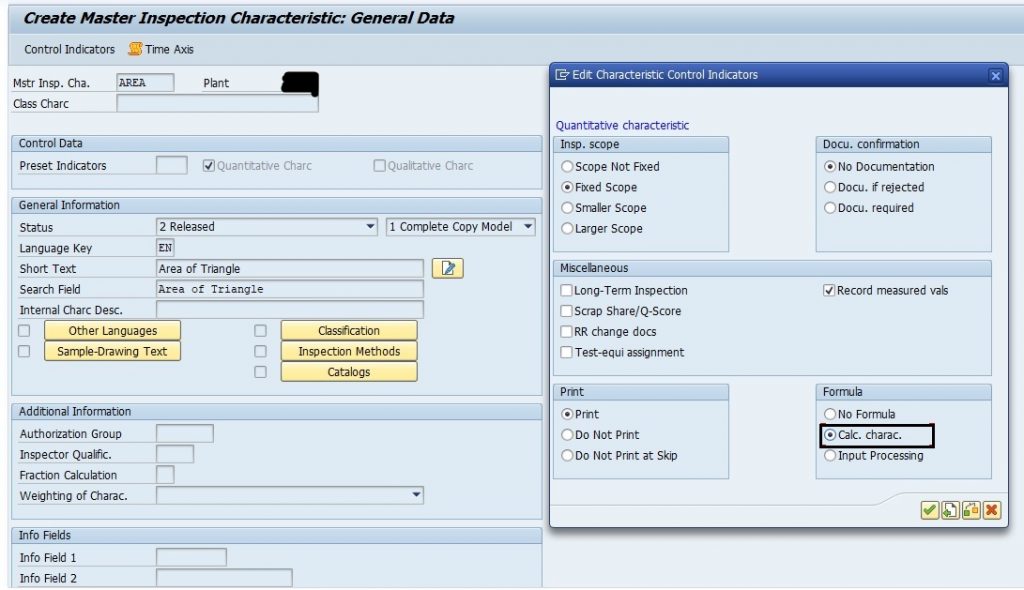
This MIC is going to be little different, as this is the MIC which is going to be formulated.
Here, it is mandatory to select Formula indicator as ” Calc. charc.” i.e. Calculated Characteristic. If this indicator is selected, then only the system will allow to enter the formula.
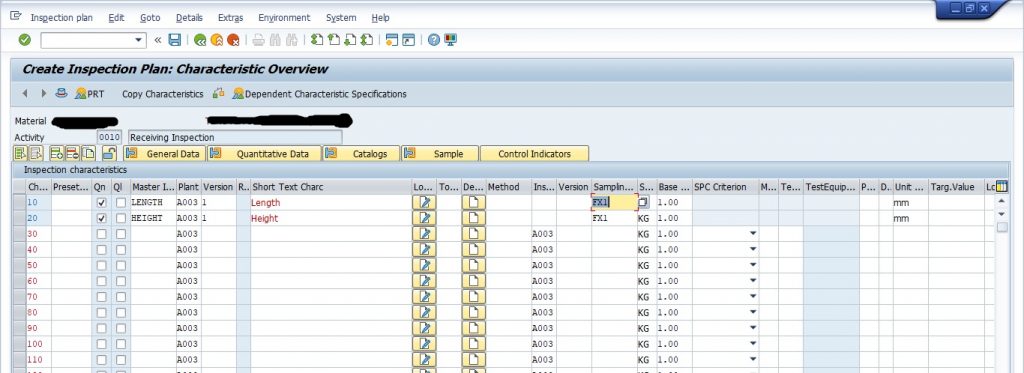
- Inspection Plan:
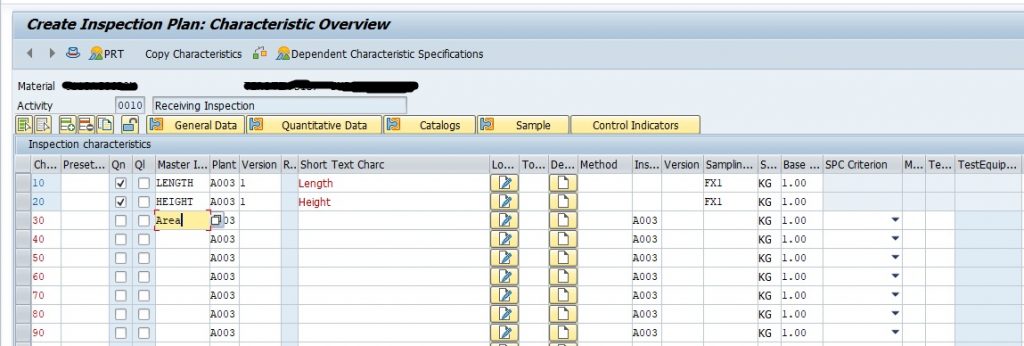
After MIC, inspection plan is next master data which needs to be maintained for this process. Here we are assigning the MIC Length at 0010 number and Height at 0020.
Now as soon as we add Calculated characteristic, system will immediately ask to provide the formula for calculation.
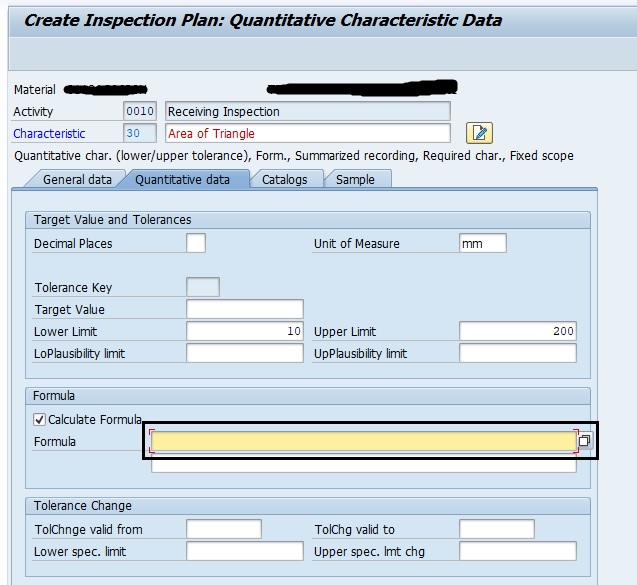
The area highlighted in the above image is the place where formula needs to be entered. To enter the formula, any one of the systems defined formula parameters should be used, as per the requirement for each MIC. In this example, Formula parameter ‘C0‘ is used.
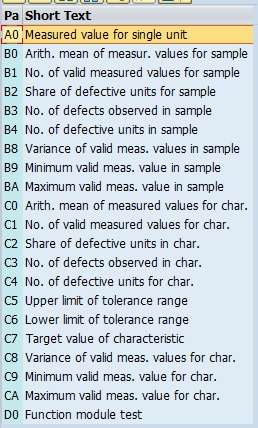
While entering the formula make a note that, MIC can’t be directly used in formula. Instead of that, the position number, where MIC is assigned should be used. In this case, Length is assigned at position 0010 & Height at 0020. So, the formula will be:
Area = 1/2*(C00010 * C00020)
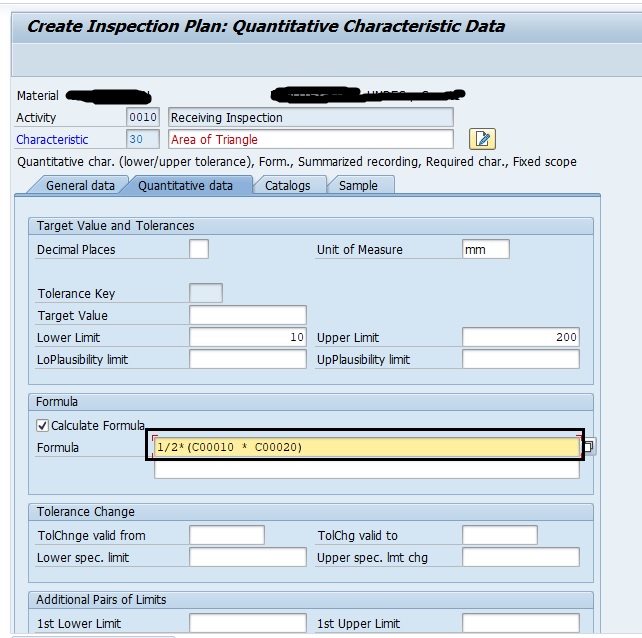
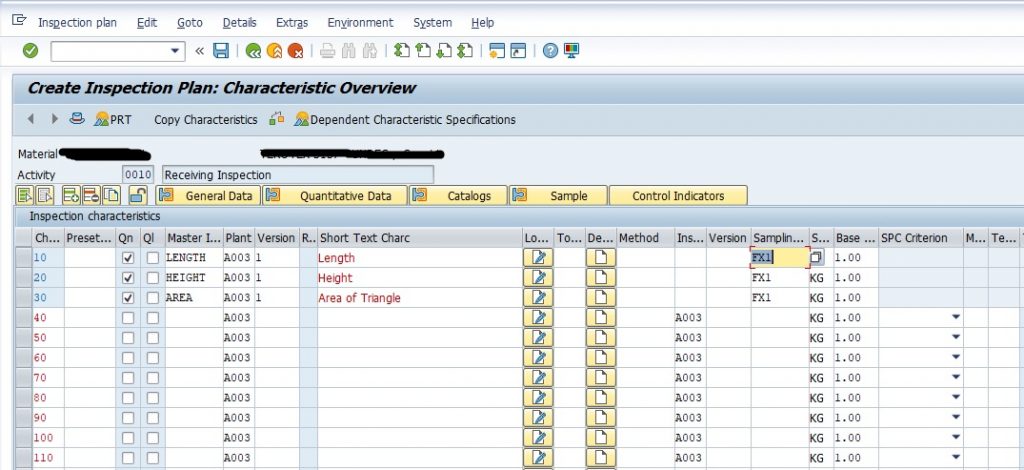
Once, all the MICs are assigned & formula is entered, save the Inspection Plan.
Inspection Processing
Once the inspection lot for the material is created, result recording can be done. To do the result recording, go to transaction QE51N. On opening the inspection lot, it can be noticed that, for calculated characteristic, system will not allow to enter the result.
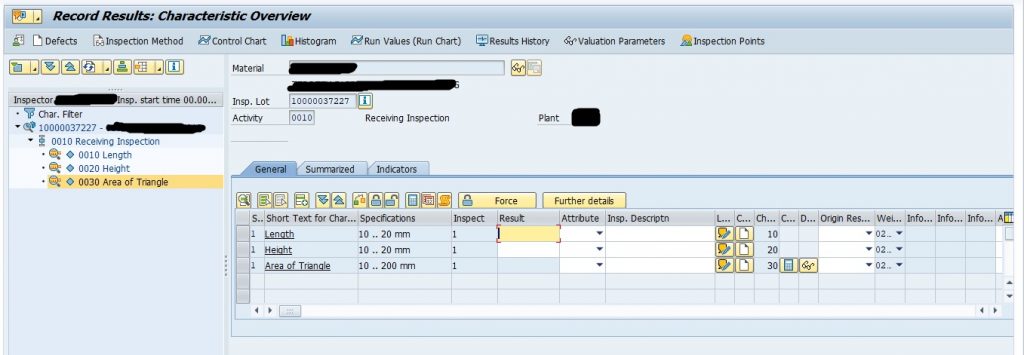
Enter values in “Result” field of Length & Height. After entering the result make sure both the MIC are Valuated i.e. status 3, else system will not allow to perform calculation. In the image below, MIC are in Close status i.e. status 5 as this is a good practice to close the MIC.

Now, select the “Area of Triangle” MIC & click on “Evaluate Formula” button.

As soon as “Evaluate Formula” button is clicked, system will perform the calculation and display the result.

Now, valuate and close the result recording.

